Your New Favorite Reason to Celebrate: Funfetti Cheesecake Bars!
Hey there, friend! Isla here from BiteTide, and I am just bubbling over with excitement to share today’s recipe with you. If you’ve ever found yourself staring into the fridge, craving something sweet, something creamy, and something that just screams *fun*, then you, my friend, have landed in the right corner of the internet. We’re ditching the fuss and diving headfirst into a batch of pure, unadulterated joy: my legendary Funfetti Cheesecake Bars.
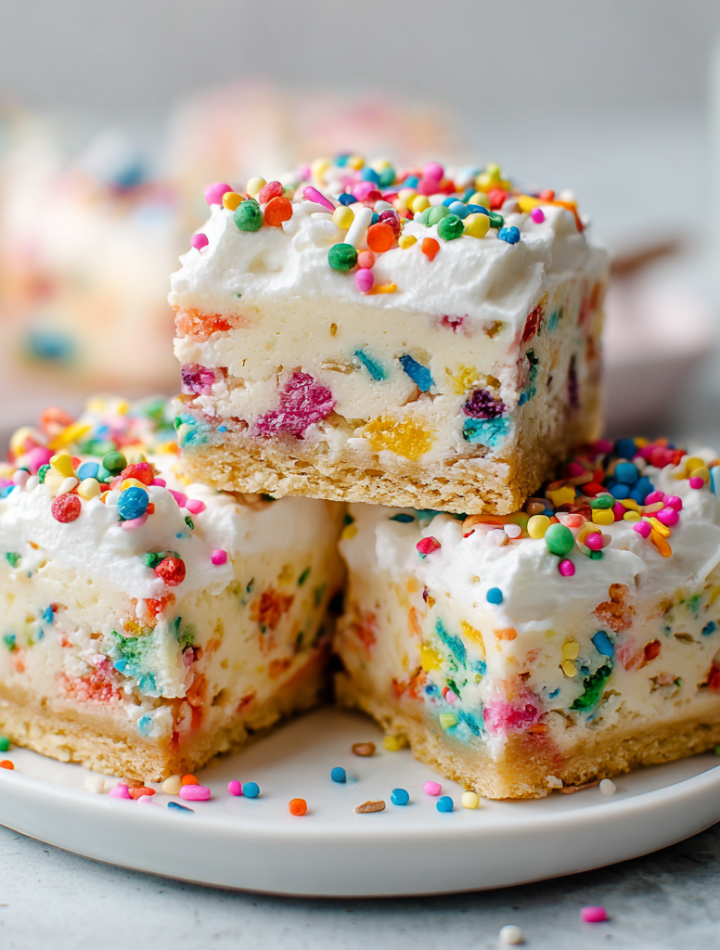
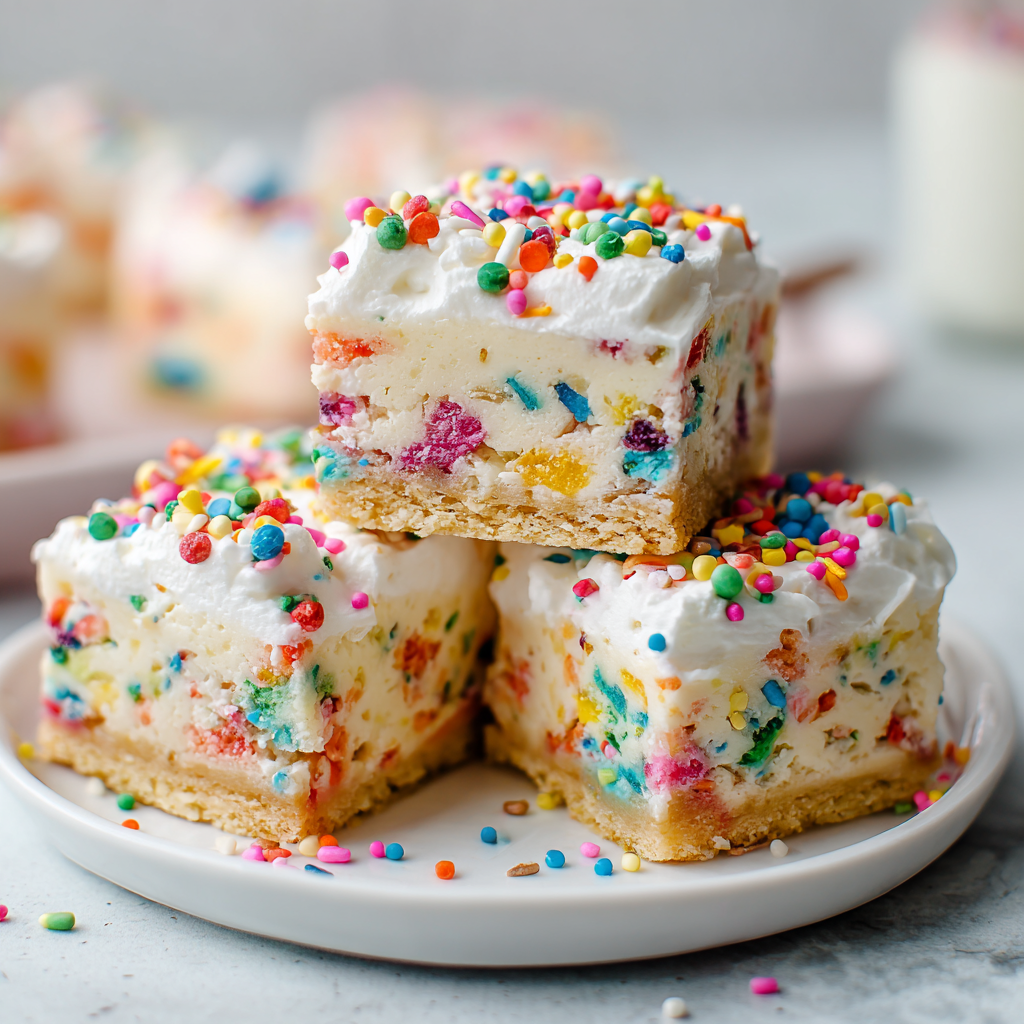
Imagine this: a buttery, vanilla-kissed crust that crumbles just right. A layer of the creamiest, dreamiest vanilla cheesecake, packed with a confetti explosion of colorful sprinkles. And because we believe in going all-in around here, we’re crowning it with a cloud of fluffy whipped cream and, you guessed it, even more sprinkles. These bars are the ultimate party on a plate, but here’s my chef’s secret: you don’t need a special occasion to make them. Baking for the sheer joy of it? That’s a occasion in my book.
I promise you, this isn’t one of those finicky, stress-you-out desserts. This is a “throw on your favorite playlist, dance around the kitchen, and create something magical” kind of recipe. It’s approachable, it’s reliable, and it’s guaranteed to make you and anyone you share it with do a little happy dance. So, grab your favorite mixing bowl, and let’s turn that craving into a reality. Ready to ride this flavor wave with me? Let’s bake!
A Sprinkle of Nostalgia: Why This Recipe Feels Like Home
You know, every time I see a bottle of rainbow sprinkles, I’m instantly transported back to my seventh birthday party. My grandma, a formidable woman who believed cake mix was a cardinal sin, was determined to teach me how to make a “proper” birthday cake from scratch. Flour was everywhere, eggshells made a daring escape attempt across the counter, and I’m pretty sure we both had more vanilla extract on our aprons than in the bowl.
But when it came time to decorate, she handed me a brand-new jar of rainbow jimmies. “The sprinkles, *ma chérie,* are the most important part,” she said with a wink. “They are the confetti for your taste buds. They don’t change the flavor, but my goodness, do they change the feeling.” She let me pour the entire jar over that lopsided, slightly too-brown vanilla cake. That moment, that feeling of unbridled creativity and joy, is what baking is all about for me. It’s not about perfection; it’s about the love and the fun you stir into every step.
These Funfetti Cheesecake Bars are my grown-up, slightly more elegant (but just as joyful) version of that lopsided birthday cake. They capture that same spirit of celebration, that same burst of color and happiness. Every bite is a little reminder that sometimes, the best recipes are the ones that make you smile before you even take the first bite.
Print
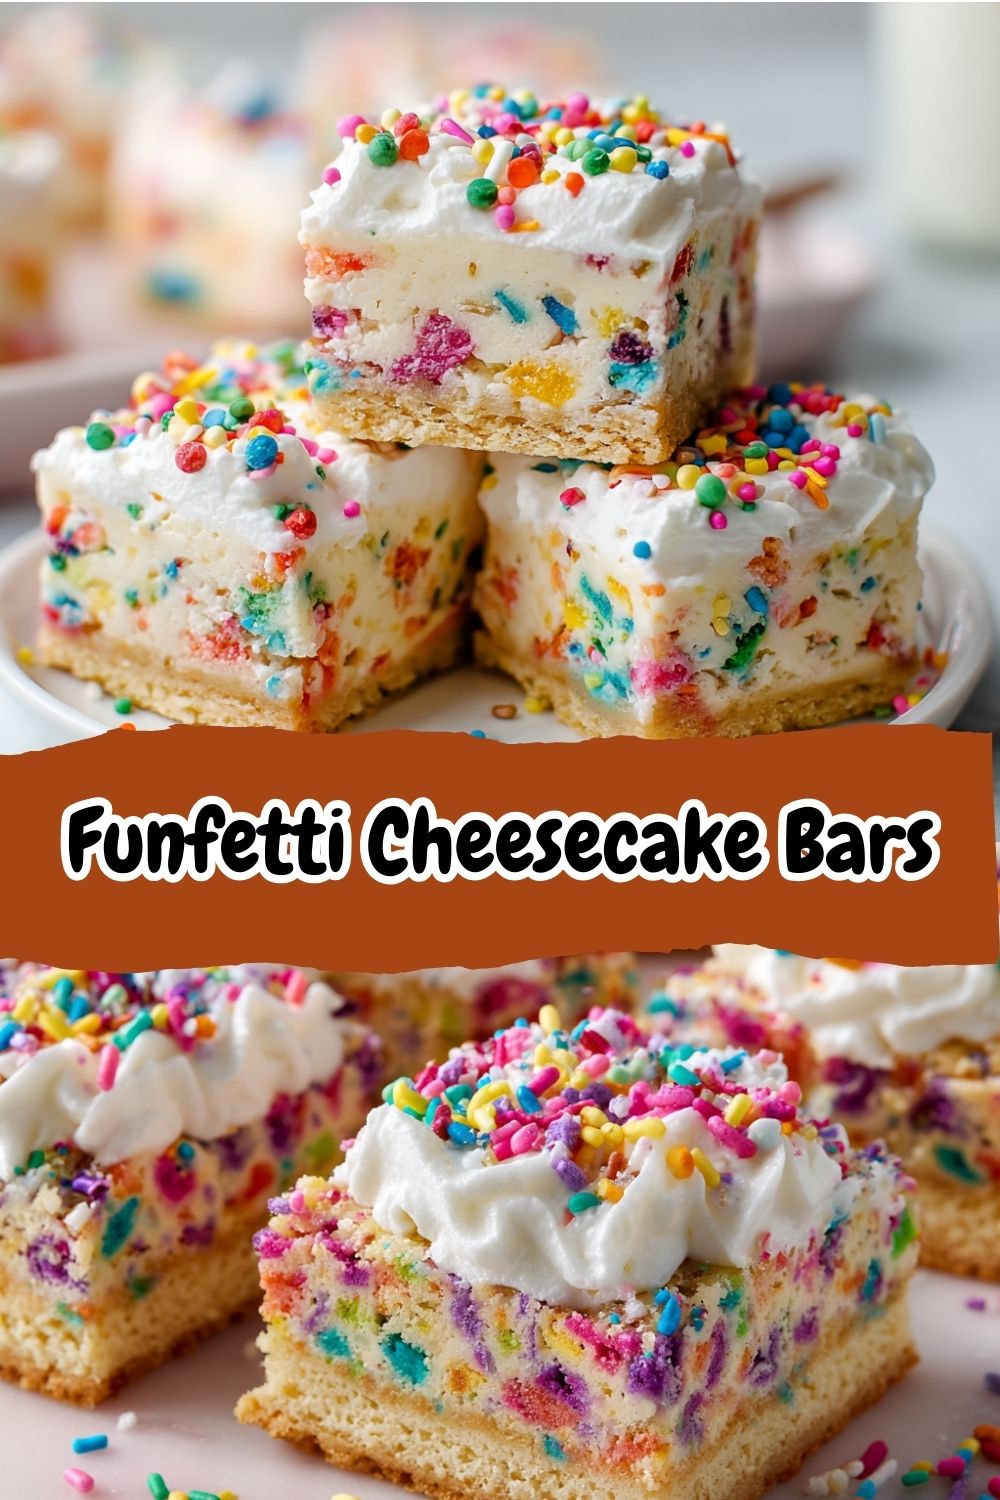
Funfetti Cheesecake Bars
- Total Time: ~5 hrs
Description
These colorful Funfetti Cheesecake Bars are as cheerful as they are creamy. With a buttery Nilla wafer crust, silky vanilla cheesecake packed with sprinkles, and a fluffy whipped topping, they’re the ultimate party treat—no occasion needed.
Ingredients
Crust:
1¼ cups (112g) crushed Nilla wafers
3 tbsp (43g) melted unsalted butter
Cheesecake Layer:
16 oz (452g) full-fat cream cheese, softened
⅓ cup (63g) white sugar
2 large eggs, room temp
1 tbsp (15ml) vanilla extract
½ cup (120g) sour cream, softened
⅓ cup colorful sprinkles
Whipped Topping:
1 cup (236ml) heavy cream
½ cup (65g) confectioners’ sugar
Extra sprinkles, for garnish
Instructions
Preheat oven to 325°F (163°C). Line an 8×8-inch pan with parchment.
Make crust: Combine Nilla crumbs and melted butter. Press into pan and bake for 8 minutes. Cool slightly.
Cheesecake: Beat cream cheese and sugar until smooth. Mix in eggs, vanilla, and sour cream. Fold in sprinkles. Pour over crust.
Bake for 30–35 minutes or until center is just set. Cool to room temp, then chill 4+ hours.
Topping: Whip cream and powdered sugar until stiff peaks form. Spread over cooled cheesecake. Add sprinkles.
Slice into bars and serve chilled.
- Prep Time: 20 minutes
- Cook Time: 35 min
- Category: Dessert
Nutrition
- Calories: 280
- Sugar: 15g
- Fat: 20g
- Carbohydrates: 20g
- Protein: 4g
Gathering Your Rainbow: The Ingredients Lineup
Here’s everything you’ll need to create this masterpiece. I’ve included some of my favorite chef insights and substitution hacks to make this recipe work for you!
For the Crust:
- 1¼ cups (112g) crushed Nilla wafers: These are my secret weapon! They have a beautiful, pure vanilla flavor that pairs perfectly with the cheesecake. Chef’s Insight: No Nilla wafers? Graham cracker crumbs work wonderfully too! You’ll need about 1 ½ cups. For a nuttier flavor, try biscoff cookies!
- 3 tbsp (43g) melted unsalted butter: This is the glue that holds our crunchy crust together. Using unsalted lets us control the salt level. Pro Tip: If you only have salted butter, that’s okay! Just skip any additional salt in the recipe.
For the Cheesecake Layer:
- 16 oz (452g) full-fat cream cheese, softened: This is non-negotiable for that luxuriously creamy, dense texture we love in cheesecake. Full-fat is key! Low-fat varieties have more water and stabilizers, which can lead to a weepy or loose filling. #TeamFullFat!
- ⅓ cup (63g) white sugar: We don’t need a ton of sugar here because the crust and topping are sweet, too. It’s the perfect amount to sweeten without overpowering the vanilla.
- 2 large eggs, room temp: Room temperature eggs incorporate much more smoothly into the cream cheese, preventing a lumpy batter and helping the cheesecake bake evenly. Quick Hack: Place cold eggs in a bowl of warm water for 5-10 minutes to quickly bring them to room temp!
- 1 tbsp (15ml) vanilla extract: That’s right, a full tablespoon! We’re going for bold vanilla flavor to complement the sprinkles. For a real treat, use vanilla bean paste—you’ll see those beautiful little specks throughout.
- ½ cup (120g) sour cream, softened: The magic ingredient! Sour cream adds a delightful tang and helps create an incredibly smooth, rich texture. Room temp is crucial here too for a seamless blend.
- ⅓ cup colorful sprinkles: Not all sprinkles are created equal! For the best results, use “jimmies” or “quins.” Avoid nonpareils (the tiny balls) as their color can bleed into the batter during mixing and baking, turning your beautiful cheesecake a murky gray color. Nobody wants that!
For the Whipped Topping:
- 1 cup (236ml) heavy cream: Also called heavy whipping cream. Make sure it’s cold, cold, cold! This is essential for getting stiff, fluffy peaks.
- ½ cup (65g) confectioners’ sugar: Also known as powdered sugar or icing sugar. It dissolves instantly into the cream, making it perfectly smooth and sweet.
- Extra sprinkles, for garnish: Because more is more when it comes to sprinkles! This is your chance to go wild.
Let’s Get Baking: The Step-by-Step Fun!
Okay, team! Let’s walk through this together. Read through all the steps once before you start—it’s my number one tip for stress-free baking!
- Preheat and Prep: Preheat your oven to 325°F (163°C). This is a lower temperature than you might be used to for cookies, but it’s perfect for baking cheesecake gently and evenly without cracks. Line an 8×8-inch square baking pan with parchment paper, leaving some overhang on two opposite sides. This is your cheat code for easily lifting the entire slab of cheesecake out of the pan later for pristine slicing. Chef’s Hack: A tiny dab of butter on the pan will help the parchment paper stick in place!
- Create the Crust: In a medium bowl, combine your finely crushed Nilla wafers and the melted butter. Stir until the mixture looks like wet sand and every crumb is moistened. Pour it into your prepared pan and press it down firmly and evenly into one solid layer. I like to use the bottom of a flat measuring cup to really pack it down—this prevents a crumbly crust that falls apart when you bite into it. Pop it in the preheated oven for 8 minutes. This “blind baking” step sets the crust and gives it a wonderful toasty flavor. Let it cool on a wire rack while you make the filling. Don’t skip the cooling! Adding cold filling to a hot crust can cause issues.
- Whip Up the Filling: In the bowl of a stand mixer fitted with the paddle attachment (or a large bowl with a hand mixer), beat the softened cream cheese and granulated sugar on medium speed for a full 2-3 minutes. Stop and scrape down the sides and bottom of the bowl. We want this to be completely smooth and lump-free! Next, add the eggs one at a time, beating on low speed just until each is incorporated. Over-beating at this stage incorporates too much air, which can cause the cheesecake to puff up and then fall and crack. Now, beat in the vanilla and the room-temperature sour cream, again just until everything is smooth and homogenous. Key Tip: Using a low speed and not over-mixing after adding the eggs is the best way to prevent cracks!
- Fold in the Fun: Take the bowl off the mixer. This next part is done by hand! Add your⅓ cup of sprinkle jimmies and use a spatula to gently fold them into the batter until they’re evenly distributed. Be gentle—we want to keep all that air we carefully incorporated. Pour this gorgeous, speckled batter over your slightly cooled crust and spread it out evenly with your spatula.
- Bake to Perfection: Place the pan in the center of your preheated oven and bake for 30-35 minutes. The cheesecake is done when the edges are set but the center still has a slight jiggle—like Jell-O—when you gently shake the pan. It will firm up dramatically as it cools. Resist the urge to overbake! That is the number one cause of a dry, cracked cheesecake. Once it’s done, turn the oven off, crack the door open, and let the cheesecake cool inside for about 15 minutes. This gradual temperature change helps prevent shocking the cheesecake, which, you guessed it, prevents cracks!
- The Big Chill: Remove the pan from the oven and place it on a wire rack to cool completely to room temperature. Once it’s no longer warm, cover it with plastic wrap and transfer it to the refrigerator to chill for at least 4 hours, but preferably overnight. This patience-testing step is absolutely critical for that perfect, firm, sliceable texture.
- Top it Off: When you’re ready to serve, make the whipped cream. In a clean, chilled bowl, whip the cold heavy cream and powdered sugar on medium-high speed until stiff peaks form. Using the parchment paper overhang, carefully lift the entire cheesecake slab out of the pan and onto a cutting board. Spread the whipped cream evenly over the top. Now, for the best part: shower it with a generous handful of extra sprinkles! Use a long, sharp knife to slice into 12 bars. For super clean slices, wipe the knife clean with a hot, damp cloth between each cut.
How to Serve These Show-Stopping Bars
Presentation is part of the fun! I love placing these bars on a simple white platter to really let those rainbow colors pop. They are rich, so cutting them into 12 generous bars is perfect. Serve them straight from the fridge—that cool, creamy texture is everything. These are an absolute star at potlucks, birthday parties, or as a “just because” treat to brighten someone’s day. Pair them with a cold glass of milk, a hot coffee, or just a big ol’ smile.
Ride Your Own Flavor Wave: Recipe Variations
Feel like mixing it up? This recipe is a fantastic canvas for creativity!
- Chocolate Chip Funfetti: Fold in ½ cup of mini chocolate chips along with the sprinkles for a double dose of fun.
- Birthday Cake Blast: Add ½ teaspoon of almond extract to the filling along with the vanilla. It tastes exactly like classic birthday cake!
- Lemon Berry Bliss: Omit the vanilla and add the zest of one lemon and 1 tablespoon of lemon juice to the filling. Fold in ⅓ cup of freeze-dried raspberry pieces (crushed lightly) instead of sprinkles. Top with fresh berries.
- Gluten-Free Friendly: Use gluten-free cookies (like gluten-free vanilla wafers or ginger snaps) for the crust and ensure your sprinkles are certified gluten-free. The filling is naturally gluten-free!
- Fruity Pebbles Twist: Replace the rainbow sprinkles in the filling with ⅓ cup of crushed Fruity Pebbles cereal. Use the cereal for the crust too by swapping it for the Nilla wafers!
Isla’s Chef Notes & Kitchen Stories
This recipe has been through many, many test batches in my chaotic, love-filled kitchen. The first time I made it, I was so excited I used the tiny round nonpareil sprinkles. Let’s just say I ended up with a beautifully delicious but… decidedly gray cheesecake. My kids called it the “Galaxy Bar,” which was a nice save, but I learned my lesson! Always use jimmies.
I’ve also found that the brand of cream cheese can make a difference. I always have the best luck with Philadelphia brand—it’s consistently smooth and reliable. And my final, most important note: HAVE FUN. If your whipped topping isn’t perfect, who cares? Cover it with more sprinkles. If your slices aren’t restaurant-neat, it doesn’t matter. You made something from scratch with your own two hands, and that is always, always something to be proud of. The mess is part of the memory.
Your Questions, Answered: FAQs & Troubleshooting
Q: Can I make these bars ahead of time?
A: Absolutely! In fact, I highly recommend it. The chilled setting time is crucial. You can make the entire bar (including the crust and cheesecake layers) up to 2 days in advance. I’d wait to add the whipped cream topping and final sprinkles until the day you plan to serve them for the freshest look and texture. Store the assembled bars covered in the fridge for up to 3 days.
Q: Why did my cheesecake crack? How can I prevent it?
A: Don’t worry, a crack doesn’t affect the taste one bit (and the whipped topping will cover it right up!). Cracks usually happen from over-mixing (which incorporates too much air), over-baking, or a rapid temperature change. To prevent them: don’t overbeat after adding the eggs, take the cheesecake out while the center is still jiggly, and let it cool gradually in the turned-off oven with the door cracked.
Q: My cream cheese was lumpy! How do I avoid that?
A: The number one rule for smooth cheesecake is ensuring EVERYTHING is at room temperature. Take your cream cheese, eggs, and sour cream out of the fridge at least 1-2 hours before you start. If you’re short on time, you can place the sealed blocks of cream cheese in a bowl of warm water for 15 minutes. Soft cream cheese is non-negotiable for a silky texture.
Q: Can I freeze these cheesecake bars?
A: Yes, but with a caveat. The cheesecake layer itself freezes beautifully. Bake, cool completely, and freeze the entire slab (without the whipped topping) wrapped tightly in plastic wrap and foil for up to 2 months. Thaw overnight in the fridge. I do not recommend freezing the bars with the whipped cream topping on, as it can become watery and grainy when thawed. Always add fresh whipped cream after thawing.
Nutritional Information (Approximate, Per Bar)
Calories: ~280 | Fat: 20g | Saturated Fat: 11g | Carbohydrates: 20g | Sugar: 15g | Protein: 4g | Cholesterol: 85mg | Sodium: 150mg
Note: This is an estimate provided by an online nutrition calculator. Values can vary based on specific ingredients and brands used.