Fresh Cherry Crumb Pie: The Taste of a Perfect Summer Day
Hey there, friend! Isla here, from my cozy kitchen to yours. There’s a certain magic that happens when cherry season rolls in. Those deep red, almost burgundy gems start showing up at the market, and my brain immediately starts dreaming of one thing: a show-stopping, juicy, Fresh Cherry Crumb Pie. Not the kind with a goopy, too-sweet canned filling, but the real deal. We’re talking about pounds of fresh cherries, a flaky, buttery homemade crust, and a spiced crumb topping that bakes up into golden, crispy perfection.
This pie is my love letter to summer baking. It blends the best of a classic fruit pie with the cozy, irresistible crunch of a crisp. It’s the dessert you proudly bring to a barbecue, the one that makes Sunday dinner feel like a celebration, and the perfect companion to a scoop of vanilla ice cream slowly melting into its warm, ruby-red filling. I promise, this recipe is built for real life. We’ll use a few clever, no-fuss techniques to ensure that crust is flaky (not tough!), and the topping stays crisp (not soggy!). So, tie on your favorite apron, put on some happy tunes, and let’s bake a pie that’s going to make you the star of any table. The flavor wave is coming, and it’s delicious.
A Pie Full of Sunshine & Stained Fingers
This pie always takes me back to my grandma’s kitchen, with its checkered curtains and the big, scarred wooden table where everything happened. Every summer, we’d drive out to a U-Pick farm, and I’d spend what felt like hours with my head in the leaves, searching for the darkest, plumpest cherries. We’d come home with buckets of them, our fingers and shirts permanently stained a joyful pink. The real work—and the real fun—was the pitting. We’d sit at that table for an hour, using a humble paperclip she’d bent into a loop, popping pits into an old bowl with a plink, plink, plink. It was meditative. It was messy. It was where she’d tell stories, and I’d listen, completely covered in cherry juice.
She never used a fancy recipe, just a “bit of this and a handful of that,” but the result was always pure magic. My version honors her spirit—simple, honest, and bursting with real fruit flavor—but I’ve added my own BiteTide twist with that buttery crumb topping she would have adored. Baking this pie isn’t just about dessert; it’s about bottling that feeling of slow, sunny afternoons and the love that gets stirred into every bite.
Print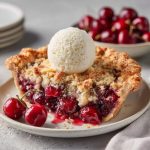
Fresh Cherry Crumb Pie : Flaky Crust, Buttery Crumble, No Canned Filling
- Total Time: 2 hours 10 minutes
Description
Celebrate cherry season the right way with this Fresh Cherry Crumb Pie. Juicy sweet cherries baked into a luscious filling, all tucked inside a golden, ultra-flaky butter crust and topped with a spiced crumb topping. This pie blends the best of a classic fruit pie with a crisp-like finish, making it perfect for summer gatherings, holiday tables, or a weekend baking project. Don’t forget a scoop of vanilla ice cream on top.
Ingredients
For the crust:
1 cup (140 g) all-purpose flour
2 tsp sugar
½ tsp kosher salt
9 tbsp (130 g) cold unsalted butter
1 large egg yolk
2 tbsp (30 g) whole milk
For the crumb topping:
4 tbsp (60 g) unsalted butter, melted
1 cup (120 g) cake flour
3 tbsp (40 g) brown sugar
3 tbsp (40 g) granulated sugar
¼ tsp ground cinnamon
¼ tsp ground ginger
¼ tsp kosher salt
For the filling:
3 lb (1360 g) sweet cherries, pitted
½ cup (100 g) sugar
¼ cup (30 g) cornstarch
½ tsp vanilla extract
¼ tsp kosher salt
Instructions
Make the crust: In a mixer, combine flour, sugar, and salt. Add butter and mix until coarse. Add yolk and milk, mixing just until dough forms. Smear dough across your surface to create thin butter layers (fraisage). Form into a disc, wrap, and chill 1 hour.
Roll out dough and place in a 9-inch pie plate. Crimp edges and chill 30 minutes.
Blind bake at 425°F with parchment and pie weights for 15-17 minutes. Remove weights and bake 3-5 more minutes. Cool completely.
Make crumb topping: Mix dry ingredients. Add melted butter and mix until crumbly. Bake crumbs at 350°F for 15 minutes. Cool.
Make filling: Mix cherries with sugar, cornstarch, vanilla, and salt. Pour into crust. Top with baked crumbs.
Bake pie at 350°F for 60-70 minutes, until bubbly and golden. Cool before slicing.
- Prep Time: 1 hour (including chill)
- Cook Time: 70 minutes
- Category: Dessert
Gathering Your Flavor Crew: Ingredients & Insights
Here’s everything you’ll need to create this masterpiece. Remember, great ingredients make a great pie, but I’ve also got your back with swaps and tips!
For the Ultra-Flaky Crust:
- 1 cup (140 g) all-purpose flour: The backbone. I like unbleached for a bit more flavor.
- 2 tsp sugar: Just a touch to encourage browning and add a hint of sweetness.
- ½ tsp kosher salt: Essential for balancing flavor. If using table salt, use a scant ¼ tsp.
- 9 tbsp (130 g) cold unsalted butter: The key to flakiness! Keep it fridge-cold and cut into small cubes. I freeze it for 10 minutes before using for extra insurance.
- 1 large egg yolk: Adds richness and tenderizes the dough beautifully.
- 2 tbsp (30 g) whole milk: The binder. Ice water works, but milk gives a more tender, golden crust.
For the Spiced Crumb Topping:
- 4 tbsp (60 g) unsalted butter, melted: Melting the butter first gives us those irresistible, craggy crumbs.
- 1 cup (120 g) cake flour: Lighter than all-purpose, it creates a more delicate, sandy crumb. All-purpose works in a pinch!
- 3 tbsp (40 g) brown sugar: For molasses-y depth and moisture.
- 3 tbsp (40 g) granulated sugar: For sweetness and crispness.
- ¼ tsp ground cinnamon & ¼ tsp ground ginger: Our secret flavor boosters. They add a warm, cozy note that pairs amazingly with cherry.
- ¼ tsp kosher salt: Makes all the sweet, buttery flavors pop.
For the Luscious Cherry Filling:
- 3 lb (1360 g) fresh sweet cherries, pitted: The star! Bing or Rainier cherries are perfect. Pro Tip: No fresh? High-quality frozen pitted cherries (thawed and drained) are a fantastic year-round swap.
- ½ cup (100 g) sugar: Sweetens without overpowering the fruit’s natural tang.
- ¼ cup (30 g) cornstarch: Our thickening hero. It creates a clear, glossy filling that sets up nicely. Tapioca starch is a great 1:1 substitute.
- ½ tsp vanilla extract: The flavor enhancer. A tiny splash of almond extract (⅛ tsp) is also magical here.
- ¼ tsp kosher salt: Again, it’s all about balancing and brightening the cherry flavor.
Let’s Bake! Step-by-Step with Chef Isla
Follow these steps, and you’ll have pie perfection. I’m walking you through every stage with my favorite kitchen hacks.
Step 1: Make & Chill the Dough
In the bowl of a stand mixer fitted with the paddle attachment (or a large bowl if using a pastry cutter), combine the flour, sugar, and salt. Scatter the ice-cold butter cubes over the top. Mix on low until the mixture looks like coarse sand with some pea-sized butter bits remaining—this is what creates flakiness! Whisk the egg yolk and milk together, then drizzle it in while mixing on low. Mix just until the dough begins to clump together.
Chef’s Hack (Fraisage): This French technique is a game-changer. Dump the shaggy dough onto a clean counter. Using the heel of your hand, smear small portions of the dough away from you, creating thin sheets. This laminates the butter into layers. Gather the smeared dough, form it into a 1-inch-thick disc, wrap tightly in plastic, and chill for at least 1 hour. This relaxes the gluten and re-chills the butter.
Step 2: Roll, Dock, & Blind Bake
On a lightly floured surface, roll your disc into a 12-inch circle. Gently transfer it to a 9-inch pie plate. I like to roll it loosely around my rolling pin to lift and move it. Don’t stretch it! Let it settle in, then trim and crimp the edges as you like. Prick the bottom all over with a fork (this is “docking”). Chill the shaped crust for 30 minutes.
Preheat oven to 425°F (220°C). Line the chilled crust with parchment paper and fill with pie weights, dried beans, or rice. Blind bake for 15-17 minutes. This sets the shape. Carefully remove the parchment and weights, then bake for another 3-5 minutes until the bottom looks dry and just starting to color. Let it cool completely. This prevents a soggy bottom!
Step 3: Pre-Bake the Crumb Topping
While the crust chills, make your crumbs. In a medium bowl, whisk together all the dry topping ingredients. Pour the melted butter over and mix with a fork until crumbly. Spread the mixture on a parchment-lined baking sheet and bake at 350°F (175°C) for about 15 minutes, stirring once, until golden and crisp. Let it cool. This step is my secret weapon for a topping that stays crunchy!
Step 4: Assemble & Bake the Masterpiece
In a large bowl, toss the pitted cherries with sugar, cornstarch, vanilla, and salt until evenly coated. Let it sit for 10 minutes—you’ll see a lovely syrup start to form. Pour this gorgeous filling into your completely cooled crust. Now, pile on all of your pre-baked crumb topping, covering the cherries in a glorious, crunchy blanket.
Place the pie on a baking sheet (to catch any rogue bubbles) and bake at 350°F (175°C) for 60-70 minutes. The pie is ready when the filling is bubbling vigorously at the edges and the crumbs are a deep golden brown. This bubbling is non-negotiable—it means the cornstarch has activated and will set properly.
Step 5: The (Hardest) Final Step: Cool!
I know, I know. The smell is incredible. But you must let the pie cool completely on a wire rack, for at least 4 hours. This allows the filling to set perfectly so you get clean slices. It’s worth the wait, I promise!
Serving Your Cherry Masterpiece
Once set, slice your beautiful pie with a sharp knife. The ideal plate partner? A generous scoop of high-quality vanilla bean ice cream or a dollop of freshly whipped cream. For a fancy brunch, try it with a side of tangy Greek yogurt. I love serving it on my grandma’s vintage plates—it just tastes better that way. Don’t forget to take a photo of your creation before everyone digs in!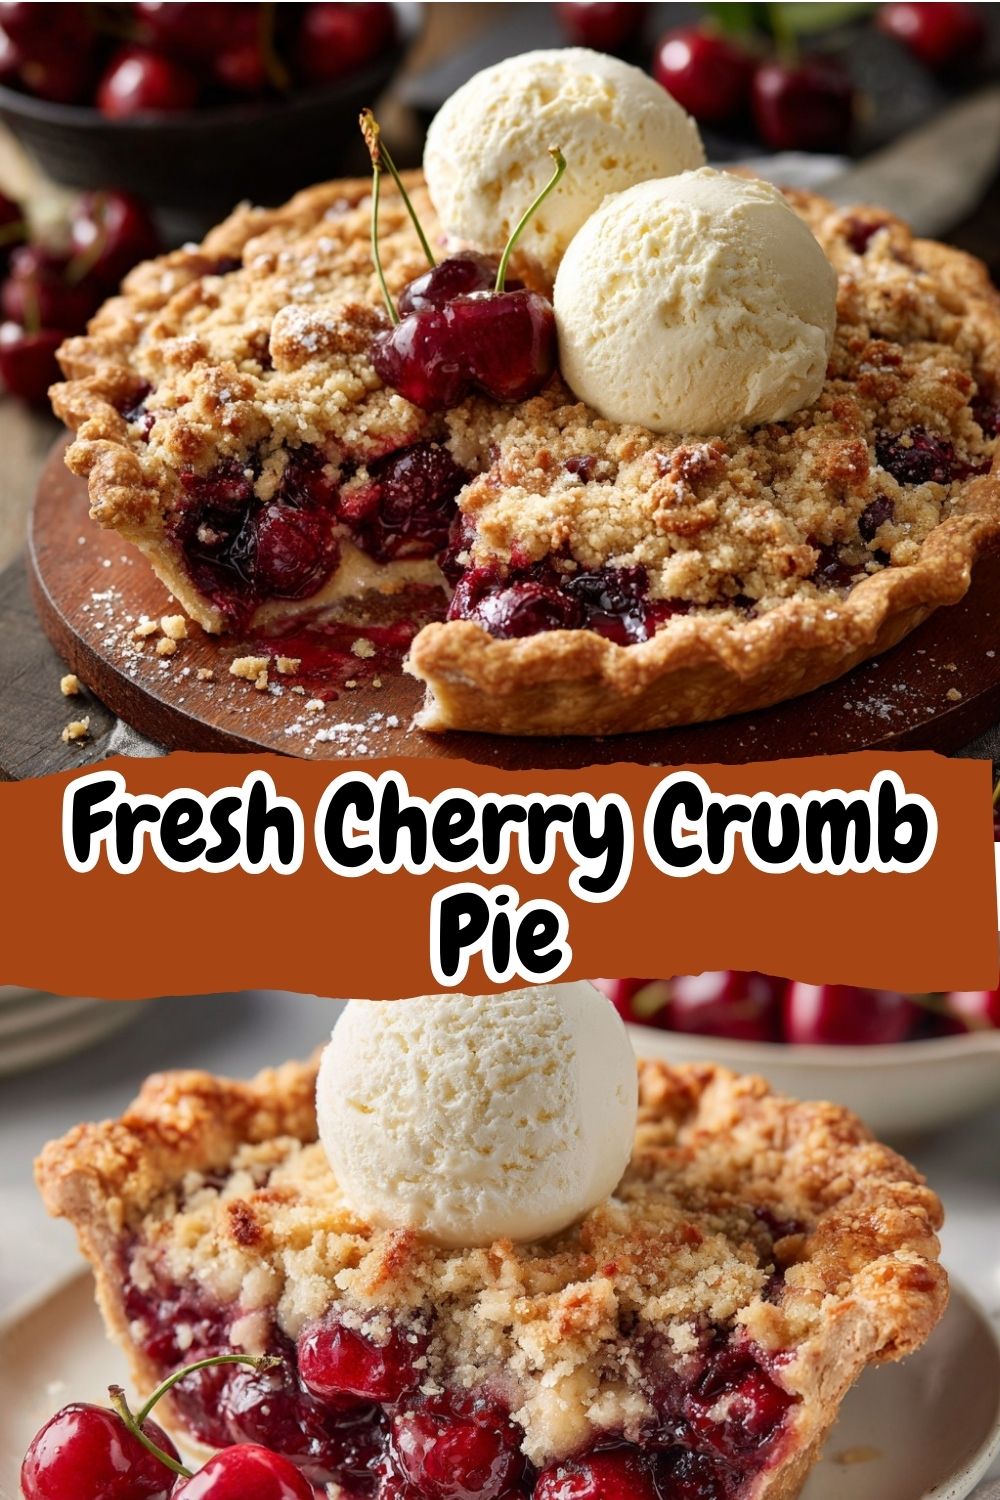
Ride Your Own Flavor Wave: Fun Variations
- Chocolate Cherry: Sprinkle ½ cup of dark chocolate chips over the cherry filling before adding the crumb topping.
- Almond Joy: Swap the vanilla for ¼ tsp almond extract in the filling, and add ½ cup of sliced almonds to the crumb mixture before baking.
- Berry Medley: Replace 1 lb of cherries with mixed berries like raspberries and blackberries for a tart twist.
- Gluten-Free: Use a 1:1 GF flour blend for both the crust and topping (with ½ tsp xanthan gum added to the crust dry ingredients).
- Bourbon Caramel Drizzle: For the adults, serve with a drizzle of bourbon-spiked caramel sauce. You’re welcome.
Isla’s Kitchen Notes
This recipe has evolved from many happy (and a few messy) kitchen experiments. The first time I made it, I didn’t pre-bake the crumbs, and they sank into the filling, creating a… interesting texture. Lesson learned! The fraisage technique was a revelation from a pastry chef friend—it truly makes the most forgiving, flaky crust. And pitting cherries? I’ve graduated from the paperclip to a simple handheld pitter, but sometimes, for old times’ sake, I’ll still sit at the table and do it the slow way, just to remember those sunny afternoons with my grandma. Food is memory, and this pie is full of my best ones.
Your Pie Questions, Answered!
Q: Can I make any part of this pie ahead of time?
A: Absolutely! The pie dough disc can be chilled for up to 3 days or frozen for 3 months. The crumb topping can be pre-baked and stored in an airtight container at room temp for 2 days. You can even fully assemble and freeze the unbaked pie (wrap tightly) for up to 3 months. Bake from frozen, adding 20-30 minutes to the baking time.
Q: My filling is too runny! What happened?
A: Two likely culprits: 1) The pie wasn’t baked long enough. Wait for those thick, slow bubbles in the center—they’re your sign the cornstarch is fully activated. 2) It was sliced too soon. The filling continues to set as it cools. If it’s still a bit loose after cooling, it will still taste amazing, just serve it in bowls!
Q: Can I use a store-bought crust?
A: You can, friend, no judgment here! For the best texture, look for a frozen deep-dish pie shell (not the refrigerated dough in a box). Still, blind bake it according to package directions and let it cool before filling.
Q: My crust shrank a lot during blind baking. Help!
A: This is usually caused by not chilling the shaped crust long enough, or by stretching the dough when placing it in the pan. Make sure it’s thoroughly chilled (30 mins minimum) and always let the dough slump gently into the pan without pulling it.
Nutritional Info (Because We’re Curious!)
Estimated per slice (based on 10 servings): Calories: ~420 | Fat: 19g | Carbs: 62g | Fiber: 3g | Sugar: 38g | Protein: 4g. Remember, these are estimates, and the real value is in the joy of baking and sharing!