Easy Taco Cups: The Bite-Sized Party Starter You’ll Make on Repeat
Hey there, flavor friend! Isla here, from my kitchen to yours. Are you ready to meet your new secret weapon for any gathering, game day, or “I just need something fun and delicious” weeknight? Let me introduce you to the irresistible magic of Easy Taco Cups.
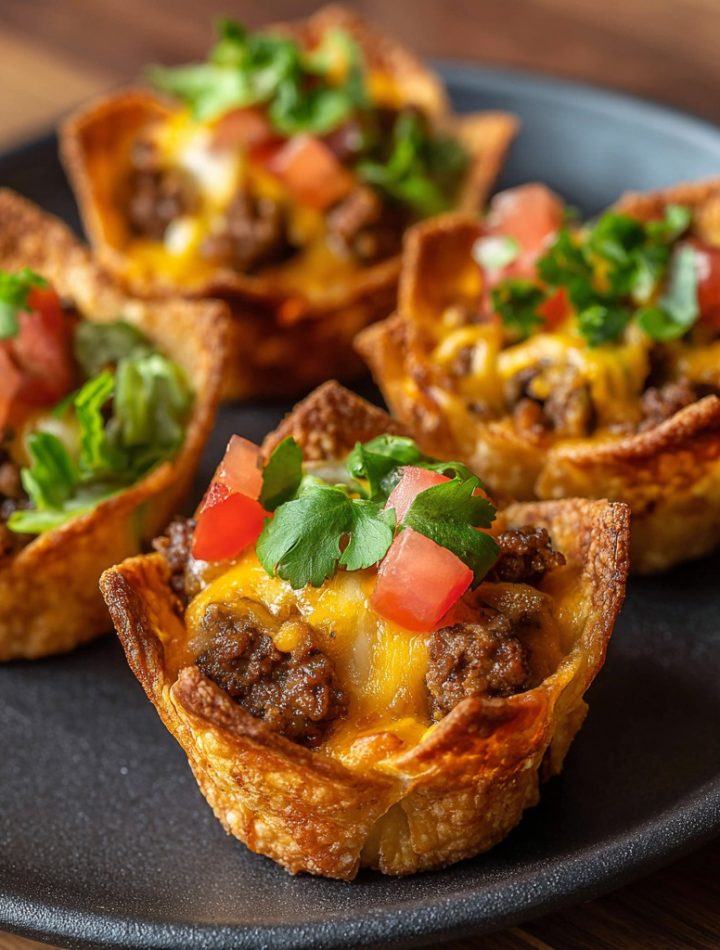
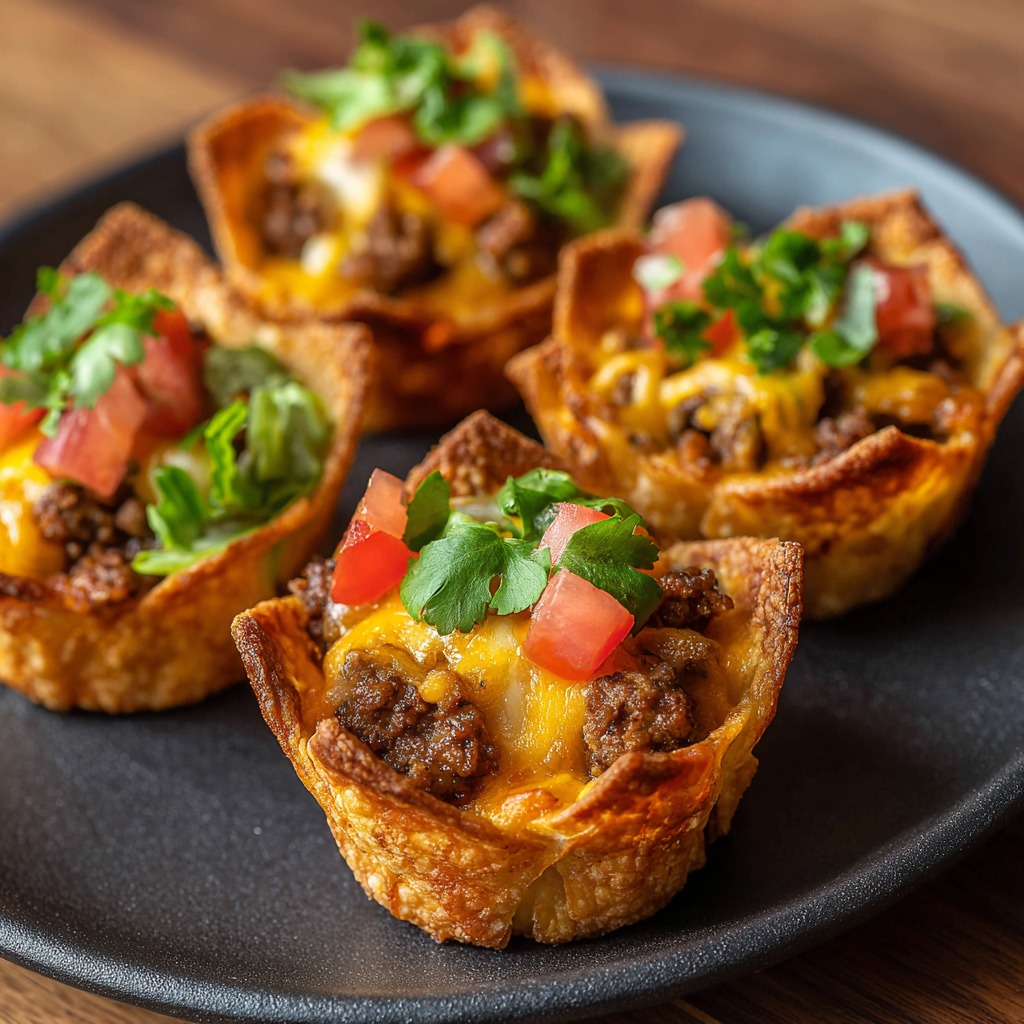
Imagine this: a crispy, golden tortilla cup, cradling perfectly seasoned taco meat, all blanketed under a layer of gooey, melted cheese. They’re like the best part of a taco—that first perfect bite—but replicated in a adorable, handheld, totally party-perfect form. No messy shells falling apart, no fighting over who gets the last one (though, fair warning, you might still fight). They’re the ultimate crowd-pleaser because they’re fun, flavorful, and so darn easy you’ll be doing a happy dance right there by the oven.
I created this recipe for one simple reason: life is too short for fussy appetizers that keep you in the kitchen while your guests are having all the fun. These taco cups let you be the host and enjoy the party. With minimal prep, simple ingredients, and a bake time that lets you whip up a quick guacamole, you’re about to become everyone’s favorite foodie hero. So, preheat that oven, grab your favorite muffin tin, and let’s ride this flavor wave together. Trust me, once you see these little cups of joy disappear from the platter, you’ll know it was worth every easy minute.
The Game-Day Snack That Started It All
These taco cups have a special place in my heart, and it all goes back to a particularly chaotic (and hilarious) Sunday football gathering at my first apartment. The space was tiny, the team was losing, and my grand plan of a massive taco bar had completely overrun my counter space. Bowls of toppings were teetering, shells were cracking, and we were all just a little hangry.
In a moment of “let’s just make this work” inspiration, I looked at the stack of tortillas and the muffin tin sitting on my drying rack. What if…? I grabbed a glass, punched out circles, and pressed them into the tin. I had some leftover taco meat from the night before, a bag of cheese, and a dream. Twenty minutes later, I emerged from my galley kitchen with a tray of these crispy, cheesy, handheld wonders. The room went silent (except for the crunch!). The game was forgotten for a solid five minutes. That was the moment I knew: the best recipes aren’t about perfection; they’re about joy, improvisation, and creating something deliciously fun that brings everyone together. These taco cups have been my go-to ever since.
Print
Easy Taco Cups : Crispy, Cheesy Party Favorite
- Total Time: 30 mins
Description
These Easy Taco Cups are the ultimate crowd-pleasing appetizer. Crispy tortilla shells filled with seasoned taco meat, melty cheese, and your favorite toppings create the perfect bite-sized snack. They’re quick to prepare, fun to serve, and ideal for parties, game nights, or an easy family dinner. Simple ingredients, bold flavors, and minimal prep make this recipe one you’ll come back to again and again.
Ingredients
6 small flour tortillas
250 g (½ lb) ground beef
1 tbsp olive oil
1 small onion, finely chopped
1 packet taco seasoning (or 1 tbsp homemade mix)
2–3 tbsp water
1 cup shredded cheddar or Mexican blend cheese
½ cup diced tomatoes
¼ cup sour cream
2 tbsp chopped fresh cilantro
Optional toppings: sliced jalapeños, avocado, corn, black beans
Instructions
Preheat oven to 180°C (350°F). Lightly grease a muffin tin.
Cut each tortilla into 4 circles using a cookie cutter or glass. Press each circle into the muffin tin to form small cups.
Bake for 8–10 minutes until lightly golden and crisp. Remove and set aside.
In a skillet, heat olive oil over medium heat. Add onion and cook until soft.
Add ground beef and cook until browned. Drain excess fat.
Stir in taco seasoning and water. Simmer for 2–3 minutes until thickened.
Spoon the beef mixture into each tortilla cup. Top with shredded cheese.
Return to oven for 5 minutes until cheese melts.
Garnish with tomatoes, sour cream, and cilantro before serving.
- Prep Time: 10 mins
- Cook Time: 20 minutes
- Category: Dinner
Nutrition
- Carbohydrates: 10g
- Protein: 8g
Gathering Your Flavor Crew: Ingredients & Smart Swaps
Here’s everything you need to create these little flavor pockets. I’ve added my favorite chef notes and swaps so you can make this recipe your own with what you have on hand!
- 6 small flour tortillas: The vessel for our crispy cup! I love the soft taco size. Chef’s Insight: Slightly stale tortillas work even better—they crisp up beautifully. No cookie cutter? A sturdy glass or even a clean, empty can works perfectly to cut out your circles.
- 1 tbsp olive oil: For sautéing and building flavor. Any neutral oil like avocado or vegetable works too.
- 1 small onion, finely chopped: The aromatic base. Yellow, white, or even red onion will do. Don’t rush cooking these—soft, translucent onions = sweet flavor foundation.
- 250 g (½ lb) ground beef: I use 80/20 for the best flavor, but lean beef, ground turkey, or chicken are fantastic leaner options. For a plant-based twist, crumbled tempeh or a plant-based ground “meat” works wonders.
- 1 packet taco seasoning (or 1 tbsp homemade mix): The flavor shortcut we all love! My quick homemade blend: 1 tsp chili powder, ½ tsp cumin, ¼ tsp each garlic powder, onion powder, paprika, and a pinch of salt & pepper.
- 2–3 tbsp water: This helps the seasoning coat every morsel of meat and creates a saucy texture.
- 1 cup shredded cheddar or Mexican blend cheese: The melty, glorious glue! Pre-shredded is convenient, but a block you grate yourself melts silkier (it doesn’t have anti-caking agents). Pepper jack is a spicy, fun swap!
- ½ cup diced tomatoes: For a fresh, juicy pop. Use Roma tomatoes (less watery) or even drained canned diced tomatoes in a pinch.
- ¼ cup sour cream: The cool, creamy finish. Greek yogurt is a fantastic protein-packed alternative with the same tang.
- 2 tbsp chopped fresh cilantro: The herbal bright note. If cilantro isn’t your thing, fresh parsley or chives are lovely, or just skip it!
- Optional Toppings: This is your playground! Sliced jalapeños, diced avocado, sweet corn, black beans, a squeeze of lime… let your cravings guide you.
Let’s Build Some Crispy Magic: Step-by-Step
Follow these steps, and you’re guaranteed taco cup success. I’ve sprinkled in my favorite kitchen hacks to make the process even smoother!
- Prep & Preheat: Start by preheating your oven to 180°C (350°F). Lightly grease a standard 12-cup muffin tin with a little oil or non-stick spray. This is your ticket to easy removal later! Chef Hack: While the oven heats, get all your toppings chopped and ready (mise en place!). It makes assembly feel like a fun, fast-paced kitchen show.
- Create the Cups: Using a 3-inch round cookie cutter or a glass, cut 2 circles from each small tortilla. You’ll get 12 perfect circles. Gently press each circle into a muffin cup, forming a little nest. Don’t worry if they overlap or look rustic—that’s part of the charm! Chef Hack: If your tortillas are very fresh and resist shaping, pop them in the microwave for 10 seconds to make them more pliable.
- The First Crisp: Bake the empty tortilla cups for 8-10 minutes, just until they are set and starting to turn a light golden brown. This “pre-bake” is the secret to a sturdy, non-soggy cup that can hold all our delicious fillings. Pull them out and let them hang out in the tin.
- Cook the Filling: While the cups bake, heat olive oil in a skillet over medium heat. Add your chopped onion and cook for 3-4 minutes until soft and fragrant. Add the ground beef, breaking it up with your spoon, and cook until no pink remains. Drain any excess fat. Chef Insight: Draining the fat is key—it prevents greasy cups and lets the taco seasoning shine.
- Season & Simmer: Sprinkle the taco seasoning over the meat, then add the water. Stir and let it simmer for 2-3 minutes until the mixture is cohesive and wonderfully fragrant. Your kitchen should smell amazing right now!
- Fill & Cheese It Up: Divide the warm taco meat evenly among your pre-baked tortilla cups. Now, the best part: top each one generously with shredded cheese. The cheese acts as a delicious, melty sealant.
- The Final Melt: Pop the whole tray back into the oven for 5-7 minutes, just until the cheese is completely melted and bubbly. Watch them—they transform into golden perfection quickly!
- Garnish & Serve: Carefully remove the taco cups from the muffin tin (a small spoon or offset spatula helps). Transfer them to a serving platter and immediately top with diced tomatoes, a dollop of sour cream, and a sprinkle of fresh cilantro. Serve while they’re hot and the cheese is gloriously stretchy!
How to Serve These Show-Stoppers
Presentation is half the fun! I love using a large, colorful platter or even a wooden board. Pile the warm taco cups in the center and scatter little bowls of extra toppings around them—think sliced jalapeños, extra sour cream, guacamole, and lime wedges. This lets your guests customize their perfect bite. For a casual family dinner, just slide the whole muffin tin onto a trivet in the middle of the table (with a warning it’s hot!). Provide small plates and napkins—these are delightfully messy in the best way. Pair with a simple side salad or a big bowl of tortilla chips and salsa for the ultimate snack spread.
Ride Your Own Flavor Wave: Creative Twists
Don’t stop here! This recipe is a blank canvas. Here are a few of my favorite spins:
- Buffalo Chicken: Swap the beef for shredded cooked chicken tossed in buffalo sauce. Use a blue cheese or ranch dressing instead of sour cream.
- Breakfast-for-Dinner: Fill with scrambled eggs, cooked breakfast sausage, and top with cheddar. Garnish with a tiny slice of avocado.
- Fully Loaded Veggie: Sauté bell peppers, corn, black beans, and onions with the taco seasoning. A fantastic meatless Monday option!
- Pizza Party: Fill with a spoonful of marinara, mini pepperoni, and shredded mozzarella. Garnish with fresh basil after baking.
- Sweet & Spicy Pork: Use ground pork seasoned with a mix of chili powder and a touch of brown sugar. Top with pineapple salsa.
Isla’s Chef Notes & Kitchen Confessions
Over the years, this recipe has seen it all in my kitchen. I’ve made them with my niece, who insisted on arranging the cheese “just so,” and I’ve whipped up a quadruple batch for a last-minute party where they were gone before I even took my apron off. My biggest lesson? Embrace the imperfect cup. Sometimes a tortilla circle tears, or a cup comes out a little lopsided. I promise, once filled and baked, no one will notice—they’ll only notice the incredible flavor.
I’ve also learned to always make a few extra. There’s a phenomenon I call “the cook’s tax,” where you inevitably snack on one or two straight from the pan. Consider it your quality control duty! This recipe is forgiving, fun, and meant to be played with. It’s evolved from a game-day hack to a beloved staple, and I hope it finds a cozy spot in your recipe rotation, too.
Your Questions, Answered (Before You Even Ask!)
Q: Can I make these ahead of time?
A: Absolutely! You can pre-bake the tortilla cups up to a day ahead and store them in an airtight container at room temp. You can also cook the taco meat filling 1-2 days in advance. When ready to serve, fill the pre-baked cups, top with cheese, and bake just until heated through and melty—about 8-10 minutes.
Q: My tortilla cups got soggy. What happened?
A: The most common culprit is skipping the “pre-bake” step for the empty cups. That initial bake seals and crisps the tortilla, creating a barrier against the juicy filling. Also, make sure your taco meat isn’t too wet—simmer it until the liquid is mostly absorbed.
Q: Can I use corn tortillas instead of flour?
A: You can, but they behave differently. Corn tortillas are less pliable and may crack when forming the cup. To help, warm them first and press two smaller, overlapping circles into each muffin cup for extra strength. The flavor will be fantastic!
Q: What’s the best way to get them out of the tin without breaking?
A: Let them cool in the tin for just 2-3 minutes after the final bake—this lets them set slightly. Then, gently slide a small butter knife or offset spatula around the edges and underneath to lift them out. If you greased the tin well, they should pop right out!
Nutritional Snapshot (Per 1 Taco Cup)
Please note: This is an estimate based on the core ingredients and will vary with specific brands, swaps, and toppings used.
- Calories: ~160 kcal
- Protein: 8 g
- Carbohydrates: 10 g
- Fat: 9 g
- Prep Time: 10 minutes
- Cook Time: 20 minutes
- Total Time: 30 minutes
There you have it, friend! The full story, all the tips, and the blueprint for your next kitchen triumph. I can’t wait for you to try these. Don’t forget to tag @BiteTide if you share them—I love seeing your creations!
With love and crispy, cheesy goodness,
Isla 💛