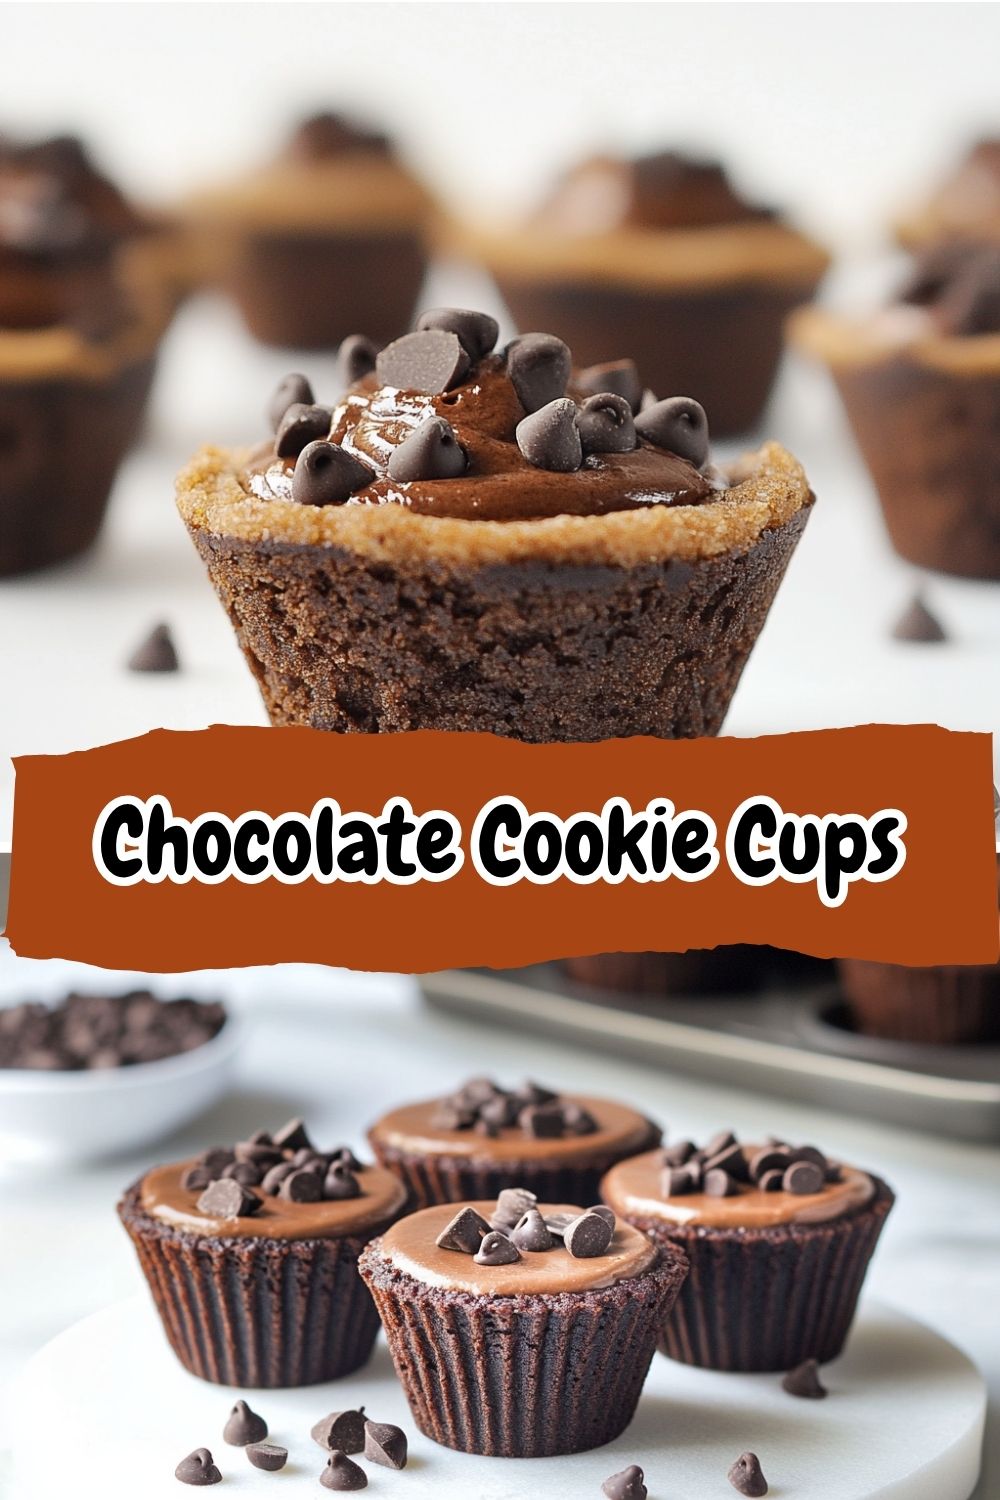
Chocolate Cookie Cups: Your New Favorite Edible Bowls of Joy
Hey there, flavor adventurer! Isla here from BiteTide, buzzing with excitement to share one of my all-time favorite treats: Chocolate Cookie Cups. Imagine a chocolate chip cookie that decided to hug your favorite filling—crispy edges giving way to a tender, fudgy center just begging to cradle cold ice cream, fluffy whipped cream, or tangy berries. These aren’t just cookies; they’re edible magic tricks that turn “snack time” into a full-on experience. Perfect for busy weeknights when you need a quick win, or weekend gatherings where you want to hear that collective “Ooooh!” from your crew. I promise—zero fuss, maximum joy. Grab your mixing bowl and let’s turn that oven on!
Why do I obsess over these? Because they’re the ultimate blank canvas! Kid begging for sprinkles? Done. Friend avoiding dairy? We’ve got swaps. Craving something fancy? Fill ’em with salted caramel and watch eyes light up. They’re proof that simple ingredients can become extraordinary with a little creativity (and a muffin tin!). So tie on that apron, crank up your favorite playlist, and let’s bake some happiness together. Your future self—licking chocolate off a spoon while these gems cool—will thank you.
How Cookie Cups Stole My Heart (and My Grandma’s Apron)
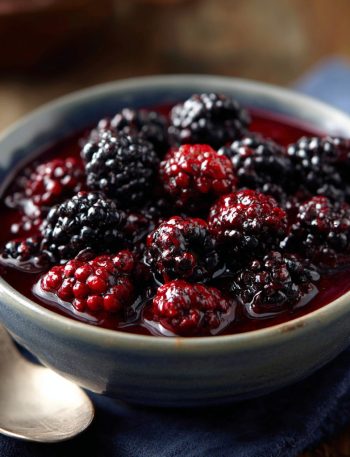
Picture this: Me, age 8, standing on a wobbly stool in my grandma’s seaside kitchen. Flour dusted the air like coastal fog as she handed me a chipped teacup. “Press the dough gently, like you’re tucking in a crab before high tide,” she’d say, her knuckles flecked with cocoa. We’d fill those warm cookie cups with wild blackberries we’d picked that morning, laughing as juice dribbled down our chins. Back then, they felt like treasure chests—each bite holding salty ocean breezes and her raspy chuckle.
Years later, when I launched BiteTide during a chaotic week of toddler meltdowns and burned dinners, I resurrected that recipe. Why? Because cookie cups are memory-makers. They’re the “yes, you can have dessert first” rebellion after a tough day. The “I-made-this!” pride when friends ask for the recipe. Every time I press dough into a muffin tin, I smell Grandma’s lavender soap and remember: food isn’t just fuel. It’s joy you can hold in your hands. Now, let’s bake new memories!
Your Flavor Toolkit: Simple Ingredients, Big Personality
- 1/2 cup unsalted butter (softened) – The VIP! Soften it by leaving it out for 1 hour (or microwave 5 seconds at 50% power). Chef hack: Salted butter works too—just skip the added salt later.
- 1/3 cup brown sugar – For chewiness and caramel vibes. Out of brown? Use all granulated sugar plus 1 tsp maple syrup.
- 1/4 cup granulated sugar – Crispy-edge creator! Swap with coconut sugar for deeper flavor.
- 1 egg – Binder extraordinaire. For egg-free, mix 1 tbsp ground flax + 3 tbsp water; let sit 10 mins.
- 1 tsp vanilla extract – Flavor booster! Try almond extract for a nutty twist.
- 1 cup all-purpose flour – The foundation. Gluten-free? Use 1:1 GF flour blend (like Bob’s Red Mill).
- 1/4 cup unsweetened cocoa powder – Choose natural cocoa (not Dutch process) for that fudgy rise.
- 1/2 tsp baking soda – Lift master! Ensure it’s fresh (fizz test: drop in vinegar—it should bubble!).
- 1/4 tsp salt – Balances sweetness. Sea salt flakes? Yes please.
- 1/2 cup chocolate chips – Go semi-sweet for balance, or dark for intensity. Chunks work too—smash a bar!
Why this combo rocks: Butter + sugars create air pockets for crispness, cocoa + baking soda react for that soft center, and chocolate chips? They’re the happy surprises! ✨
Print
Chocolate Cookie Cups
- Total Time: 22 min
Description
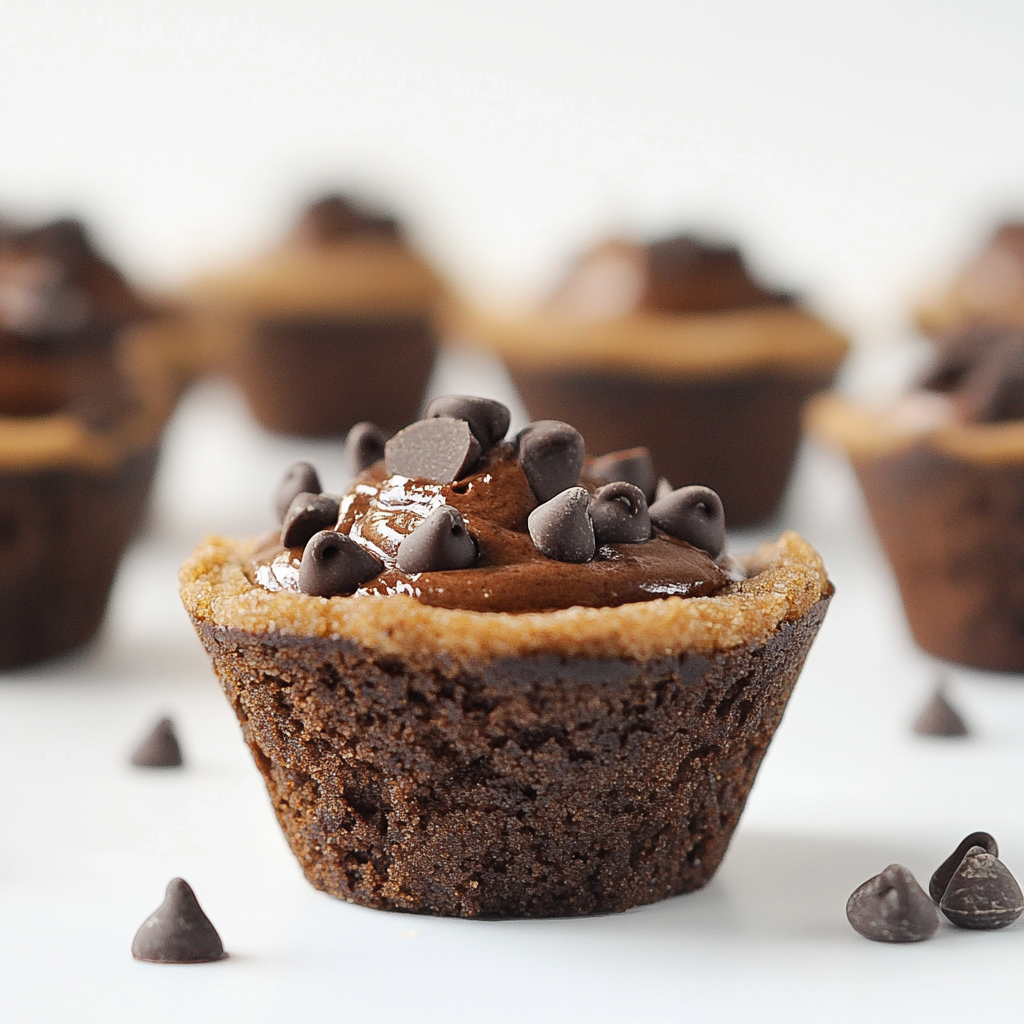
There’s something magical about cookie dough molded into little cups—like tiny bowls of joy just waiting to be filled. We used to make these for birthdays, but now they’re our go-to when we want a treat that’s playful, delicious, and just a little extra. Fill them with whipped cream, yogurt, or ice cream—they’re always a hit.
Ingredients
1/2 cup unsalted butter (softened)
1/3 cup brown sugar
1/4 cup granulated sugar
1 egg
1 tsp vanilla extract
1 cup all-purpose flour
1/4 cup unsweetened cocoa powder
1/2 tsp baking soda
1/4 tsp salt
1/2 cup chocolate chips
Instructions
Preheat oven to 350°F (175°C). Grease or line a 12-cup muffin tin.
Cream butter and sugars until fluffy. Add egg and vanilla; mix well.
In a separate bowl, combine flour, cocoa, baking soda, and salt.
Mix dry ingredients into wet until just combined. Fold in chocolate chips.
Scoop dough into muffin cups, pressing up the sides to form “cups.”
Bake for 10–12 minutes. If centers puff up, gently press them down with a spoon after baking.
Let cool completely, then fill as desired (ice cream, mousse, fruit, etc.).
Notes
Crisp on the outside, soft in the middle, and ready for whatever sweet filling you love—these cookie cups are joy in every bite.
- Prep Time: 10 min
- Cook Time: 12 min
- Category: Dessert
Nutrition
- Calories: ~180
- Sugar: 12 g
- Fat: 9 g
- Carbohydrates: 22 g
- Protein: 2 g
Let’s Bake! Your Foolproof Cookie Cup Journey
- Preheat oven to 350°F (175°C). Grease a 12-cup muffin tin generously with butter or non-stick spray. (Trust me, skimp here = stuck cups!)
- Cream butter & sugars in a bowl until fluffy (2 mins with a hand mixer). Chef secret: Scrape the bowl halfway! Unmixed butter = sad flat cups.
- Add egg and vanilla. Mix until just combined—overmix = tough cookies. It’ll look curdled briefly; that’s normal!
- Whisk dry ingredients in a separate bowl. Sift cocoa if lumpy! Why sift? No one wants bitter clumps.
- Mix dry into wet on low speed until almost combined. Leave streaks of flour—this prevents overworking.
- Fold in chocolate chips with a spatula. Sneak a taste? I won’t tell. 😉
- Scoop dough into muffin cups (about 1.5 tbsp each). Use a spoon to press dough up the sides, forming a cup shape (thinner walls = crispier!). Center will be thicker.
- Bake 10-12 mins until edges firm but centers soft. Watch closely! They go from perfect to overbaked FAST.
- Press puffed centers gently with a teaspoon back if they dome up. Do this straight out of the oven—they’re pliable!
- Cool 15 mins in tin (they’ll firm up), then transfer to a rack. Patience warrior: Filling warm cups = structural disaster!
Pro tip: Bake one “test cup” first to adjust time—ovens vary!
Serving: Where the Magic Happens!
Fill these beauties RIGHT before serving to keep ’em crisp. For summer: Pile high with vanilla ice cream, fresh berries, and a mint leaf. Fancy brunch? Lemon curd + raspberries + dusting of powdered sugar. Midnight snack? Whipped cream + chocolate shavings. Presentation hack: Arrange on a wooden board with fillings in tiny bowls—let guests DIY! Store unfilled cups in an airtight container for 3 days (but let’s be real… they won’t last that long).
Shake It Up! 5 Delicious Twists
- S’mores Madness: Add 1/4 cup crushed graham crackers to dough. Fill with marshmallow fluff + torch it!
- Peanut Butter Bliss: Swirl 2 tbsp PB into dough. Fill with banana slices + honey.
- Mint Chip Cooler: Swap vanilla for 1/2 tsp peppermint extract. Fill with chocolate mousse.
- Vegan Vibes: Use vegan butter + flax egg. Fill with coconut yogurt + mango.
- Espresso Kick: Add 1 tbsp instant espresso to dry ingredients. Fill with mascarpone + dark cherry compote.
Isla’s Kitchen Confessions
True story: The first time I tested these, I used a mini muffin tin (disaster—cups too small to fill!). Then my kid “helped” by pressing dough into giant Texas muffin tins… which became cookie cereal bowls (genius, right?!). Over time, I learned: Room temp ingredients are NON-NEGOTIABLE for that perfect texture. And that spoon-press trick after baking? Born from me angrily smashing a puffed cup with my finger (ouch, lesson learned). Now, these are my go-to for last-minute potlucks—I bake the cups ahead, toss fillings in a cooler, and assemble on-site. Cue the happy dances!
Your Questions, Solved!
Q: My cups stuck to the pan! Help!
A: Grease, grease, GREASE! Non-stick spray works best. Or use silicone liners—they pop right out.
Q: Centers collapsed after filling. Sadness!
A: Likely underbaked or filled too warm. Bake until edges look set, cool COMPLETELY, and add cold fillings (like ice cream) just before serving.
Q: Can I freeze the dough?
A: Absolutely! Scoop raw dough into muffin tins, freeze solid, then transfer to bags. Bake straight from frozen—add 2 extra mins.
Q: Why did my cups spread flat?
A: Butter was too warm or dough overmixed. Chill dough 20 mins before baking if kitchen’s hot!
Nutritional Notes (Per Cookie Cup, No Filling)
Calories: ~180 kcal • Protein: 2g • Carbs: 22g • Fat: 9g • Sugar: 12g
Dietary swaps: For lower sugar, use sugar-free chocolate chips + reduce sugars by 2 tbsp.