Chicken Parm Roll-Ups: Your New Favorite Way to Eat the Classic
Hey friend! Isla here, from my cozy kitchen to yours. Let’s talk about that magical moment when a classic dish gets a playful makeover and becomes something even better. That’s exactly what happened the day I first made these Chicken Parm Roll-Ups. We all love a good chicken parmesan—the crispy crust, the river of melted cheese, that tangy marinara—it’s pure comfort on a plate. But sometimes, you want all that glorious flavor in a neater, faster, and honestly, just more fun package. Enter the roll-up.
Imagine: tender chicken, pounded thin, acting as a soft blanket for a gooey, cheesy filling. It gets rolled up, snuggled into a baking dish, smothered in more sauce and cheese, and baked until your entire kitchen smells like a little Italian trattoria. The best part? They slice into these gorgeous, spiraled pinwheels that look like you spent hours, but the hands-on time is seriously minimal. This is the kind of recipe that makes weeknights feel special and feeding a crowd utterly stress-free. So, grab your rolling pin (or a handy can of tomatoes!) and let’s roll up our sleeves. We’re about to make a cheesy, saucy, oven-baked masterpiece together.
Print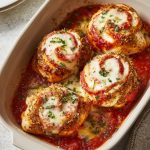
Chicken Parm Roll-Ups : Cheesy, Saucy, and Oven-Baked Perfection
- Total Time: 40 minutes
- Yield: 4 servings 1x
Description
These Chicken Parm Roll-Ups are a fun twist on the Italian classic—thin chicken cutlets rolled up with mozzarella and marinara, then baked until golden and bubbling. They’re easy to slice and serve, making them perfect for dinner, entertaining, or meal prep. All the comfort of chicken parmesan, with a fresh, rolled-up spin.
Ingredients
4 thin chicken cutlets (or 2 chicken breasts, sliced in half lengthwise)
1 cup marinara sauce
1 cup shredded mozzarella cheese
1/4 cup grated Parmesan cheese
1 tsp Italian seasoning
Salt and pepper, to taste
1 tbsp olive oil
Optional: fresh basil or parsley for garnish
Instructions
Preheat oven to 200°C (400°F).
Pound chicken to even thickness if needed. Season with salt, pepper, and Italian seasoning.
Spread a spoonful of marinara on each cutlet. Add a layer of mozzarella and a sprinkle of parmesan.
Roll up tightly and place seam-side down in a greased baking dish.
Drizzle with olive oil and spoon extra marinara on top. Sprinkle with remaining cheese.
Bake uncovered for 25–30 minutes until chicken is cooked through and cheese is melted.
Let rest 5 minutes, then slice and serve with pasta, salad, or crusty bread.
- Prep Time: 10 mins
- Cook Time: 30 mins
- Category: Dinner
The Night We Rolled With It: A Kitchen Pivot Story
I have to confess, this recipe was born from a happy accident—or maybe a “hangry” accident is more accurate. Picture this: It was a typical chaotic Wednesday. I’d promised my family chicken parm, my brain already dreaming of that crispy fried goodness. But when I opened the pantry, my breadcrumbs had… seen better days. We’re talking a mysterious, clumpy texture that spelled disaster. A mutiny was brewing. My youngest was already asking “is it ready yet?” for the tenth time.
Instead of panicking, I remembered my grandma’s wisdom: “When you’re missing an ingredient, lean into what you *do* have.” I had the chicken, the cheese, the sauce. I looked at the thin cutlets and had a lightbulb moment. What if we *rolled* it all up and baked it? No frying, no breading mess, just pure, concentrated flavor. Twenty minutes later, the aroma wafting from the oven had everyone gathered around. When I pulled out those golden, bubbling rolls and sliced into them, revealing that gorgeous cheesy spiral, the “oohs” and “aahs” were immediate. It wasn’t the chicken parm I’d planned, but it was, somehow, even better. It taught me that the best kitchen memories often start with a little improvisation and a lot of love.
What You’ll Need: A Closer Look at Your Flavor Team
Here’s your cast of characters. Simple, quality ingredients are the key to big flavor here. Let’s break them down:
- 4 thin chicken cutlets (or 2 large chicken breasts): Thin cutlets are a major time-saver! If you’re using breasts, you’ll butterfly and pound them. Thinner meat means quicker, more even cooking and a tender, roll-able result.
- 1 cup marinara sauce: This is the flavor backbone. Use your favorite jarred brand for ultimate ease, or your homemade sauce if you’ve got it stashed away. I’m a fan of a sauce with a little garlic and basil already in it.
- 1 cup shredded mozzarella cheese: For that iconic, irresistible melt. I like to use a low-moisture, whole-milk mozzarella for the best stretch and flavor without making the roll-ups soggy.
- 1/4 cup grated Parmesan cheese: The salty, nutty kick that takes it over the top. Freshly grated from a wedge tastes infinitely better than the pre-grated stuff in a canister—it melts smoother and packs more punch.
- 1 tsp Italian seasoning: A quick flavor boost. No blend on hand? Make your own with a pinch each of dried oregano, basil, thyme, and rosemary.
- Salt and pepper, to taste: Don’t be shy! Seasoning the chicken directly is your first and most important layer of flavor.
- 1 tbsp olive oil: A light drizzle before baking helps the top get golden and delicious.
- Optional: fresh basil or parsley for garnish: A sprinkle of green at the end makes it pretty and adds a pop of fresh flavor.
Let’s Make Magic: Step-by-Step Roll-Up Guide
Follow these steps, and you’ll be a roll-up pro in no time. I’ve packed each one with my favorite little hacks to guarantee success!
- Preheat and Prep. Fire up your oven to 400°F (200°C). This ensures it’s perfectly hot when your roll-ups go in. Take a 9×13 inch baking dish and give it a light spritz of cooking spray or a swipe of olive oil. This prevents any cheesy overflow from becoming a permanent part of your dish!
- Prepare the Chicken. If you’re starting with whole chicken breasts, butterfly them: place your hand on top and slice horizontally through the middle, almost but not quite all the way through, then open it like a book. Now, whether you have cutlets or butterflied breasts, place them between two sheets of plastic wrap or in a large zip-top bag. Use a rolling pin, a heavy skillet, or even a can of beans to gently pound them to an even ¼-inch thickness. This tenderizes the meat and makes rolling a breeze. Season both sides generously with salt, pepper, and that Italian seasoning.
- Assemble the Roll-Ups. Lay your seasoned chicken cutlets flat. Spread about 1 tablespoon of marinara sauce over each one, leaving a small border around the edges. Next, sprinkle a generous handful of shredded mozzarella and a bit of the Parmesan over the sauce. Chef’s Tip: Don’t overfill! About 3 tablespoons of cheese total per cutlet is perfect. Too much, and it will all ooze out during baking.
- Roll ‘Em Up! Starting from the shorter end, tightly roll up the chicken, tucking in the filling as you go. Think of rolling a snug burrito. Place the roll seam-side down in your prepared baking dish. Repeat with all cutlets, giving them a little space in the dish so heat can circulate.
- Sauce and Cheese the Tops. Spoon the remaining marinara sauce over the tops of the roll-ups. Drizzle lightly with the olive oil—this helps them brown beautifully. Finish by showering them with the rest of your mozzarella and Parmesan. Go on, make it cheesy!
- Bake to Bubbly Perfection. Bake, uncovered, for 25-30 minutes. You’re looking for the chicken to be cooked through (an internal thermometer should read 165°F) and the cheese to be melted, golden, and gloriously bubbly around the edges.
- The Most Important Step: Rest! I know it’s tempting to dive right in, but let the roll-ups rest for 5-7 minutes after pulling them from the oven. This allows the juices to redistribute, ensuring every slice is moist and the filling sets slightly so it doesn’t all run out when you cut.
How to Serve These Cheesy Spirals
Presentation is part of the fun! After resting, I love to transfer the roll-ups to a cutting board and slice them in half on a slight diagonal. You can plate them over a bed of tender pasta (tossed with a bit of that extra marinara), alongside a crisp, green salad with a sharp vinaigrette to cut the richness, or simply with a pile of garlicky roasted broccoli and a hunk of warm, crusty bread for mopping up every last bit of sauce. A final flourish of torn fresh basil or chopped parsley makes it restaurant-worthy.
Mix It Up! Creative Twists on the Classic
Once you master the basic roll, the world is your oyster (or should I say, your meatball?). Try these fun variations:
- Spinach & Ricotta: Swap the mozzarella for a mixture of ricotta, thawed and squeezed-dry frozen spinach, and a pinch of nutmeg.
- Pesto Party: Use a layer of basil pesto instead of marinara inside the roll, and top with mozzarella and sun-dried tomatoes.
- Spicy Pepperoni Pizza: Add a few slices of pepperoni and a sprinkle of crushed red pepper flakes inside with the cheese.
- Gluten-Free/Dairy-Free: The recipe is naturally gluten-free! For dairy-free, use your favorite plant-based mozzarella and Parmesan shreds.
- Protein Swap: Try this with thin slices of eggplant (salted and pressed first) or even large, butterflied shrimp for a seafood twist!
Isla’s Chef Notes & Kitchen Confessions
This recipe has become a staple in my home, and it’s evolved in the best ways. Sometimes I’ll add a thin slice of prosciutto under the cheese for a salty, savory punch. I’ve also learned that letting the rolled chicken chill in the fridge for 20 minutes before baking can help them hold their shape even better—a great tip if you’re prepping ahead! My funniest kitchen fail with these? I once got overzealous with the pounding and turned a cutlet into a chicken lace doily. It was so thin, I could see through it! I just patched it together with another piece—no one ever knew, and it tasted just as amazing. The moral: don’t strive for perfection, strive for deliciousness. It’s way more fun.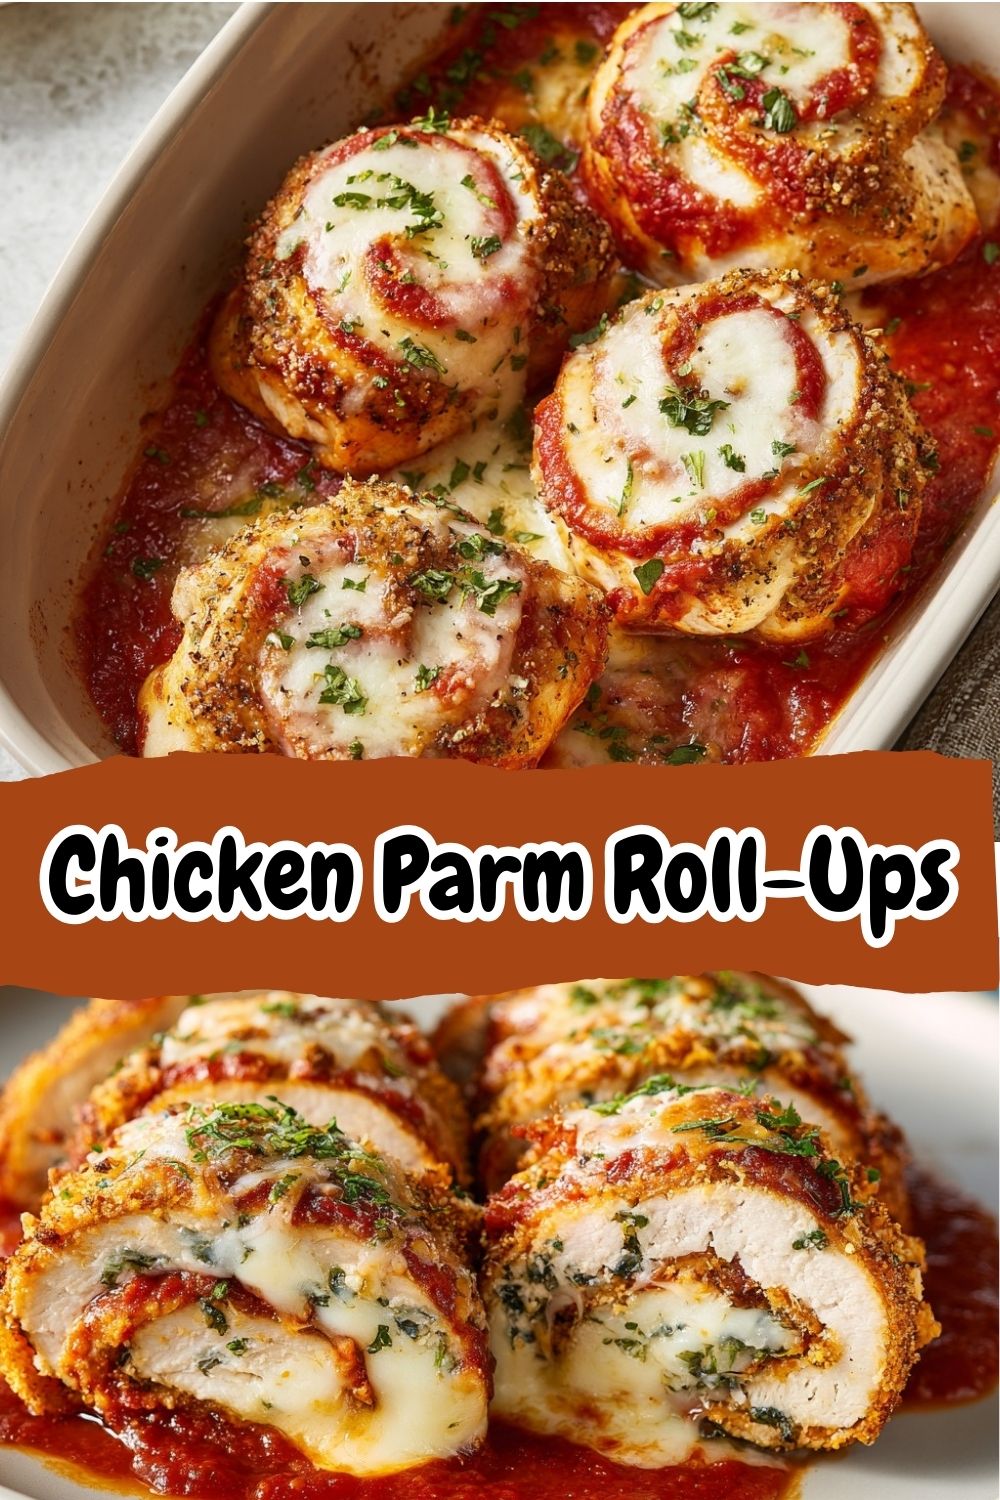
Your Questions, Answered!
Q: My cheese exploded out the sides while baking! What did I do wrong?
A: No worries, this happens! It usually means the rolls were either overfilled or not rolled tightly enough. Next time, use a touch less filling and really give it a firm, snug roll. The escaped cheese just becomes tasty, crispy bits—it’s still a win.
Q: Can I make these ahead of time?
A> Absolutely! You can assemble the roll-ups completely, cover the dish tightly, and refrigerate for up to 24 hours. When you’re ready, just bake them straight from the fridge, adding maybe 5-10 extra minutes to the cooking time since they’ll be cold.
Q: How do I store and reheat leftovers?
A> Store leftovers in an airtight container in the fridge for up to 3 days. To reheat, place them in a baking dish with a splash of water or sauce, cover with foil, and warm in a 350°F oven until heated through. This keeps them from drying out better than the microwave.
Q: My chicken is cooking unevenly. Help!
A> This is why pounding to an even thickness is crucial! If you have one roll that’s much thicker, it might need more time. You can always check them early, and if one isn’t done, remove the cooked ones tented with foil while the thicker one finishes up.
Nutritional Information (Per Roll-Up)
Please note: This is an estimate for one chicken parm roll-up, based on the ingredients listed. Values may vary based on specific brands and ingredient amounts used.
- Calories: 320
- Fat: 18g
- Carbohydrates: 7g
- Protein: 32g
And there you have it! My foolproof, fun, and fantastically delicious take on Chicken Parm Roll-Ups. I hope this recipe brings as much joy and flavor to your table as it does to mine. Remember, cooking is about the journey—the little experiments, the shared smiles, the happy dances when a recipe works. Now, go roll up something amazing! Don’t forget to tag me @BiteTide if you make them—I love seeing your creations.
With love and a full baking dish,
Isla 💛