Hey there, friend! Isla here, your culinary cheerleader from BiteTide. Let me ask you a question. Are you having one of those days? You know the ones. The clock is ticking towards dinnertime, the troops are getting hangry, and you’re staring into the fridge hoping a fully-prepared, delicious meal will magically appear. I’ve been there more times than I can count, and that, my friend, is exactly why this glorious Cheesy Taco Pie exists.
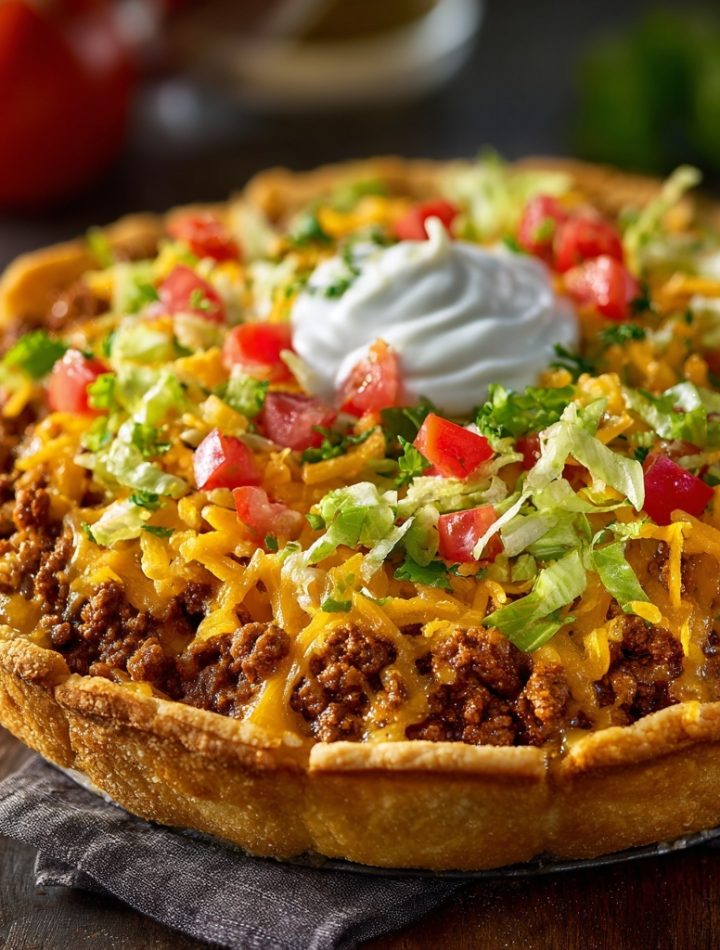
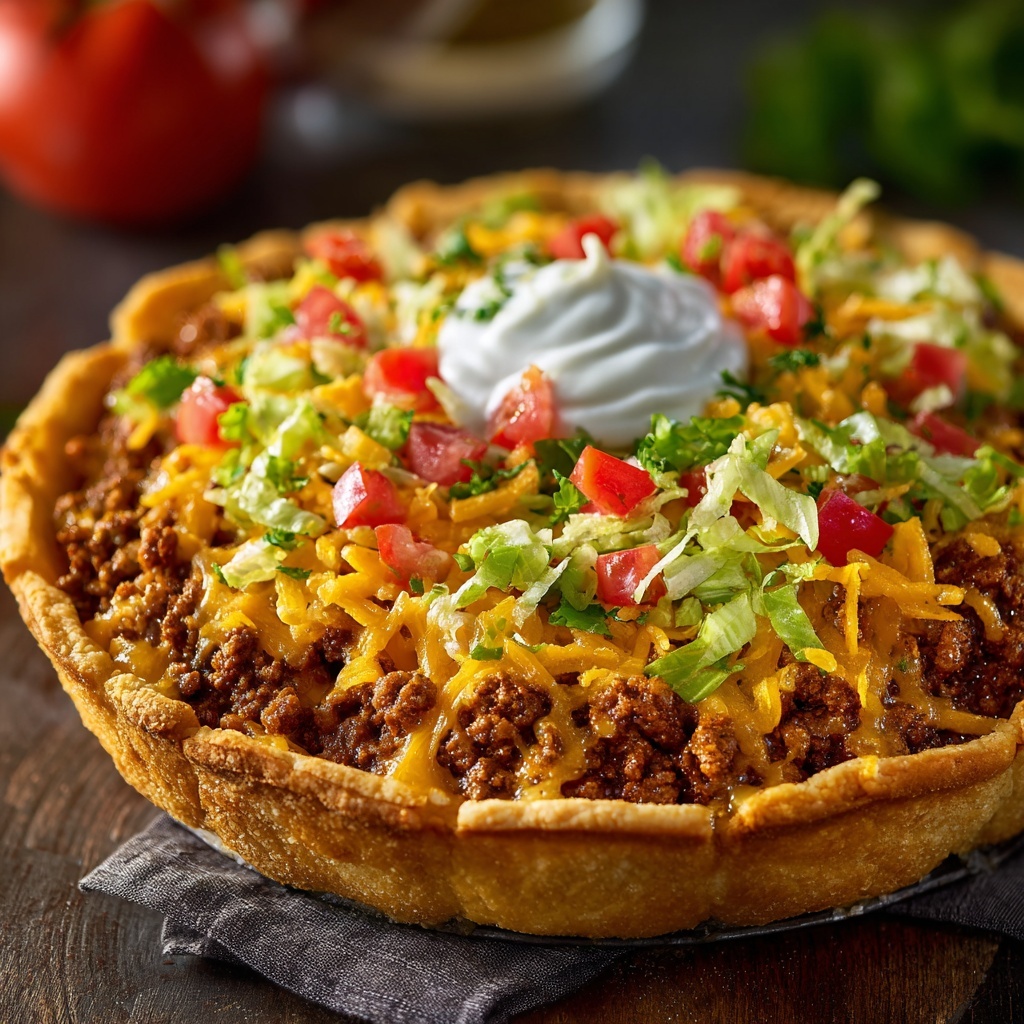
Imagine all the best parts of taco night—the savory seasoned beef, the satisfying crunch, the gooey melted cheese—all hugged by a buttery, golden crust and baked into one irresistible, sliceable pie. This isn’t just dinner; it’s a flavor party in a pie dish, and everyone’s invited. It’s the hero we need on a busy weeknight, the ultimate comfort food that comes together in a flash, and the answer to the eternal question, “What’s for dinner?” So, tie on your apron, crank up the tunes, and let’s turn that kitchen chaos into a triumphant, cheesy victory dance. This is fun, flavorful, and fuss-free food at its finest.
Taco Tuesdays and Grandma’s Pie Plate
This recipe takes me right back to my childhood kitchen, with its chipped tile countertops and the ever-present smell of something delicious simmering on the stove. Taco night was a weekly event, a happy, messy affair where my dad would man the skillet and my job was to meticulously arrange all the topping bowls into a colorful buffet. But the real magic happened with leftovers. The next day, my grandma, a woman who believed no scrap of food should go to waste, would take the leftover taco meat, mix it with whatever else we had, and press it into a pie crust. She called it her “Kitchen Sink Pie.”
My version, this Cheesy Taco Pie, is a direct love letter to her resourceful spirit. I’ve just given it a few modern, craveable upgrades (hello, Fritos and crescent rolls!). That feeling of creating something incredible from simple, everyday ingredients? That’s the heart of BiteTide. It’s not about perfection; it’s about the joy of making something that brings everyone to the table with a smile.
Print
Cheesy Taco Pie
- Total Time: 35 minutes
- Yield: 6 servings 1x
Description
Preheat oven to 375°F (190°C).
Press crescent roll dough into a greased 9-inch pie dish to form the crust.
Bake the crust for 7–8 minutes, just until lightly golden.
While crust is baking, cook ground beef in a skillet until browned. Drain excess fat.
Add taco seasoning and cook according to package instructions (typically with 2/3 cup water).
Spread crushed corn chips evenly over baked crust.
Add the taco beef mixture, then spread sour cream over top.
Sprinkle with shredded cheese.
Bake uncovered for 10–15 more minutes, or until cheese is melted and bubbly.
Let rest 5 minutes, then top with fresh lettuce and tomatoes if desired. Slice and serve
Ingredients
1 tube crescent rolls
2 cups corn chips (like Fritos), crushed
1 pound ground beef
1 packet taco seasoning
1/2 cup sour cream
1 cup shredded cheddar cheese
Optional toppings: chopped lettuce, tomatoes, green onions, jalapeños
- Prep Time: 10 minutes
- Cook Time: 25 minutes
- Category: Dinner, Main Course
- Cuisine: American
Nutrition
- Calories: 470
- Fat: 32g
- Protein: 21g
Gathering Your Flavor Crew
Here’s the dream team of ingredients that makes this pie so unforgettable. Don’t be afraid to swap and play based on what’s in your pantry—that’s the beauty of this recipe!
- 1 tube crescent rolls: This is our secret weapon for a quick, buttery, and flaky crust. It’s the ultimate shortcut to golden-brown perfection. If you have refrigerated pie crust, that works beautifully too!
- 2 cups corn chips (like Fritos), crushed: This is our flavor game-changer! The Fritos add an incredible, corny crunch and a salty punch that takes this pie to the next level. Pro chef insight: Don’t crush them into dust! You want small pieces to maintain that fantastic texture.
- 1 pound ground beef: I use an 80/20 blend for the best flavor, but lean ground turkey or chicken are fantastic, lighter alternatives.
- 1 packet taco seasoning: The flavor powerhouse! It’s a blend of chili powder, cumin, and other spices that does all the heavy lifting for you. For a homemade twist, mix 1 tbsp chili powder, 1 1/2 tsp cumin, 1 tsp each of garlic powder, paprika, and onion powder, and 1/2 tsp of oregano.
- 1/2 cup sour cream: This adds a lovely, tangy creaminess that balances the spice from the seasoning. A chef’s hack: Let the sour cream sit out for 10 minutes before spreading—it will be much easier to dollop and smooth over the hot beef layer.
- 1 cup shredded cheddar cheese: Because what’s a cheesy taco pie without the glorious, melty cheese? A Mexican blend or even pepper jack would be delicious here for an extra kick.
- Optional toppings: chopped lettuce, tomatoes, green onions, jalapeños: This is where you make it your own! The fresh, cool toppings provide a fantastic contrast to the warm, savory pie. Don’t skip them if you can help it!
Let’s Build the Pie! Your Step-by-Step Guide
Ready to create some magic? Follow these steps, and you’ll have a masterpiece on the table in no time. I’ve sprinkled in my favorite chef hacks to make sure your pie is absolutely perfect.
- Preheat your oven to 375°F (190°C). Let’s get that oven hot and ready for our crust! A properly preheated oven is key for a flaky, non-soggy bottom.
- Press the crescent roll dough into a greased 9-inch pie dish to form the crust. Here’s a little hack: unroll the dough and press the seams together to create one solid sheet. Gently press it into the bottom and up the sides of the dish. No fancy crimping needed—rustic is charming!
- Bake the crust for 7–8 minutes, just until lightly golden. This is called “par-baking” and it’s our secret weapon against a doughy, undercooked bottom crust. We’re just giving it a head start!
- While the crust is baking, cook the ground beef in a skillet until beautifully browned. Drain any excess fat. I like to get a good sear on the beef for maximum flavor. Don’t just gray it—let it get some color!
- Add the taco seasoning and cook according to package instructions (typically with 2/3 cup water). Let it simmer until the liquid reduces and the meat is coated in that fragrant, spiced sauce. Your kitchen should smell amazing right now.
- Time to layer! Spread the crushed corn chips evenly over the baked crust. This layer acts as a barrier, helping to keep the crust crispy by absorbing any extra moisture from the beef.
- Next, add the entire taco beef mixture, spreading it into an even layer. The heat from the beef will start to melt the chips underneath, creating an incredible flavor fusion.
- Dollop the sour cream over the hot beef, then gently spread it into a thin, even layer. Remember that hack about letting the sour cream warm up? This is where it pays off! Using the back of a spoon makes this step super easy.
- Finish it off with a glorious blanket of shredded cheddar cheese. Cover every inch! This is the cheesy, golden lid that holds our pie together.
- Bake uncovered for 10–15 more minutes, or until the cheese is completely melted, bubbly, and just starting to get those gorgeous golden-brown spots.
- Let the pie rest for 5 minutes before slicing. I know, the wait is torture! But this is crucial. It allows the layers to set, so you get clean, beautiful slices instead of a delicious but soupy mess.
- Top with all your fresh, crunchy toppings, slice like a pizza, and serve immediately. Get ready for the compliments to roll in!
How to Serve Your Masterpiece
Presentation is part of the fun! I love placing the whole pie dish right in the middle of the table for a family-style feast. Slice it into six generous wedges. The beauty of this dish is that it’s a complete meal in one, but if you want to go the extra mile, a simple side of cilantro-lime rice, a crisp green salad, or a bowl of black beans makes it an even heartier spread. Don’t forget the hot sauce for those who like it spicy!
Ride Your Own Flavor Wave: Recipe Variations
The fun doesn’t stop here! This recipe is a blank canvas for your culinary creativity. Here are a few of my favorite twists:
- Breakfast-for-Dinner Pie: Swap the beef for cooked, crumbled breakfast sausage. Use a layer of frozen hash browns (thawed) instead of Fritos, and top with cheddar cheese. Serve with a fried egg on top!
- Buffalo Chicken Pie: Use 2 cups of shredded rotisserie chicken tossed in 1/2 cup of buffalo sauce instead of the taco meat. Use a blue cheese or ranch dressing layer instead of sour cream.
- Seven-Layer Dip Pie: Add a layer of refried beans under the beef, and a layer of guacamole under the sour cream. After baking, add diced tomatoes, olives, and green onions.
- Full Veggie Power: Use a plant-based ground “meat” or a sautéed mix of bell peppers, onions, corn, and black beans seasoned with taco spices.
- Spicy Fiesta Pie: Use pepper jack cheese, add a can of diced green chiles to the beef, and top with pickled jalapeños.
Isla’s Chef Notes & Kitchen Confessions
This recipe has been a staple in my kitchen for years, and it’s evolved almost as much as my taste in music. The first time I made it, I completely forgot to par-bake the crust. The result was… edible, but let’s just say the bottom layer had a uniquely doughy texture. We still ate it, but I learned my lesson! Now, I never skip that step.
Over time, I’ve found that letting the pie rest is non-negotiable. I’m an impatient foodie, and I’ve burned the roof of my mouth more than once diving in too early. The five-minute wait is a test of willpower, but it’s a test worth passing for the perfect slice. This recipe is a testament to the fact that the best dishes aren’t about fancy techniques; they’re about heart, flavor, and a little bit of cleverness. It’s a living recipe, so please, make it your own!
Your Questions, Answered!
I’ve made this pie a zillion times, and I’ve heard all your brilliant questions. Here are the answers to the most common ones.
-
- Q: My crust got really puffy during the first bake. What did I do wrong?
A: This happens! Crescent roll dough is designed to puff up. The simple fix is “docking”—just prick the unbaked crust all over with a fork before you put it in the oven. This releases the steam and helps it stay flat. If you forget, you can gently press it down with a spatula when it comes out of the oven. - Q: Can I make this ahead of time?
A: Absolutely! You can assemble the whole pie (through the cheese layer), cover it tightly, and refrigerate it for up to 24 hours. When you’re ready, just pop it in the oven. You may need to add 5-10 minutes to the final bake time since it’s going in cold.
- Q: My crust got really puffy during the first bake. What did I do wrong?
Q: My pie is very liquidy/greasy. How can I prevent that?
A: The two biggest culprits are fat from the meat and liquid from the toppings. To fix it: 1) Be sure to drain the browned beef really well. I sometimes even give it a quick pat with a paper towel. 2) Make sure your fresh, watery toppings (like tomatoes and lettuce) are only added *after* baking, right before serving. The Fritos layer also helps absorb some excess grease.
- Q: I don’t have a pie dish. What can I use instead?
A: No problem! A 9×9 inch square baking dish or even a cast-iron skillet works perfectly. Just press the crust into the bottom and partially up the sides.
Nutritional Information*
*Please note: This is an estimate for 1 serving (1/6th of the pie) without optional toppings. Values can vary greatly based on the specific brands of ingredients you use.
- Calories: 470
- Protein: 21g
- Fat: 32g
- Saturated Fat: 13g
- Carbohydrates: 24g
- Fiber: 1g
- Sugar: 3g
- Cholesterol: 85mg
- Sodium: 870mg
There you have it! Your new go-to, no-fuss, mega-flavorful dinner. I’m so thrilled to share this recipe with you. If you make it (and I really hope you do!), please tag me on social @BiteTide or drop a comment on the blog. I love seeing your creations! Now go forth and conquer dinnertime.
With love and a full plate,
Isla 💛