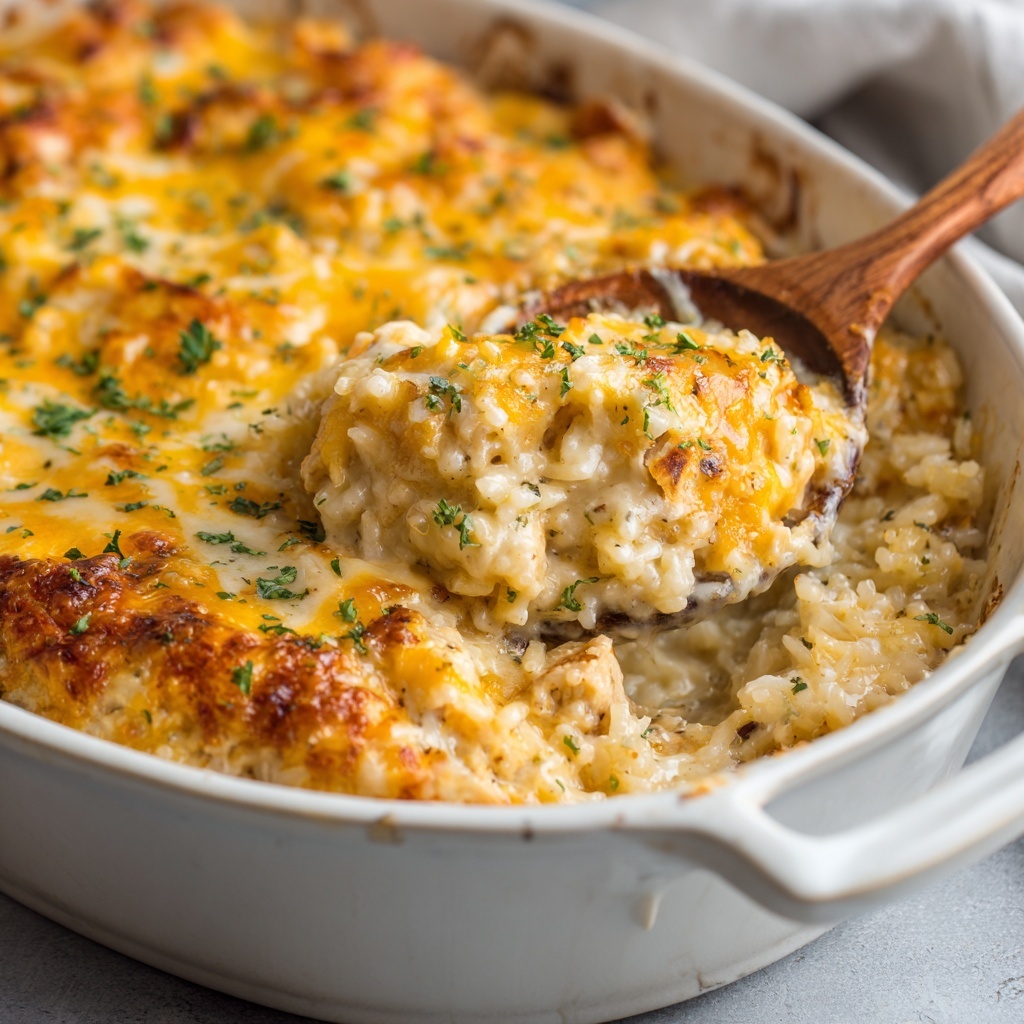
Your New Favorite Weeknight Hero: Cheesy Chicken & Rice Bake
Hey there, friend! Isla here from BiteTide. Let’s talk about reality for a second. You know those nights when the clock is your enemy, the pantry seems bare, and everyone’s stomachs are growling in a chorus of pure hangry impatience? Yeah, we’ve all been there. You want to make something comforting, something that feels like a warm hug in a dish, but you also don’t have the bandwidth for a culinary masterpiece that dirties every pot and pan you own.
Well, take a deep breath, because I’m about to hand you the ultimate weeknight lifesaver: my Cheesy Chicken & Rice Bake. This isn’t just a recipe; it’s your ticket to a stress-free, wildly delicious dinner that the whole family will actually cheer for. Imagine juicy chicken tenderloins, nestled in a bed of creamy, savory rice, all topped with a blanket of perfectly melted, bubbly cheese. It’s the kind of meal that tastes like you fussed over it for hours, but secretly comes together with minimal prep and a handful of pantry staples. So, tie that apron on, put on your favorite playlist, and let’s make some magic happen. This is comfort food, simplified.
The Recipe That Saved My Sanity (More Than Once)
I have to confess, this recipe holds a special place in my heart—and not just because it’s cheesy and amazing. It truly became a legend in my kitchen during a particularly chaotic week a few years back. My best friend was visiting with her two incredibly energetic toddlers, my fridge was on the fritz, and I had a major blog deadline looming. The pressure was on to get a decent meal on the table without losing my cool.
I stood in front of the open fridge, doing that blank stare we all know too well. I had a pack of chicken tenderloins, some soup cans, and a few packets of rice. In a moment of “what’s the worst that could happen?” inspiration, I threw it all into a casserole dish, said a little prayer to the kitchen gods, and popped it in the oven. 50 minutes later, the most incredible aroma filled the house. We sat down to eat, and the sound of happy, quiet munching from those toddlers was the highest compliment I could have received. That dish didn’t just feed us; it created a moment of peace and connection in the middle of the chaos. It’s been a go-to ever since, a little reminder that the best meals don’t have to be complicated to be perfect.
Print
Cheesy Chicken & Rice Bake : Quick, Budget-Friendly & Family-Approved
- Total Time: 1 hour
- Yield: 6 servings 1x
Description
This Cheesy Chicken & Rice Bake is the ultimate weeknight winner—minimal prep, pantry staples, and major comfort in one dish. Juicy chicken tenderloins are baked into creamy, savory rice and topped with bubbling cheese. It’s hearty, kid-friendly, and perfect when you need something satisfying without spending hours in the kitchen.
Ingredients
1 package chicken tenderloins (about 1–1.5 lbs)
2 packs Knorr’s rice (chicken-flavored or chicken fried rice)
2 cans cream of chicken soup (10.5 oz each)
1 can chicken broth (about 14.5 oz)
1½–2 cups shredded cheese (cheddar, Colby-Jack, or a mix)
Optional: garlic powder, black pepper, or Italian seasoning for added flavor
Optional: chopped parsley for garnish
Instructions
Preheat oven to 350°F (175°C).
Prepare the Knorr rice packets according to package directions (or skip if using them dry—see variation below).
In a large bowl, combine cooked rice (or dry packets), cream of chicken soup, and chicken broth. Stir well to form a creamy mixture.
Spread mixture into a greased 9×13″ casserole dish. Nestle chicken tenderloins evenly throughout.
Cover with foil and bake for 40 minutes.
Remove foil, top with shredded cheese, and bake uncovered for another 10 minutes or until cheese is melted and golden.
Let rest 5 minutes before serving. Garnish with parsley if desired.
- Prep Time: 10 mins
- Cook Time: 50 minutes
- Category: Dinner
Nutrition
- Calories: 510
- Sodium: 980mg
- Fat: 24g
- Protein: 36g
Gather Your Flavor All-Stars
Here’s the beautiful part: this dish is all about simplicity. You probably have most of this hanging around already! Let’s break down the dream team.
- 1 package chicken tenderloins (about 1–1.5 lbs): I love using tenderloins because they cook quickly and stay super juicy. Chef’s Hack: If you only have chicken breasts, just slice them into strips about the same size for even cooking.
- 2 packs Knorr’s rice (chicken-flavored or chicken fried rice): These little packets are the ultimate flavor shortcut! They’re already seasoned, which means we’re building a delicious base with zero effort. Substitution Tip: No Knorr’s? Use 1.5 cups of uncooked long-grain white rice and add an extra ½ cup of broth. You might just need to bump up the seasoning with a bit more garlic powder or salt.
- 2 cans cream of chicken soup (10.5 oz each): This is our creamy, dreamy sauce base. It creates that luscious, cohesive texture we’re after. Substitution Tip: For a from-scratch version, you can make a quick roux with butter, flour, and chicken stock. Or, if you need a gluten-free swap, use a certified GF cream of chicken soup!
- 1 can chicken broth (about 14.5 oz): This thins our soup-&-rice mixture to the perfect consistency, ensuring every grain gets cooked and infused with flavor.
- 1½–2 cups shredded cheese (cheddar, Colby-Jack, or a mix): The glorious, golden crown! I’m a huge fan of a cheese blend for maximum meltiness and flavor. Chef’s Insight: Pre-shredded cheese is totally fine for convenience, but if you have a spare minute, shredding a block yourself will give you an even creamier melt (they coat pre-shredded cheese to prevent clumping).
- Optional: garlic powder, black pepper, or Italian seasoning: This is where you make it your own! A sprinkle of garlic powder adds depth, black pepper gives a little heat, and Italian seasoning brings an herby vibe. Don’t be shy!
- Optional: chopped parsley for garnish: A little sprinkle of fresh green parsley at the end makes it look restaurant-fancy and adds a pop of fresh flavor. But it’s totally optional—no stress!
Let’s Build Our Masterpiece: Step-by-Step
Ready? This is the easy part. I’ll walk you through every step with my favorite little hacks to ensure perfection.
- Preheat & Prep: First things first, preheat your oven to 350°F (175°C). This is the perfect temperature for gentle, even cooking that will cook our rice and chicken through without drying anything out. While it’s heating, grab your trusty 9×13-inch casserole dish and give it a quick spritz with cooking spray. A little non-stick love now means easy serving and clean-up later!
- Rice Situation: Now, for the rice. The classic way is to cook the Knorr’s rice packets according to the package directions. BUT, here’s a major time-saving hack I discovered: You can often just use the dry rice packets straight from the package! The liquid in the casserole will cook it perfectly in the oven. It’s one less pot to wash and it works like a charm. If you’re nervous, go ahead and cook it—but I promise the dry method is a game-changer.
- Create the Creamy Base: In a large mixing bowl, combine your cooked (or dry!) rice, the two cans of cream of chicken soup, and the entire can of chicken broth. Grab a spatula or a big spoon and stir it all together until it’s one beautifully creamy, uniform mixture. This is also the time to stir in any of those optional seasonings. I always add a good crack of black pepper and about a half teaspoon of garlic powder. Taste it (it’s safe, everything’s cooked or canned!) and adjust if you like.
- Assemble with Love: Pour your creamy rice mixture into your prepared casserole dish and spread it into an even layer. Now, take your chicken tenderloins and just nestle them down into the rice. I like to space them out evenly so every serving gets its own piece of chicken. Don’t just plop them on top—pushing them down into the saucy rice ensures they stay moist and cook evenly.
- The First Bake (Patience is a Virtue!): Cover the entire dish tightly with aluminum foil. This is crucial! The foil creates a steamy little sauna inside the dish, which is what cooks our rice to tender perfection and gently poaches the chicken. Slide it into your preheated oven and let it work its magic for 40 minutes.
- The Cheesy Finale: After 40 minutes, carefully remove the dish from the oven (steam is hot!) and take off the foil. You’ll be greeted with a beautifully bubbly base and perfectly cooked chicken. Now, for the fun part! Sprinkle that glorious mountain of shredded cheese evenly over the top. Pop it back into the oven, uncovered, for another 10-15 minutes, or until the cheese is completely melted, bubbly, and maybe even has a few golden-brown spots. That’s flavor, right there.
- The Most Important Step: Rest! I know, I know. It’s torture to wait when it smells this good. But trust me on this one. Let the bake sit on the stovetop for about 5 minutes before you dive in. This allows the sauce to thicken up just a bit and lets everything settle, making it easier to serve up perfect, non-soupy portions.

How to Serve It Up in Style
This dish is a complete meal all on its own, but a little flair never hurts! I love serving generous scoops right into shallow bowls. The bowl helps contain all that cheesy, creamy goodness. If you added that optional parsley, now’s the time for a vibrant sprinkle on top—it makes the colors pop! For a perfect weeknight meal, I’ll sometimes add a simple side of steamed green beans or a crisp, green salad with a tangy vinaigrette to cut through the richness. It’s all about that balance!
Make It Your Own: Flavor Twists & Swaps
The beauty of this recipe is its flexibility. Ride whatever flavor wave you’re craving!
- Broccoli Cheddar Twist: Stir 2 cups of fresh or frozen broccoli florets (no need to thaw) into the rice mixture before baking. It’s a classic for a reason!
- Southwest Fiesta: Swap the cream of chicken for cream of celery, add a can of drained Ro-Tel tomatoes with green chiles, and use a Mexican-blend cheese. Top with a dollop of sour cream and sliced jalapeños after baking.
- Mushroom & Herb Delight: Use one can of cream of mushroom soup instead of chicken. Stir in 1 cup of sliced sautéed mushrooms and a tablespoon of fresh thyme with the rice mixture.
- Protein Swap: Not a chicken fan? This works wonderfully with pork chops or even thick-cut pork sausages, sliced into coins.
Isla’s Chef Notes & Kitchen Confessions
This recipe has truly evolved in my kitchen over the years. The “dry rice packet” hack was a complete happy accident born from a desperate “I don’t have time for this” moment. It’s now my preferred method! I’ve also learned that this is the perfect dish to clean out the veggie drawer. A lone carrot, diced small? Toss it in. Some leftover corn? Yes, please. Half an onion? Absolutely. It all just adds to the flavor.
One of my favorite kitchen memories involving this bake was when my niece, who is a notoriously picky eater, asked for seconds. She even did a little cheese-pull for a TikTok video. That’s a win in my book! This recipe isn’t about being fancy; it’s about being reliable, delicious, and bringing people together. Don’t be afraid to make it your own.
Your Questions, Answered!
I’ve made this so many times, I’ve basically seen it all. Here are answers to the most common questions I get.
Q: My rice is still a bit crunchy/hard after baking. What happened?
A: This usually means there wasn’t quite enough liquid, or the dish wasn’t covered tightly enough with foil. The steam is essential for cooking the rice! If you find this happening, just add a couple of tablespoons of extra broth, re-cover, and pop it back in the oven for 10-minute increments until it’s tender. Also, different brands of rice can absorb liquid differently.
Q: Can I make this ahead of time?
A: You absolutely can! Assemble the entire dish (right up to the point before baking), cover it tightly, and refrigerate for up to 24 hours. When you’re ready, you’ll need to add about 10-15 minutes to the initial bake time since it’s going into the oven cold. Hold off on adding the cheese until the very end, as usual.
Q: What’s the best way to store and reheat leftovers?
A: Leftovers keep beautifully in an airtight container in the fridge for 3-4 days. To reheat, I recommend the oven (350°F until warm) or the toaster oven to keep the texture nice. The microwave works in a pinch, but it can make the rice a little mushy.
Q: Can I use frozen chicken?
A: I don’t recommend using fully frozen chicken, as it will throw off the cooking time and temperature of the whole dish, potentially leaving the rice undercooked. For best results, thaw your chicken completely first.
Nutritional Information*
*Please note: This is an estimated nutritional breakdown based on the specific ingredients listed. Values can vary based on brands and exact quantities used.
Per Serving (Serves 6):
Calories: ~510 | Fat: 24g | Carbohydrates: 35g | Protein: 36g | Sodium: 980mg
And there you have it! Your new secret weapon for a delicious, no-fuss dinner. I hope this Cheesy Chicken & Rice Bake brings as much joy and ease to your kitchen as it has to mine. If you make it, I’d be absolutely thrilled to hear about it! Tag me on social @BiteTide or drop a comment below. Now go enjoy that well-deserved delicious dinner – you’ve earned it!
With love and a full belly,
Isla 💛