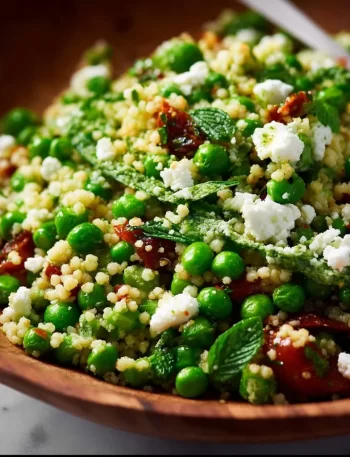
# Spring Pea Feta Couscous Salad with Basil Vinaigrette ## Introduction Ah, spring! It’s that magical time of year when …
Bite Tide
Bite Tide
 islamerrickUpdated on Leave a Comment on Spring Pea Feta Couscous Salad with Basil Vinaigrette9 min read
# Spring Pea Feta Couscous Salad with Basil Vinaigrette ## Introduction Ah, spring! It’s that magical time of year when …
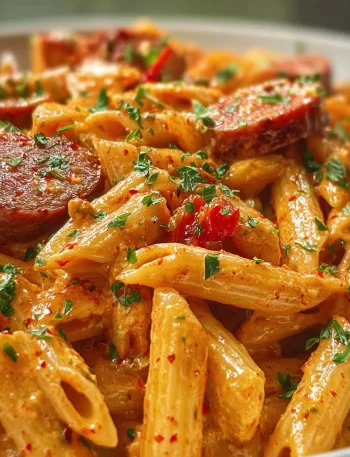
One-Pot Creamy Spicy Cajun Sausage Pasta: A Flavorful Journey 🥘 Hey there, food enthusiasts! Welcome back to BiteTide, where flavor …

Sweet Potato Taco Bowl: Colorful Comfort Food Made Easy Hey there, fellow food lovers! 🌟 I’m so excited to share …
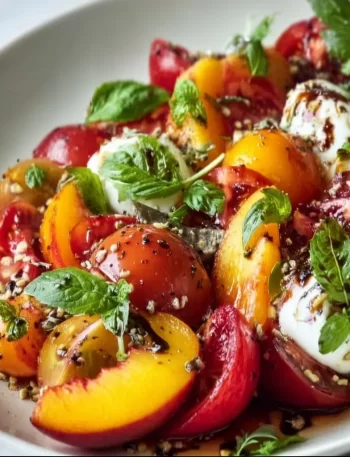
Tomato, Peach, and Burrata Salad: A Summer Symphony on Your Plate Hey there, flavor adventurers! 🌊 Today, I’ve got a …
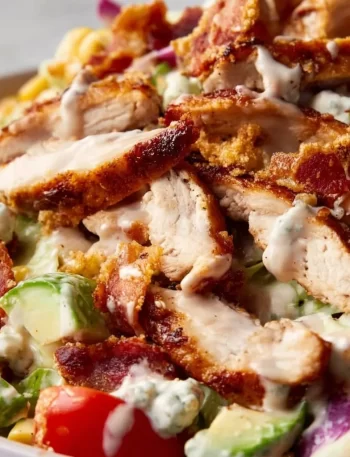 islamerrickUpdated on Leave a Comment on Copycat Cheesecake Factory BBQ Ranch Chicken Salad9 min read
Copycat Cheesecake Factory BBQ Ranch Chicken Salad: A Flavorful Journey Hello, my fellow food lovers! 🌟 Get ready to dive …
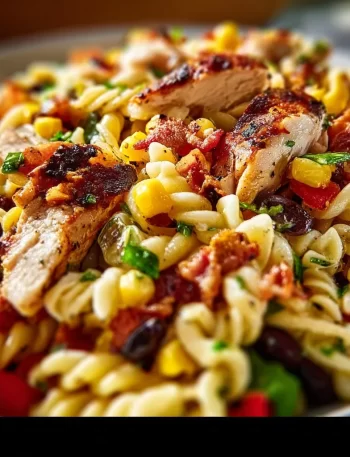
BBQ Chicken Pasta Salad for a Fun Summer Meal! Ah, summer! The sun is shining, the grill is warming up, …
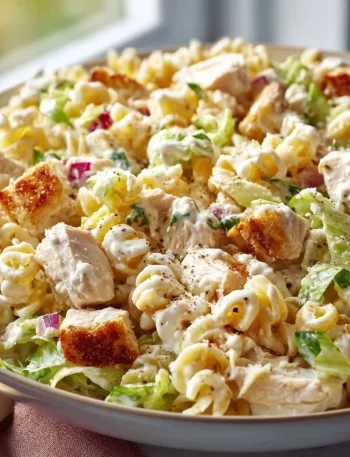
# Creamy Chicken Pasta Salad: A Flavorful Hug in a Bowl ## Introduction Hey there, fellow food lovers! 🌊 I’m …
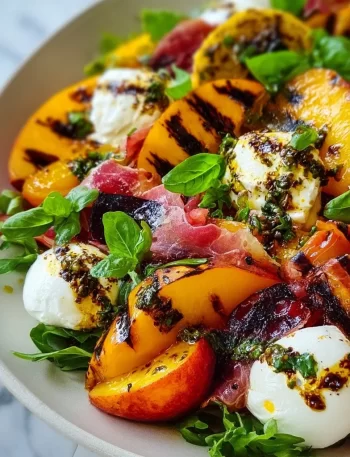
Grilled Peach Burrata Salad: A Summer Flavor Delight Welcome to BiteTide, where we’re all about enjoying food that lights up …
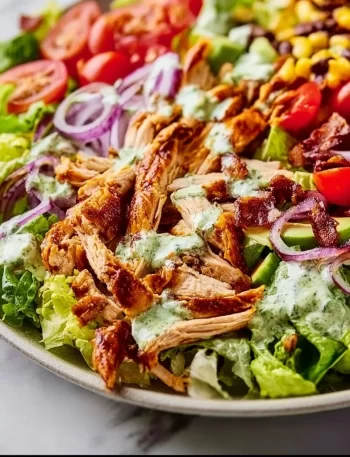
BBQ Chicken Salad: The Flavor Wave You’ve Been Craving! Hey there, flavor enthusiasts! 🌊 Are you ready to take your …
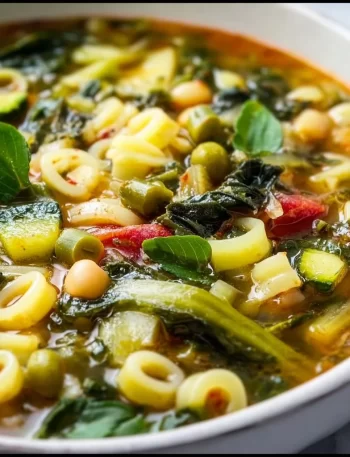
Spring Minestrone Soup: A Bowl of Sunshine Hey there, fellow food lovers! 🌼 It’s Isla here, and I’m so excited …