 Your Secret Weapon for Winning Mornings: The Ultimate Breakfast Burrito Meal Prep
Let’s be real: mornings can be chaos. The alarm blares, your to-do list starts screaming, and somewhere between finding matching socks and remembering where you left your keys, breakfast becomes an afterthought. You’re left grabbing a sad granola bar or, worse, facing the day on an empty stomach. I’ve been there—standing in my kitchen, robe askew, wondering how “fueling up” became so complicated. But what if I told you that the most delicious, satisfying, and energizing breakfast could be waiting for you, ready in minutes, without any morning fuss?
Enter the hero of hectic days: the Make-Ahead Breakfast Burrito. This isn’t just a recipe; it’s a strategy. A batch of these freezer-friendly flavor bombs is like giving your future self a high-five. Imagine opening your freezer to a lineup of personalized, protein-packed bundles of joy, each one a perfect combo of fluffy eggs, savory sausage, hearty beans, and melty cheese, all hugged by a warm tortilla. They’re the ultimate grab-and-go fuel that actually tastes amazing and keeps you powered for hours.
In my kitchen, these burritos are a non-negotiable. They’ve saved me on early shoot days, fueled my kids before school, and been the envy of many a coworker. I’m sharing my tried-and-true method, packed with all my favorite chef hacks to ensure your burritos are never soggy, always flavorful, and reheat like a dream. So, let’s turn meal prep into a joyful ritual and make chaotic mornings a thing of the past. Grab your skillet, and let’s make breakfast magic!
Grandma’s Skillet & The Art of the Scramble
My love for a good egg scramble is deeply rooted in my grandma’s sunny kitchen. She had this old, well-seasoned cast iron skillet that she called “Old Faithful.” Every Sunday, without fail, she’d whip up a “clean-out-the-fridge” scramble that was different every week but always incredible. I’d perch on a stool, mesmerized as she’d toss in leftover roasted potatoes, bits of last night’s ham, wilting spinach, and always, always a generous handful of sharp cheddar. The sizzle, the smell, the way she’d gently fold the eggs—it was pure alchemy.
She’d say, “Isla, good cooking isn’t about fancy recipes. It’s about making something wonderful with what you have and who you’re with.” Those Sunday scrambles taught me about flexibility, flavor, and the quiet joy of a shared meal. These breakfast burritos are my homage to her. They capture that same spirit of hearty, no-fuss goodness, designed to be tailored with what’s in your fridge and made ahead to share comfort with your busiest self. Every time I fold cheese into scrambled eggs, I think of her, and it reminds me that the best food is often the simplest, made with a little bit of love and a lot of practicality.
Print
Breakfast Burrito Meal Prep : Grab-and-Go Fuel to Start Your Day
- Total Time: 25 mins
- Yield: 4 servings 1x
Description
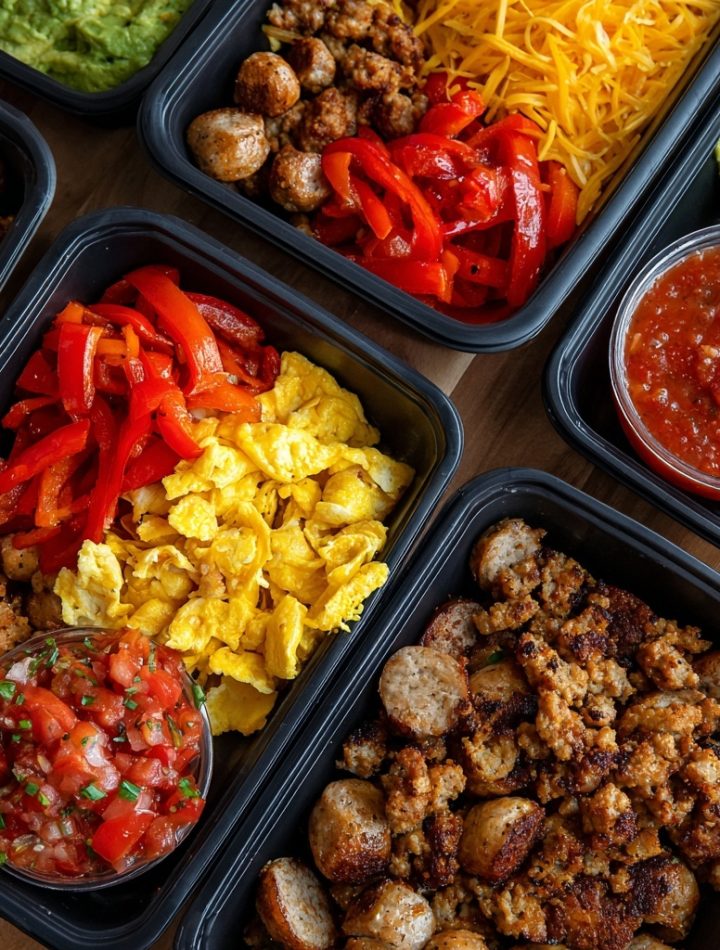
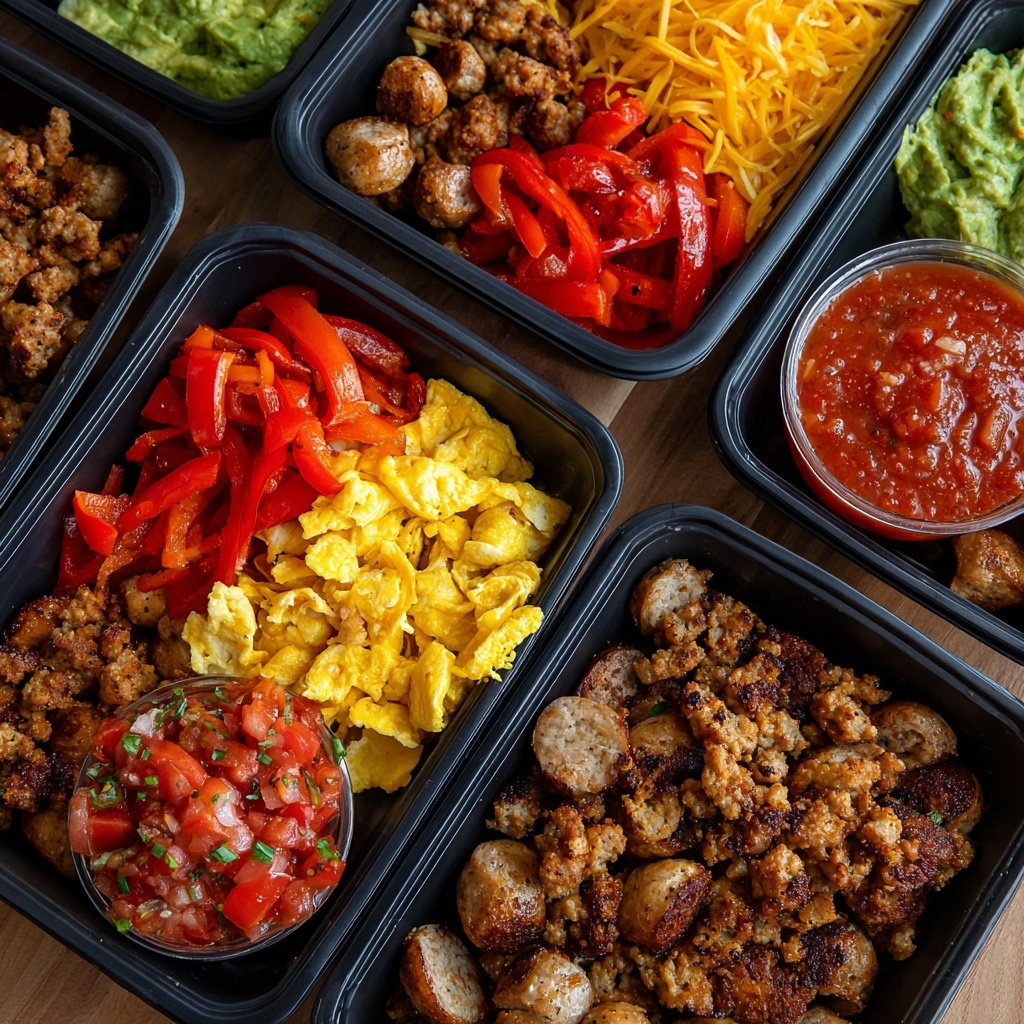
These Breakfast Burrito Meal Prep wraps are a powerhouse combo of eggs, lean protein, veggies, and cheese—all rolled into a freezer-friendly tortilla. Perfect for busy mornings, each burrito delivers lasting energy and flavor, with great macros to kick off your day right. Meal prep a batch, and breakfast is solved all week.
Ingredients
6 large eggs
½ cup egg whites (optional for extra protein)
½ cup cooked turkey sausage or diced chicken sausage
½ cup black beans (rinsed and drained)
½ cup bell pepper, diced
¼ cup onion, diced
½ cup shredded cheddar or Mexican blend cheese
4 large whole wheat or low-carb tortillas
Optional: salsa, avocado, or hot sauce for serving
Instructions
In a skillet, sauté bell pepper and onion until soft. Add sausage and cook until warmed through.
In a bowl, whisk eggs and egg whites. Scramble in the skillet with the veggie mixture until just set.
Stir in black beans and cheese until melted.
Divide the filling among 4 tortillas. Roll tightly into burritos.
Wrap each in foil or parchment, then store in the fridge (up to 4 days) or freezer (up to 2 months).
To reheat: microwave 1–2 minutes from fridge, or 3–4 minutes from frozen, flipping halfway.
- Prep Time: 15 mins
- Cook Time: 10 minutes
- Category: Breakfast
Gathering Your Flavor Crew: Ingredients & Smart Swaps
Here’s what you’ll need to build your burrito brigade. Think of this list as a blueprint—feel free to get creative and make it yours!
- 6 large eggs: The heart of the burrito! They create a creamy, sturdy base. For a richer flavor, I sometimes use one or two extra yolks.
- ½ cup egg whites (optional): My favorite hack for a major protein boost without making the filling too “eggy.” It also makes the scramble wonderfully fluffy. If you don’t have carton whites, just use 2 more whole eggs.
- ½ cup cooked turkey or chicken sausage: I love the lean protein and herby flavor of a good chicken sausage (apple maple is a secret winner!). Substitute: Any cooked protein works—crumbled bacon, diced ham, ground beef, or even a plant-based crumble for a vegetarian twist.
- ½ cup black beans, rinsed and drained: For fiber, plant-based protein, and a satisfying, hearty texture. Pinto beans or kidney beans are great alternatives.
- ½ cup bell pepper, diced: Color and crunch! I use a mix of red and green for sweetness and vibrancy. Chef’s Insight: Sautéing them first is non-negotiable—it caramelizes their sugars and banishes any raw bitterness.
- ¼ cup onion, diced: The flavor foundation. Yellow onion is classic, but a sweet Vidalia or a few sliced green onions stirred in at the end are delicious.
- ½ cup shredded cheddar or Mexican blend cheese: The glorious glue! It adds creaminess and helps hold everything together. For a kick, try pepper jack. For dairy-free, a melty vegan cheese works, or simply omit it.
- 4 large whole wheat or low-carb tortillas (burrito-size): The vessel. The key here is pliability. Warm them slightly before rolling to prevent cracks. Spinach or tomato-flavored tortillas are fun options!
- Optional for serving: Salsa, avocado, hot sauce, or a dollop of Greek yogurt. These are your flavor finishers!
Let’s Build Your Burrito Batch: Step-by-Step
Follow these steps, and you’ll have a flawless fleet of freezer burritos in no time. I’m adding my personal commentary and hacks along the way—think of me as your cheerleader in an apron!
- Prep Your Station: Before you even turn on the stove, dice your peppers and onion, shred your cheese if needed, and have all your ingredients ready to go (this is called mise en place and it makes everything smoother). Crack your eggs and egg whites into a bowl but don’t whisk them yet—we’ll do that right before cooking.
- Sizzle Those Veggies: Heat a large non-stick or well-seasoned cast iron skillet over medium heat. Add a tiny drizzle of oil. Toss in your diced peppers and onion with a pinch of salt. Cook, stirring occasionally, for 5-7 minutes until they’re softened and have a few golden spots. Chef Hack: That pinch of salt draws out moisture and speeds up the cooking process. Let them get some color—that’s flavor!
- Brown the Protein: Add your cooked sausage to the skillet with the veggies. If you’re using raw sausage or ground meat, cook it separately first, drain any excess fat, then add it here. Stir everything together and let it heat through for 2-3 minutes. This allows the flavors to mingle.
- The Perfect Scramble: Now, give your eggs and egg whites a vigorous whisk with a fork until uniform and slightly frothy. Pour the egg mixture directly over the veggie and sausage mix in the skillet. Let it sit, undisturbed, for about 30 seconds to set the bottom. Then, using a spatula, gently push the cooked edges toward the center, letting the uncooked egg flow to the edges. Big Tip: Stop cooking when the eggs are just barely set—they should look moist and slightly underdone. They’ll continue to cook from residual heat, and this prevents a rubbery texture in your reheated burrito. This is the secret!
- Fold in the Goodies: Remove the skillet from the heat. Immediately stir in the rinsed black beans and the shredded cheese. The residual heat will melt the cheese perfectly and warm the beans. Give it one final, gentle mix. Taste and season with a little extra salt and pepper if needed. Let this filling cool for 10-15 minutes. This cooling step is CRUCIAL to avoid steam making your tortilla soggy.
- The Art of the Tight Roll: Warm your tortillas for about 15 seconds in the microwave or a dry skillet—this makes them flexible. Place a tortilla on a clean surface. Spoon a generous quarter of the filling just below the center line. Fold the bottom edge up and over the filling, tucking it in snugly. Fold in the left and right sides. Then, roll it tightly away from you into a neat package. Pro Move: Don’t overfill! It’s tempting, but a slightly less-stuffed burrito rolls and reheats better.
- Wrap for the Future: Wrap each burrito tightly in parchment paper, then foil. The parchment prevents the foil from sticking, and the foil protects against freezer burn. Label with the date and contents—your future self will thank you.
- Reheat & Enjoy: From Fridge: Remove foil (keep parchment on), microwave for 1-2 minutes. From Freezer: Remove foil, keep parchment on, microwave for 2 minutes. Flip, then microwave another 1-2 minutes until hot throughout. For a crispier tortilla, finish in a toaster oven or air fryer for a minute or two!
Serving Up Your Sunrise Fuel
Presentation is part of the joy! I love slicing my reheated burrito in half on a slight diagonal—it shows off all the beautiful layers inside. Plate it alongside a vibrant little mound of salsa or pico de gallo and a few slices of creamy avocado. A drizzle of hot sauce or a dollop of cool, tangy Greek yogurt (or sour cream) is the perfect finishing touch. For a full “brunch at home” vibe, add a handful of crispy hash browns or a simple fruit salad. Remember, you’ve already done the hard work—now just enjoy the delicious rewards!
Ride Your Own Flavor Wave: 5 Tasty Twists
- Southwestern Fiesta: Swap in chorizo (drain well), use pepper jack cheese, and add a handful of frozen corn with the peppers.
- Green Machine (Vegetarian): Skip the meat. Sauté mushrooms and spinach with the peppers. Use a can of rinsed, drained cannellini beans and feta cheese.
- “Everything Bagel” Style: Use cooked diced ham or Canadian bacon. Stir 2 tablespoons of everything bagel seasoning into the eggs before scrambling. Use plain cream cheese instead of shredded cheese.
- Lower-Carb Power Bowl: Skip the tortilla! Pack the cooled filling into a meal prep container and reheat. Top with avocado and hot sauce. It’s a fantastic, macro-friendly option.
- Spicy Sweet Potato Hash: Replace the beans with ½ cup of diced, cooked sweet potato. Add a diced jalapeño with the peppers and use a spicy sausage.
Isla’s Kitchen Notes & Stories
This recipe has evolved from many (many!) Saturday morning test sessions. My first batch was a disaster—I didn’t cool the filling, rolled them while hot, and ended up with soggy, torn tortillas. Lesson learned! The other funny thing is my husband’s “burrito rolling technique.” He treats it like he’s building a structural support beam—it’s hilarious and actually produces the tightest rolls. We’ve made it a fun weekend activity.
Over time, I’ve found that the real magic is in the texture contrast. That’s why I’m now militant about slightly under-scrambling the eggs and ensuring the veggies have a bit of bite. It makes the reheated experience so much better. These burritos have traveled with us on road trips, been packed in lunchboxes, and have been my most-requested recipe from friends. They’re more than meal prep; they’re a little bundle of preparedness and self-care. I hope they become a staple in your kitchen, too!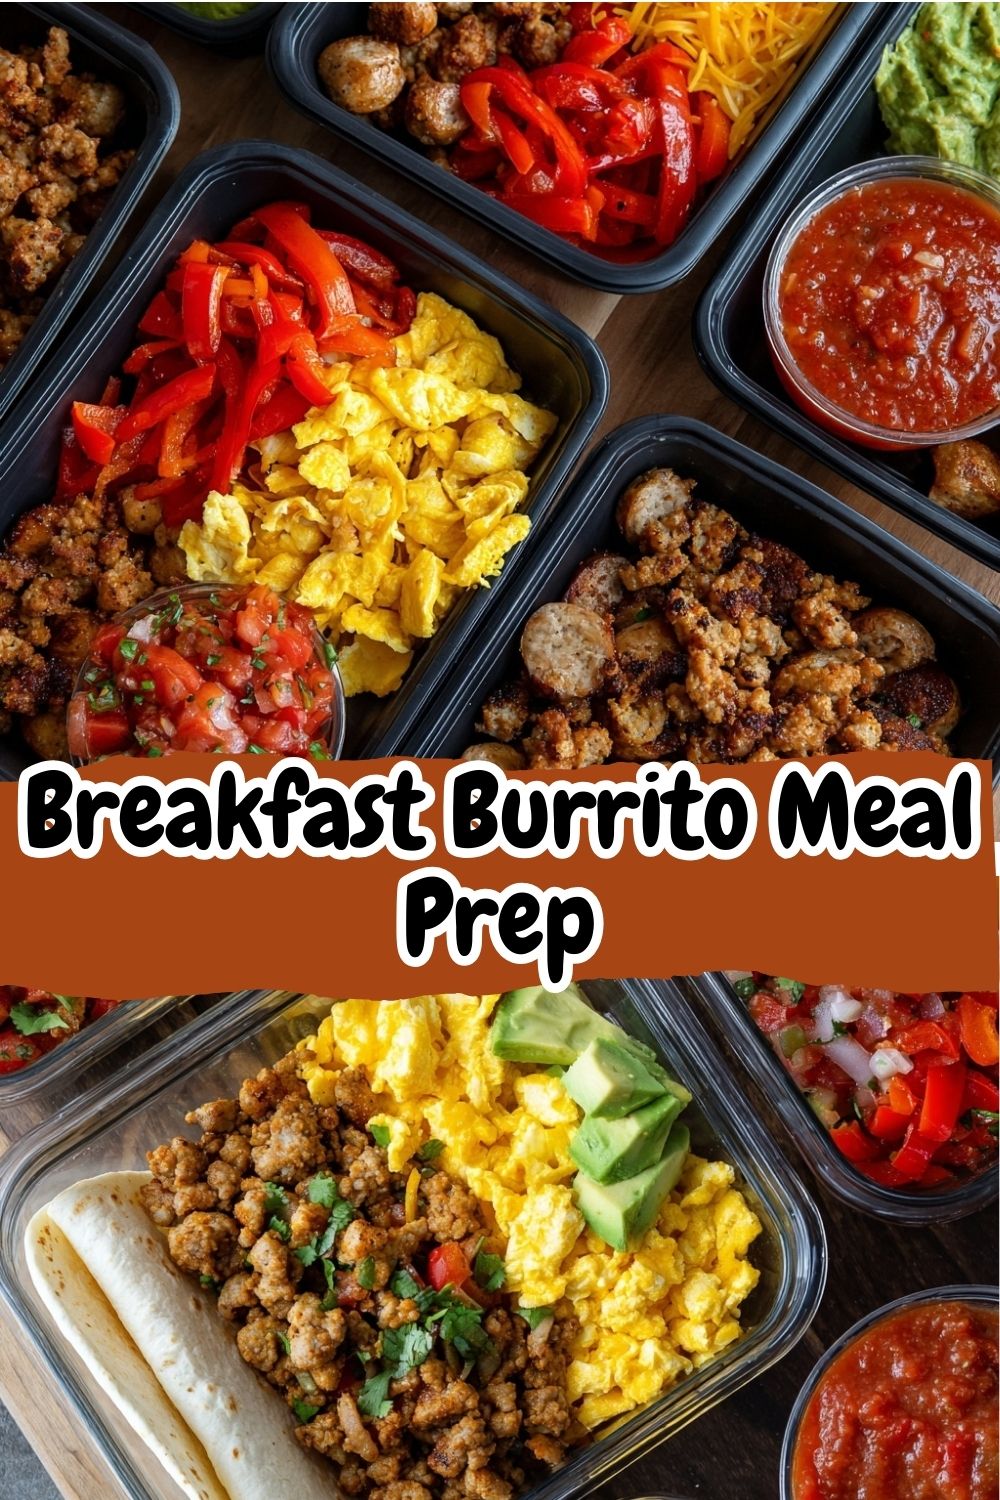
Your Questions, Answered!
Q: My burritos get soggy when I reheat them. What am I doing wrong?
A: Sogginess usually comes from three things: 1) Filling wasn’t cooled before rolling (steam gets trapped), 2) Overcooking the eggs (they release more water when reheated), or 3) Using watery fresh veggies like tomatoes inside the filling (save them for topping!). Ensure your filling is completely cool, scramble eggs just to set, and always use the parchment/foil double-wrap. Reheating from frozen also helps—it gives the tortilla time to crisp up as the inside thaws and heats.
Q: Can I use different kinds of tortillas?
A: Absolutely! The key is size (burrito-sized, usually 10-inch) and pliability. Whole wheat, spinach, sun-dried tomato, or low-carb tortillas all work. If they seem dry or crack easily, warm them under a damp paper towel for 15 seconds in the microwave before rolling. Avoid ultra-thin “street taco” size tortillas—they’ll rip.
Q: How long do they really last in the freezer?
A: With the double-wrap (parchment + foil), they’ll stay delicious for up to 2-3 months. After that, they’re still safe but might start to get a hint of freezer taste or the tortilla can become dry. For best quality, try to enjoy them within 6-8 weeks. Always label with the date!
Q: Can I make these for a crowd? Any way to bake them?
A: Yes, and yes! You can easily double or triple the recipe. For a crowd, consider assembling them as “burrito bowls” for easier serving. To bake a batch, arrange foil-wrapped burritos on a baking sheet and bake at 375°F for 25-30 minutes from frozen (flip halfway) until hot. This gives a more even heat but takes longer than the microwave.
Nutritional Information*
*This is an estimate for one burrito using whole wheat tortillas, turkey sausage, and cheddar cheese. Values will vary based on your specific ingredients and swaps.
- Calories: 330
- Protein: 25g
- Carbohydrates: 26g
- Dietary Fiber: 5g
- Sugars: 2g
- Fat: 14g
- Saturated Fat: 5g
- Sodium: 490mg
These breakfast burritos are a total lifesaver when mornings get hectic. They’re hearty, customizable, and freeze like a dream — so you always have a warm, filling meal ready in minutes. Mix and match proteins, add veggies, or spice things up to fit your taste. With simple prep and reliable results, this recipe keeps breakfast stress-free, satisfying, and something you’ll actually look forward to all week.