Banana Pudding Cheesecake: Your New Favorite Slice of Heaven
Hey there, friend! Isla here from BiteTide, and I am just bubbling over with excitement to share this recipe with you today. If you’ve ever found yourself torn between the creamy, dreamy comfort of classic banana pudding and the rich, decadent thrill of a perfect cheesecake, I have glorious news: you don’t have to choose. This Banana Pudding Cheesecake is the love child of two iconic desserts, and it is nothing short of magical.
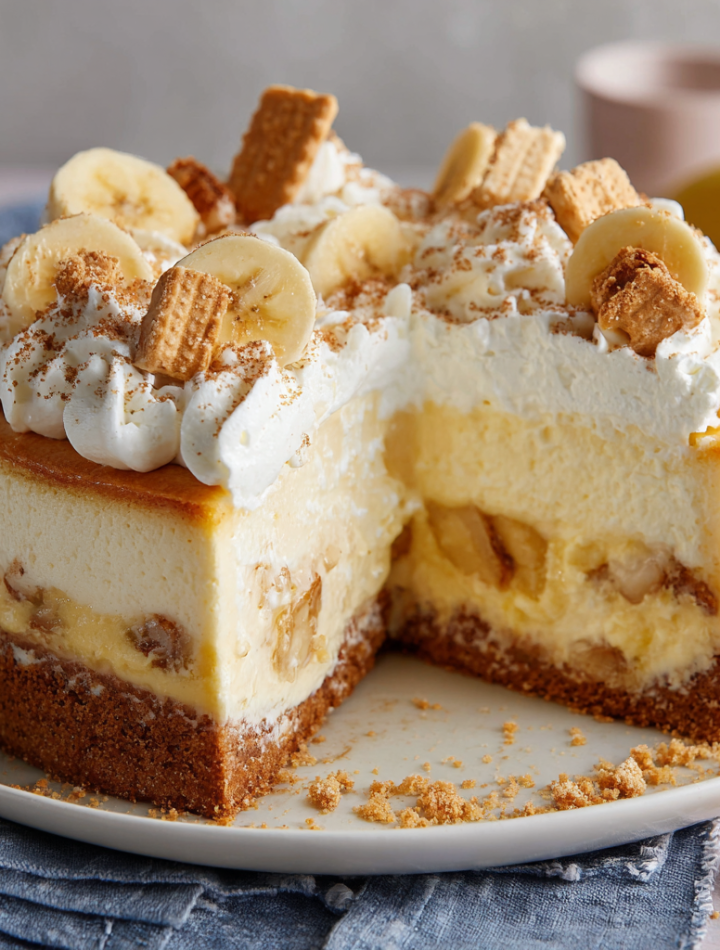
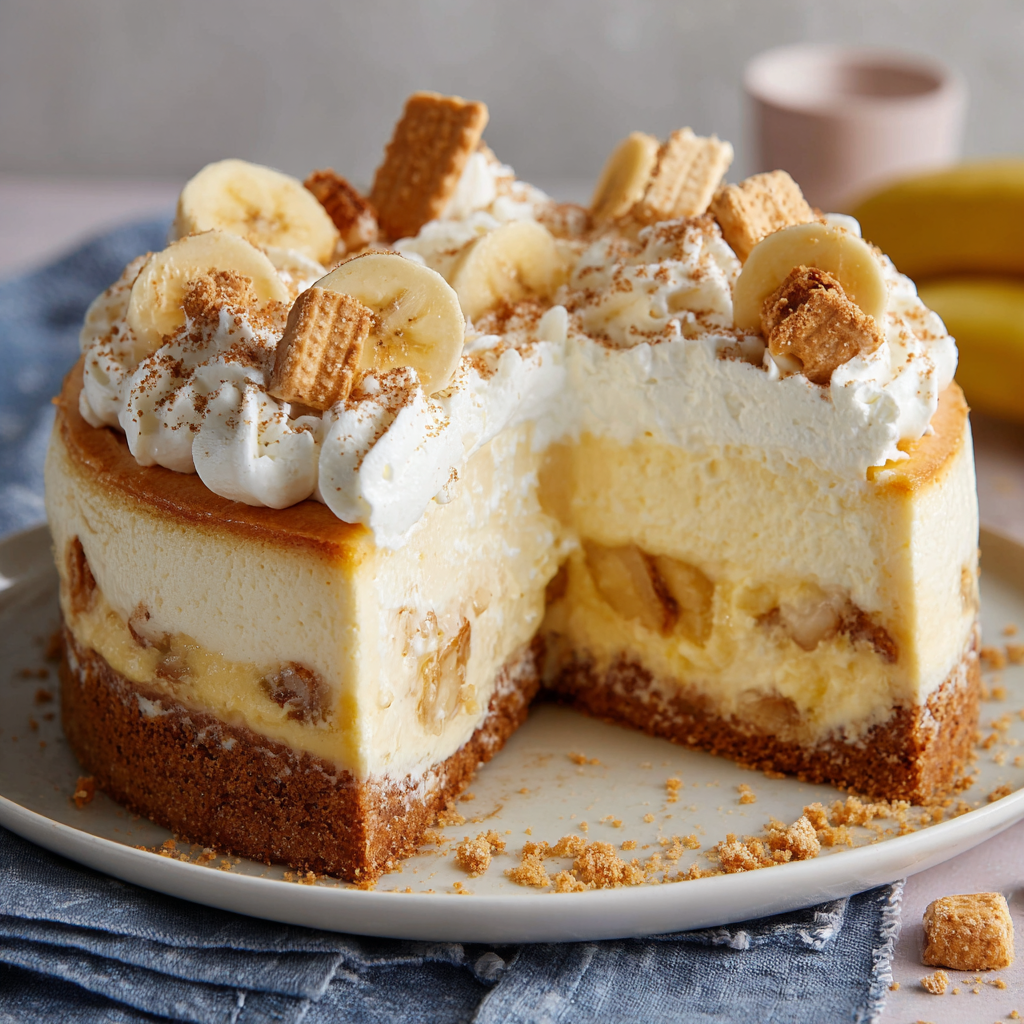
Imagine this: a buttery, crunchy Nilla wafer crust that tastes like pure nostalgia. A luxuriously smooth cheesecake filling infused with real banana flavor and pockets of creamy pudding. It’s all topped with a cloud of freshly whipped cream, more bananas, and a generous crunch of those iconic wafers. Every single bite is a wave of flavor and texture that will have you doing a little happy dance right there in your kitchen. I promise you, this show-stopping dessert tastes like it took a lifetime of pastry chef skills, but the secret is… it’s totally approachable. We’re using a few smart shortcuts (hello, instant pudding!) to create maximum wow factor with minimal fuss. So, preheat that oven, grab your favorite mixing bowl, and let’s make some memories—and one incredible cheesecake—together.
A Tale of Two Desserts: My Grandma’s Kitchen
This recipe takes me right back to my grandma’s linoleum-floored kitchen, where the air was always thick with the smell of something sweet. Grandma was a banana pudding purist. She made it the old-school way, layering warm pudding, bananas, and wafers in a giant glass bowl, always letting it sit just long enough for the wafers to get that perfect, soft-yet-sturdy texture. I, on the other hand, went through a serious New York-style cheesecake phase in my twenties. I thought anything that wasn’t dense, rich, and crackly on top wasn’t worth the calories.
The idea for this mashup hit me during a summer potluck. I was tasked with bringing dessert and found myself staring at a bunch of spotty bananas and a box of pudding mix. “What if…,” I thought. The result was this cheesecake, and let me tell you, it was a revelation. It’s my grandma’s cozy comfort meets my bold flavor obsession, all in one stunning slice. It’s the dessert that finally got my cheesecake-snob friends to admit that maybe, just maybe, a little Southern whimsy belongs in every baker’s repertoire.
Print
Banana Pudding Cheesecake
- Total Time: ~7½ hrs
Description
This Banana Pudding Cheesecake is everything you love about the classic Southern dessert—transformed into a rich, creamy cheesecake. With a Nilla wafer crust, silky banana-flavored filling, and layers of pudding and whipped cream, it’s nostalgic, decadent, and perfect for potlucks, holidays, or any time you’re craving comfort in a slice.
Ingredients
Crust:
2 cups crushed Nilla wafers
6 tbsp unsalted butter, melted
Cheesecake Filling:
24 oz cream cheese, softened
¾ cup granulated sugar
3 large eggs
1 tsp vanilla extract
½ cup sour cream
1 box (3.4 oz) instant banana pudding mix
½ cup milk
Whipped Topping & Layers:
1½ cups heavy cream
¼ cup powdered sugar
2 ripe bananas, sliced
Extra Nilla wafers for garnish
Instructions
Preheat oven to 325°F (163°C). Line and grease a springform pan.
Crust: Combine Nilla crumbs and melted butter. Press into pan. Bake 10 minutes. Cool.
Filling: Beat cream cheese and sugar until smooth. Add eggs one at a time, then vanilla and sour cream. Whisk pudding mix with milk until thick, then fold into batter.
Pour filling over crust. Bake 55–65 minutes or until center is just set. Cool, then chill at least 6 hours or overnight.
Topping: Whip cream and powdered sugar until stiff. Spread over chilled cheesecake. Top with banana slices and crushed wafers before serving.
- Prep Time: 25 min
- Cook Time: 1 hr
- Category: Dessert
Nutrition
- Sugar: 24g
- Fat: 30g
- Carbohydrates: 32g
Gathering Your Flavor Wave: The Ingredients
Here’s everything you’ll need to create this masterpiece. Remember, baking is a science, but it’s also about feeling! I’ve included my best tips and swaps so you can make it your own.
For the Crust:
- 2 cups crushed Nilla wafers: This is the non-negotiable heart of the crust! That distinct vanilla flavor is the backbone of the whole dessert. If you’re in a real pinch, graham crackers will work, but you’ll lose a bit of that classic banana pudding authenticity.
- 6 tbsp unsalted butter, melted: This is the glue that holds our crunchy crust together. Using unsalted lets us control the salt level in the dessert. If you only have salted butter, that’s okay—just skip adding any extra salt later on.
For the Cheesecake Filling:
- 24 oz (three 8-oz blocks) cream cheese, softened: This is CRUCIAL. Take the cream cheese out of the fridge at least 2 hours before you start. Room temp cream cheese blends smoothly and avoids a lumpy batter. Full-fat is best for that classic dense, creamy texture.
- ¾ cup granulated sugar: Sweetens the deal without overpowering the banana flavor.
- 3 large eggs, at room temperature: Another room temp superstar! Cold eggs can cause the cream cheese to seize up. They act as the binder and give the cheesecake its structure.
- 1 tsp pure vanilla extract: The vanilla works in harmony with the Nilla wafers to build a beautiful flavor base.
- ½ cup sour cream, at room temperature: My secret weapon for the tangiest, creamiest, most velvety cheesecake texture. It adds a wonderful richness and helps prevent cracking.
- 1 box (3.4 oz) instant banana pudding mix: Our flavor powerhouse! This little box is what gives the filling that intense, nostalgic banana pudding taste. Be sure it’s instant pudding, not cook-and-serve.
- ½ cup whole milk: Used to activate the pudding mix before we fold it in. Whole milk gives the richest result, but 2% will work in a pinch.
For the Topping & Layers:
- 1½ cups heavy cream, cold: For whipping into gorgeous, stiff peaks. The higher the fat content, the better it will whip.
- ¼ cup powdered sugar: Sweetens the whipped cream without the grittiness of granulated sugar.
- 2 ripe but firm bananas, sliced: The perfect fresh fruit garnish. We’ll add these right before serving to keep them from turning brown.
- Extra Nilla wafers for garnish: For that final crunch and visual flair!
Let’s Build This Dream: Step-by-Step Instructions
Follow these steps, and you’ll be a cheesecake hero. I’m walking you through every detail with all my favorite chef hacks!
Step 1: Prep Like a Pro
Preheat your oven to 325°F (163°C). Grab a 9-inch springform pan—this is essential for getting the cheesecake out cleanly! Take two large sheets of heavy-duty aluminum foil and tightly wrap the outside bottom and sides of the pan. This will prevent any water from our water bath (see below!) seeping in. Lightly grease the inside of the pan with butter or baking spray. Trust me, this extra step is a game-changer.
Step 2: Create the Crust
Place your Nilla wafers in a food processor and pulse until you have fine crumbs. No processor? No problem! Throw them in a sturdy zip-top bag and crush them with a rolling pin—it’s a great way to work out any frustration! In a medium bowl, combine the crumbs with the melted butter. Mix until it resembles wet sand. Pour the mixture into your prepared pan and press it firmly and evenly into the bottom and about halfway up the sides. I like to use the bottom of a measuring cup to really pack it down. Bake for 10 minutes, then set it on a wire rack to cool. Leave the oven on!
Step 3: Master the Filling
In the bowl of a stand mixer fitted with a paddle attachment (or a large bowl with a hand mixer), beat the softened cream cheese and granulated sugar on medium speed for 2-3 minutes. You want it to be completely smooth and free of lumps. Scrape down the sides and bottom of the bowl—this is a critical step to avoid hidden lumps of cream cheese! With the mixer on low, add the eggs one at a time, fully incorporating each before adding the next. Scrape the bowl again. Mix in the vanilla extract and sour cream until just combined. Don’t overmix!
Now, in a separate small bowl, whisk the instant banana pudding mix with the ½ cup of milk. Whisk for a full 2 minutes until it’s very thick. Using a spatula, gently fold this thick pudding into the cheesecake batter until it’s evenly distributed. You’ll see those beautiful ribbons of banana flavor swirled throughout.
Step 4: The Bake (and the Secret to No Cracks!)
Place your foil-wrapped springform pan inside a larger roasting pan. Pour the cheesecake batter over the cooled crust. Smooth the top with your spatula. Now, carefully pour hot water into the larger roasting pan until it comes about halfway up the sides of the springform pan. This water bath creates a steamy environment in the oven, which cooks the cheesecake gently and evenly, preventing those dreaded cracks and a rubbery texture. Carefully transfer the whole setup to the preheated oven.
Bake for 55-65 minutes. The edges will look set, but the center should still have a slight jiggle—like Jell-O—when you gently shake the pan. This means it’s done! Turn off the oven, crack the oven door open, and let the cheesecake cool inside for 1 hour. This gradual cooling is another key to a crack-free top.
Step 5: The Chill Time (The Hardest Part!)
After its hour in the off oven, remove the cheesecake from the water bath, take off the foil, and let it cool completely on the wire rack. Then, cover it with plastic wrap and refrigerate for at least 6 hours, but overnight is truly best. This patience allows the flavors to meld and the texture to become perfectly firm and sliceable.
Step 6: The Grand Finale – Topping
Right before you’re ready to serve, make the whipped cream. In a chilled bowl, whip the cold heavy cream and powdered sugar on high speed until stiff peaks form. Unclasp the springform pan and remove the ring. Spread the whipped cream over the top of the chilled cheesecake. Artfully arrange the sliced bananas and additional Nilla wafers on top. For a gorgeous finish, you can also crush a few extra wafers and sprinkle them around the edges.
How to Serve This Stunner
This cheesecake is the star of the show, so keep the plating simple! Run a sharp knife under hot water, wipe it dry, and then make your slice for beautifully clean cuts. Serve each slice on a simple white plate to let those beautiful layers shine. A little drizzle of caramel sauce or a light dusting of cinnamon can be gorgeous, but honestly, it’s perfect all on its own. It pairs wonderfully with a cup of strong coffee to cut through the sweetness or a glass of cold milk for the ultimate nostalgic experience.
Ride Your Own Flavor Wave: Recipe Variations
Feel like mixing it up? Here are a few delicious twists on the classic:
- Chocolate Lover’s: Add a cup of mini chocolate chips to the batter or drizzle the finished top with chocolate sauce.
- Peanut Butter Banana: Swirl ½ cup of creamy peanut butter into the batter before baking.
- Tropical Twist: Fold ½ cup of toasted coconut into the crust and garnish the top with toasted coconut and macadamia nuts.
- Lighter Option: Use reduced-fat cream cheese and Neufchâtel cheese, and swap the whipped cream for a light Cool Whip topping.
- Boozy Banana: Add a tablespoon of bourbon or dark rum to the filling for a sophisticated kick adults will love.
Isla’s Chef Notes & Kitchen Stories
This recipe has become a staple in my house, especially for birthdays. The first time I made it, I was so nervous about the water bath that I used three layers of foil. I ended up sloshing water everywhere trying to get it into the oven! My tip? Place the roasting pan with the springform pan already inside onto the oven rack, THEN pour the hot water into the roasting pan. No lifting a heavy, sloshy pan!
I’ve also learned that the ripeness of your garnish bananas is key. Too green, and they lack flavor. Too ripe, and they turn mushy and brown too quickly. Look for bananas that are yellow with just a few brown speckles—they’re at their peak sweetness and will hold up perfectly for your serving time.
Your Questions, Answered: FAQs & Troubleshooting
Q: Can I make this without a water bath?
A: I really don’t recommend skipping it. The water bath is the secret to that creamy, luxurious texture and crack-free surface. Without it, the cheesecake is much more likely to puff up, crack, and have a drier, denser texture. If you’re truly opposed, you can place a pan of hot water on the rack below the cheesecake to create steam, but it’s not quite as effective.
Q: Why did my cheesecake crack?
A: Oh, we’ve all been there! Cracking usually happens for a few reasons: overmixing the batter (which incorporates too much air), a drastic temperature change, or overbaking. Using a water bath and letting the cake cool gradually in the oven are your best defenses against this. But hey, if it cracks, just pile on extra whipped cream and bananas! No one will ever know.
Q: Can I make this ahead of time?
A: Absolutely! In fact, I insist on it. Cheesecake needs that long chill time to set properly. You can bake it up to two days in advance. Just wait to add the banana slices and whipped cream topping until a few hours before you plan to serve it to keep everything fresh and beautiful.
Q: My bananas are browning on top. How can I prevent this?
A: To keep your banana slices looking pretty, you can toss them in a little bit of lemon or pineapple juice before arranging them on the cheesecake. The citric acid will slow down the oxidation (browning) process. But honestly, if you’re serving it within an hour or two, it’s usually not a big issue.
Nutritional Information*
*This is an estimate provided for informational purposes only. Calculations will vary based on specific ingredients used.
Per Slice (1 of 12): Calories: ~420 | Total Fat: 30g | Saturated Fat: 17g | Cholesterol: 125mg | Sodium: 280mg | Total Carbohydrates: 32g | Dietary Fiber: 1g | Sugars: 24g | Protein: 6g