 BiteTide
Ditch the Takeout Menu: Your New Favorite 30-Minute Dinner is Here! Raise your hand if this sounds familiar: it’s 6 …

Bite Tide
Bite Tide
Ditch the Takeout Menu: Your New Favorite 30-Minute Dinner is Here! Raise your hand if this sounds familiar: it’s 6 …
Easter Magic Cookie Bars – Your New Holiday Tradition Hey there, friend! Isla here from BiteTide, waving a buttery, crumb-covered …

Southwest Quinoa Salad: Your New Go-To for Flavor That Pops! Hey there, flavor friend! Isla here, from my cozy kitchen …
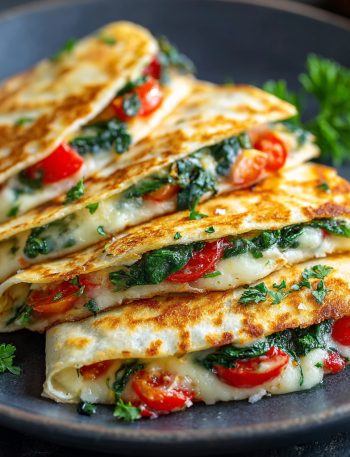
That “What’s for Dinner?” Wave? Ride It with This Mediterranean Quesadilla. Hey friend, Isla here! Let’s talk about cravings. One …
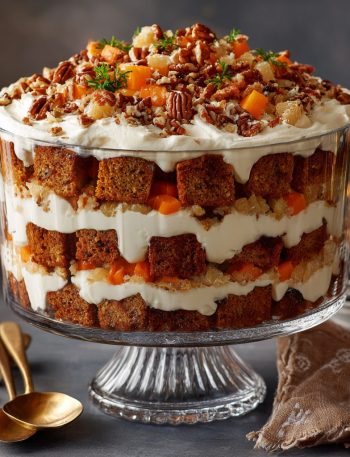
Carrot Cake Trifle: The Ultimate No-Stress, All-Wow Celebration Dessert Hey there, friend! Isla here from BiteTide. Have you ever stared …
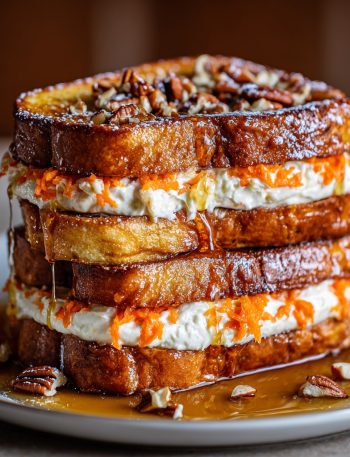
Carrot Cake Stuffed French Toast: The Brunch Upgrade You Deserve Hey there, friend! Isla here, from BiteTide. Let’s talk about …
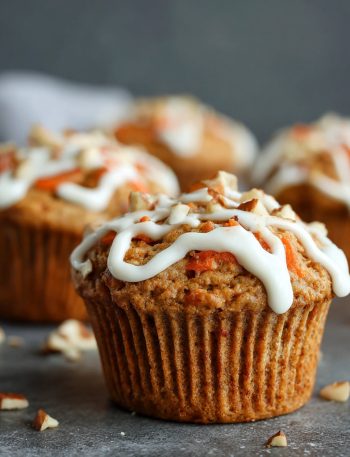
Carrot Cake Protein Muffins: Your New Gym & Morning BFF Hey friend! Let’s talk about that eternal 3 p.m. slump. …
Carrot Cake Crumbl-Style Giant Cookie: Your New Favorite Dessert Obsession Hey friend! Isla here, from BiteTide. Let’s talk about that …
Carrot Cake Tres Leches: The Cozy, Creamy Dessert Mashup of Your Dreams Hey friend! Isla here. Let’s talk about two …
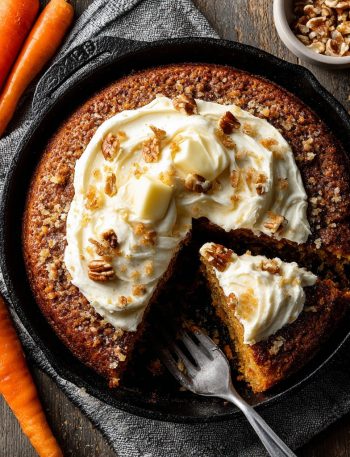
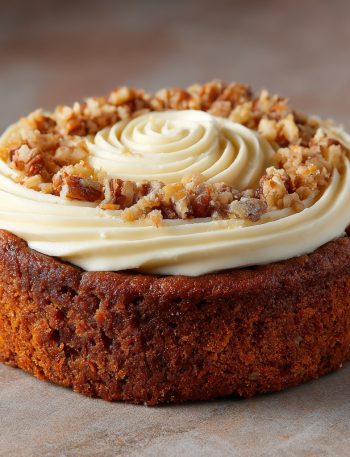
Brown Butter Carrot Cake Skillet Cake: Your New Favorite Cozy Dessert Hey there, friend! Isla here, from BiteTide. Grab your …