Mini Egg-Studded Chocolate Tray Cake: Your New Viral Bake Obsession
Hey there, flavor friend! Isla here, diving spoon-first into the kitchen chaos we all know and love. Have you ever scrolled through your feed, seen one of those utterly mesmerizing, crackly-top dessert videos, and thought, “I need to make that immediately”? Yeah, me too. That’s exactly how I felt when I first spotted the glorious, Mini Egg-studded chocolate tray bake taking over the internet. It’s the kind of recipe that doesn’t just promise deliciousness—it promises a moment. That gorgeous crack as your knife slices through a chocolate shell into fudgy cake beneath, revealing a confetti of colorful Mini Eggs? Pure, unadulterated baking joy.
But here’s my BiteTide philosophy: viral recipes should be accessible, not intimidating. They should work in your real kitchen, with your real-life schedule. So, I grabbed my favorite apron, turned up the tunes, and got to testing. What I’m sharing with you today is the perfected, fuss-free, one-pan wonder that lives up to the hype. This isn’t just an Easter showstopper (though it absolutely is!). It’s a anytime-you-need-a-dose-of-happy bake. It’s rich, deeply chocolatey, and the playful crunch of those candy shells against the soft cake is a texture dream. So, let’s ditch the stress and embrace the fun. Grab your favorite mixing bowl, and let’s create some magic that’s as satisfying to make as it is to devour.
Print
Mini Egg-Studded Chocolate Tray Cake : Viral One-Pan Easter Bake
- Total Time: ~45 minutes
- Yield: 12–16 squares 1x
Description
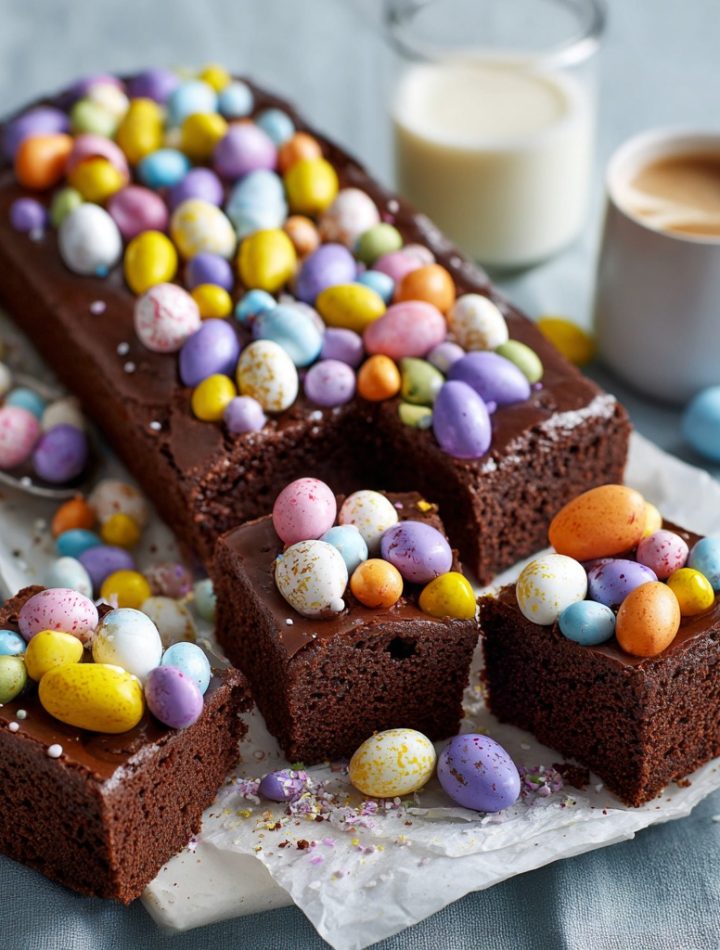
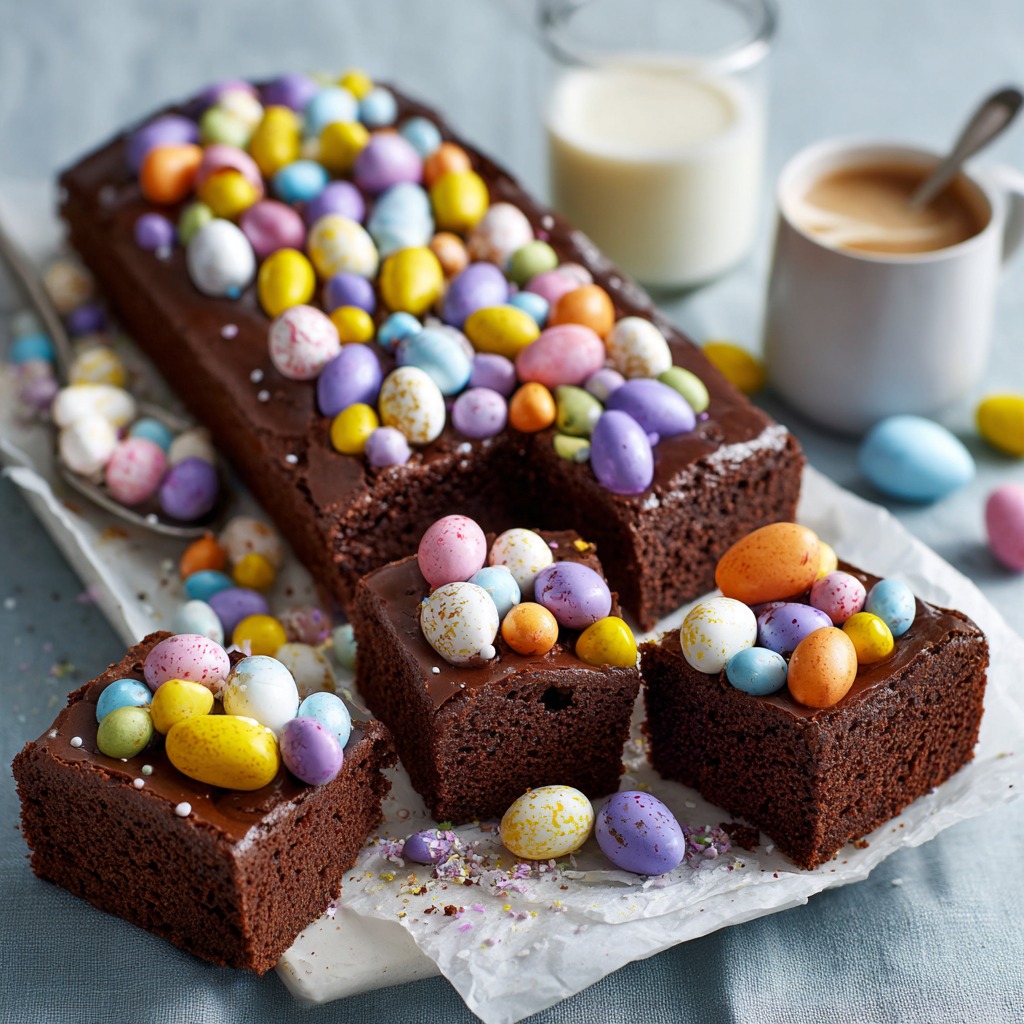
This Mini Egg-Studded Chocolate Tray Cake is the definition of easy, viral baking. A rich, fudgy chocolate cake baked in one pan, finished by pressing colorful Mini Eggs straight into the warm surface. Once sliced, that crack-through chocolate shell reveals gooey cake underneath—exactly the kind of moment TikTok can’t get enough of. Perfect for Easter, bake sales, or anytime you want instant wow with minimal effort.
Ingredients
Chocolate Tray Cake
1½ cups all-purpose flour
¾ cup cocoa powder
1 tsp baking soda
½ tsp salt
1 cup sugar
½ cup brown sugar
¾ cup vegetable oil
1 cup milk
2 large eggs
1 tsp vanilla extract
½ cup hot water
Topping
1½ cups Mini Eggs (whole or lightly crushed)
Instructions
Preheat oven to 350°F (175°C). Line a rectangular tray pan with parchment paper.
In a large bowl, whisk flour, cocoa powder, baking soda, salt, and sugars.
Add oil, milk, eggs, and vanilla. Mix until smooth.
Stir in hot water until the batter is glossy and pourable.
Pour into prepared pan and bake 25–30 minutes, until just set in the center.
Remove from oven and immediately press Mini Eggs gently into the hot cake.
Cool completely to allow the chocolate shell to crack beautifully when sliced.
- Prep Time: 10 mins
- Cook Time: 30 mins
- Category: Dessert
A Crack in Time: My Easter Kitchen Memory
This recipe takes me right back to my grandma’s linoleum-tiled kitchen around Easter. The air would be thick with the scent of yeast from hot cross buns, but my mission was always the chocolate. She had this ancient, speckled ceramic bowl she called the “magic cauldron,” and in it, we’d melt chocolate for dipping everything from biscuits to strawberries. One year, I got a bit overzealous and tapped the still-wet chocolate on a cluster of jelly beans. The thin shell splintered into a beautiful, crazy web. “Look, Nana! It’s got cracks like a dinosaur egg!” I declared. She laughed that deep, rumbling laugh of hers and said, “The best treats aren’t perfect, love. They’re the ones with character.”
Every time I press those Mini Eggs into this warm cake and watch the chocolate shell fracture as it cools, I think of her. It’s that same delightful imperfection, that same promise of a sweet surprise hidden just beneath the surface. This tray bake captures that spirit—it’s playful, a little messy in the best way, and guaranteed to create a happy memory (and maybe a few chocolate-smeared smiles) in your kitchen, too.
Gathering Your Flavor Wave: Ingredients & Insights
Here’s everything you need to ride this chocolate wave. I’ve added my little chef notes because knowing the “why” makes you a more confident baker!
- 1½ cups all-purpose flour: The trusty foundation. For a slightly denser, fudgier crumb, you can swap in ½ cup of cake flour, but all-purpose works beautifully.
- ¾ cup cocoa powder: Use natural, unsweetened cocoa powder here, not Dutch-processed. Why? We’re using baking soda as our leavener, and it needs the acidity in natural cocoa to react and give us that perfect rise. This is my #1 pro tip for this cake!
- 1 tsp baking soda: Our lift-off agent! It reacts with the cocoa and hot water to give the cake a tender, open crumb.
- ½ tsp salt: Never skip it! Salt is the flavor enhancer that makes the chocolate taste deeper and richer, not just sweet.
- 1 cup granulated sugar + ½ cup brown sugar: The white sugar gives sweetness and structure, while the brown sugar (pack it in!) adds moisture and a subtle molasses note that pairs amazingly with chocolate.
- ¾ cup vegetable oil: Oil keeps this cake supremely moist for days, much more so than butter. Canola or a light olive oil work great too.
- 1 cup milk: Whole milk gives the richest result, but any milk you have works. Dairy-free? Almond, oat, or soy milk are seamless swaps.
- 2 large eggs: Bring them to room temperature if you can! They incorporate more easily, leading to a smoother, more uniform batter.
- 1 tsp vanilla extract: The aromatic backbone. A splash of almond extract (¼ tsp) is also a delicious secret here.
- ½ cup hot water: This is the game-changer! It “blooms” the cocoa powder, intensifying its flavor, and creates a thin, pourable batter that bakes up with that wonderful fudgy texture.
- 1½ cups Mini Eggs: The star of the show! You can use them whole for maximum visual pop, or give them a very light crush in a bag with a rolling pin for more distributed crunch. No Mini Eggs? See my variations below!
Let’s Bake: Simple Steps to Viral-Worthy Cake
Follow these steps, and you’re golden. I’m chatting you through each one with my best tips!
- Preheat & Prep: Fire up your oven to 350°F (175°C). This is the perfect temperature for a steady, even bake. Take a rectangular baking pan (approx. 9×13 inches) and line it with parchment paper, leaving a little overhang on the sides. This is your “no-mess, easy-lift” hack for getting the whole cake out perfectly later. Give the paper a quick spritz with cooking spray so the batter doesn’t stick.
- The Dry Dance: In a large bowl, grab your whisk and combine the flour, cocoa powder, baking soda, and salt. Whisk it really well! We want to aerate these dry ingredients and make sure the leaveners are evenly distributed, so you don’t get any bitter bites. Then, whisk in both sugars until everything looks like a uniform, chocolatey sand.
- Bring in the Wet Team: Make a well in the center of your dry ingredients. Pour in the vegetable oil, milk, cracked eggs, and vanilla. Now, switch to a spatula or wooden spoon and mix until you have a thick, shaggy batter. It’ll seem a bit stiff at this point—that’s totally normal, I promise!
- The Hot Water Magic: Here’s where the transformation happens. Slowly pour in the half cup of hot water (just off the boil is fine). As you stir, the batter will loosen dramatically, turning glossy, smooth, and almost pourable. It will be quite thin—this is exactly what you want! This liquid is the secret to that fudgy, moist texture.
- Bake to Set: Carefully pour the batter into your prepared pan, nudging it into the corners. Slide it into the center of your preheated oven. Bake for 25-30 minutes. You’re looking for the edges to be fully set and pulling away from the pan slightly, and the center should be just set with a slight spring when gently pressed. A toothpick inserted will come out with a few moist crumbs, not wet batter. Don’t overbake! We want fudgy, not dry.
- The Grand Finale – Press Those Eggs! As soon as the cake comes out of the oven, this is your moment. Working quickly but gently, take your Mini Eggs (whole or lightly crushed) and press them randomly, generously, and firmly into the hot surface of the cake. They’ll sink in slightly and start to melt almost immediately. This is what creates that iconic cracked-shell topping as the cake and chocolate cool together. Let the cake cool completely in the pan on a wire rack. This requires patience, but it’s crucial for the shell to set!
Serving Up the Joy
Once completely cool, use the parchment paper overhang to lift the entire cake onto a cutting board. For those picture-perfect, clean cracks, use a large, sharp knife to slice into squares. Wipe the knife clean between cuts for neat edges. This cake is a star all on its own, but I love serving it with a dollop of barely-sweetened whipped cream or a scoop of vanilla bean ice cream to contrast the rich chocolate. Pile slices on a pretty platter and watch them disappear—it’s the ultimate shareable treat for a gathering, or a glorious personal project with a cup of coffee (no judgment here!).
Ride Your Own Flavor Wave: Fun Variations
This recipe is a fantastic canvas! Here are a few ways to make it your own:
- “Cadbury Creme Egg” Core: Before baking, pour half the batter into the pan. Place 4-5 halved Cadbury Creme Eggs (cut side down) on the batter, then cover with the remaining batter. Bake as directed. Gooey surprise inside!
- Peanut Butter Paradise: Swirl ½ cup of warmed, smooth peanut butter into the batter before baking. Top with chopped peanut butter cups instead of Mini Eggs.
- Orange Zest Zing: Add the zest of one large orange to the dry ingredients. The chocolate-orange combo is a classic for a reason!
- Mint Chocolate Chip: Use mint chocolate chips instead of Mini Eggs for the topping, and add ½ tsp peppermint extract to the batter with the vanilla.
- Allergy-Friendly Swap: Use a 1:1 gluten-free flour blend and ensure your cocoa and candies are gluten-free. For dairy-free, use plant-based milk and check your Mini Egg alternatives.
Isla’s Kitchen Confessions & Notes
This recipe has become such a staple in my house that it’s evolved beyond just Easter. My biggest “oops” turned into a win: I once only had a round cake pan free, so I baked it in that. The thicker cake needed 5 more minutes, but it turned into this incredibly decadent, almost brownie-like dessert. So don’t be afraid of pan swaps—just adjust the time and keep an eye on it!
I also have a confession: I’ve been known to make this just for the topping. Seriously, pressing those eggs into the warm cake is weirdly therapeutic. It’s my favorite part of the process, next to the crackly slice reveal. This cake stores beautifully at room temperature in an airtight container for 3 days (if it lasts that long). The texture actually gets even more fudgy on day two. Just try to keep it away from direct sunlight… for obvious melty reasons!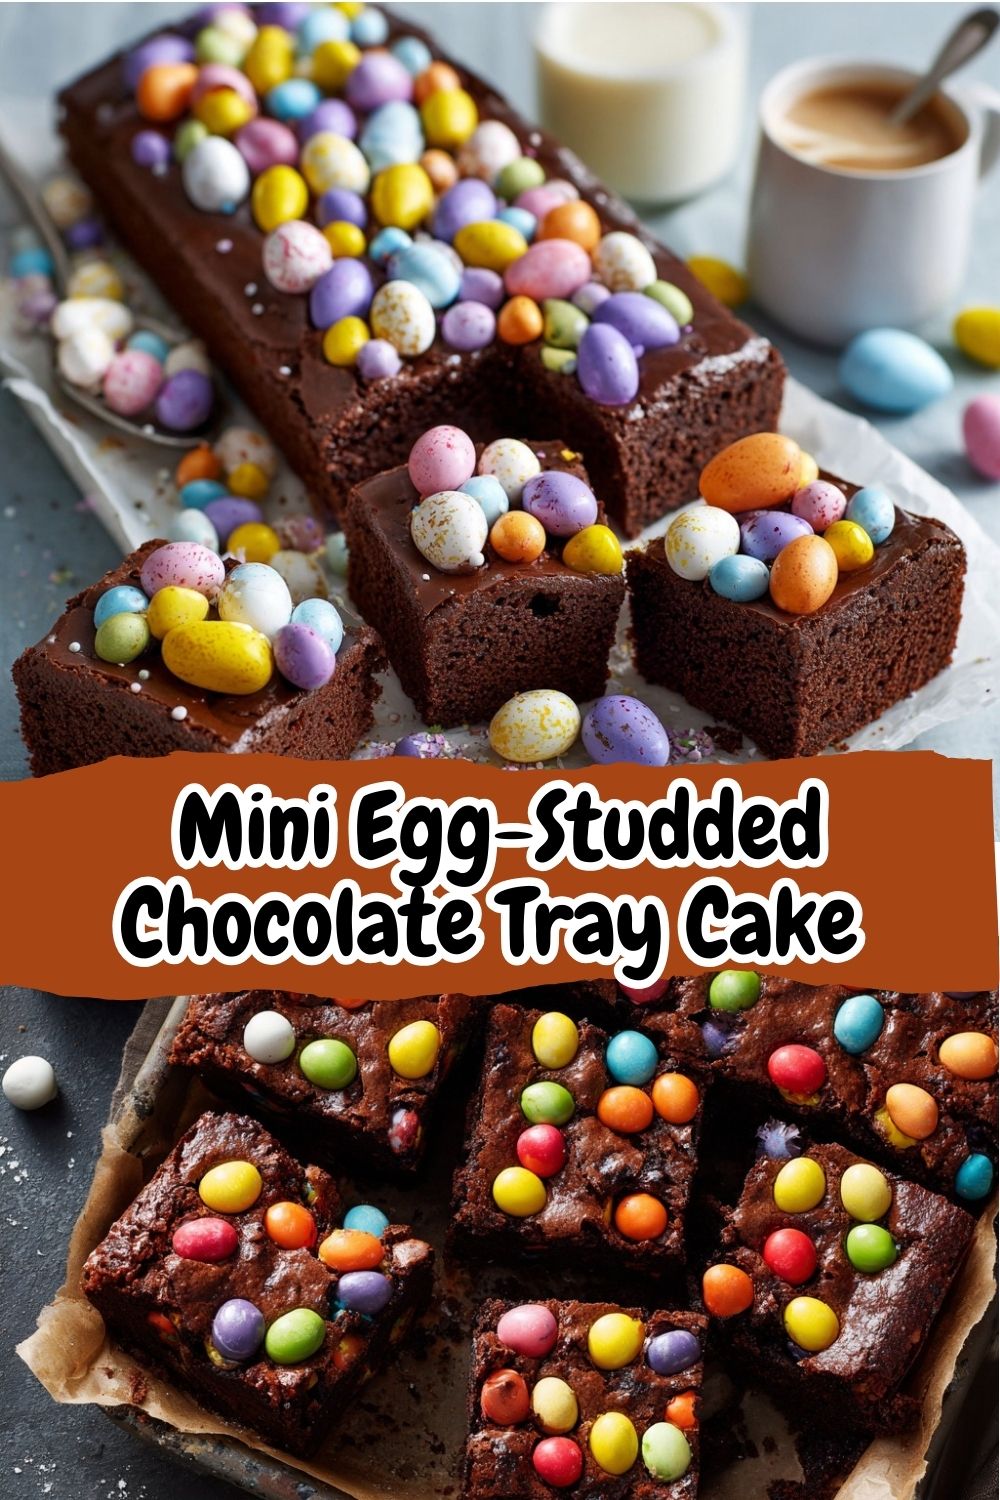
Your Questions, Answered!
Q: My chocolate topping stayed soft and didn’t get that crackly shell. What happened?
A: This usually means the cake wasn’t quite hot enough when you pressed the eggs in, or the eggs/cake were too cool. Make sure you press them in *immediately* after pulling the cake from the oven. Also, let the cake cool completely at room temp, not in the fridge, to allow the shell to crystallize properly.
Q: Can I make this ahead of time?
A: Absolutely! Bake it, top it, and let it cool completely. Cover it well and keep it at room temperature for up to a day before serving. It actually tastes better! For longer storage, you can freeze the whole undecorated cake (wrap tightly in plastic) for up to 2 months. Thaw, warm it slightly in the oven, then add your Mini Eggs fresh.
Q: My batter was so thin—did I do something wrong?
A> Nope! You did everything right. The thin, almost soupy batter is intentional. The hot water hydrates the cocoa and creates steam during baking, which gives us that tender, fudgy crumb. Trust the process!
Q: What can I use if I don’t have Mini Eggs or it’s not Easter?
A> So many options! M&Ms, Smarties, chopped chocolate bars (like Snickers or Twix), Reese’s Pieces, or even just a mix of chocolate and white chocolate chips work wonderfully. Any candy that can handle a gentle press into a warm cake will do.
Just the Facts (Approximate, per slice)
- Calories: 320
- Fat: 16g
- Carbohydrates: 42g
- Protein: 4g
- Prep Time: 10 minutes
- Bake Time: 25-30 minutes
- Total Time: ~45 minutes + cooling
- Servings: 12-16 squares