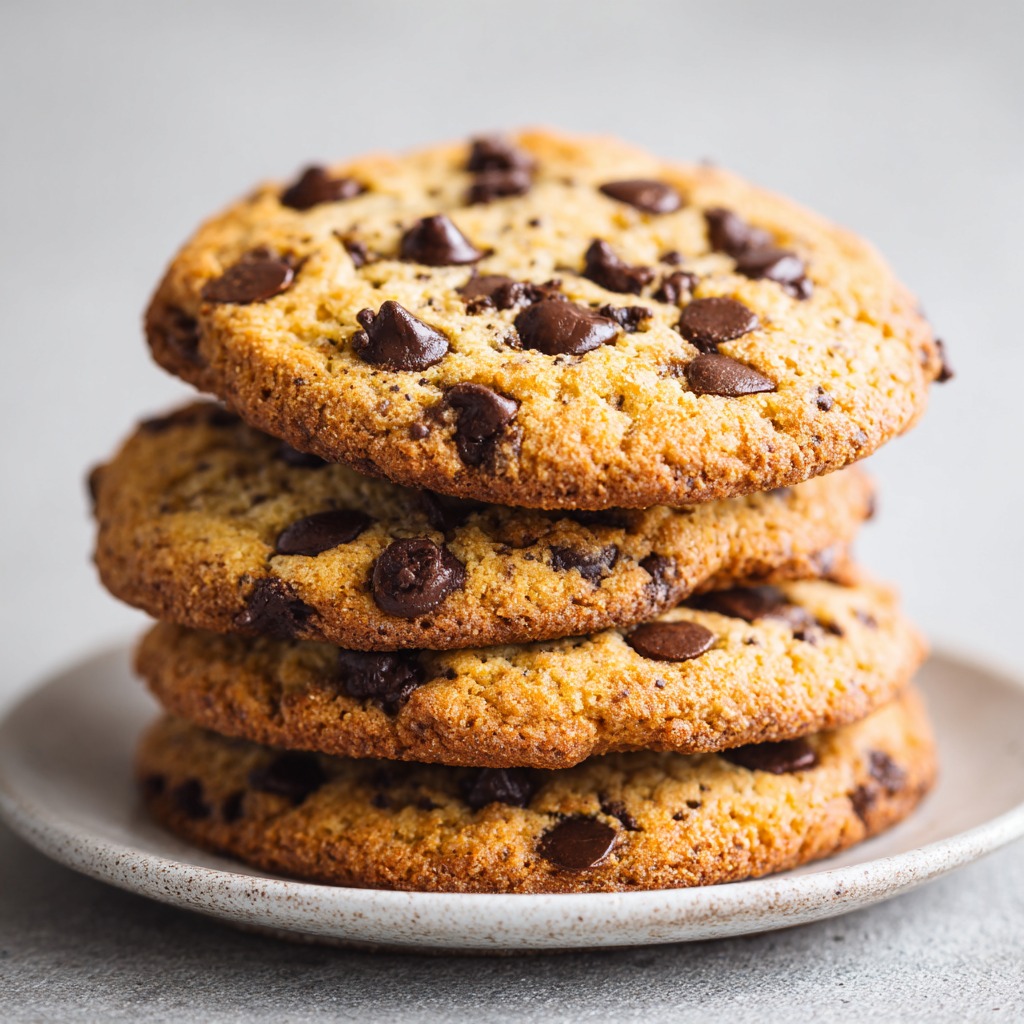
The Best Gluten-Free Chocolate Chip Cookies You’ll Ever Bake
Hey there, friend! Pull up a stool. Can you smell that? That warm, buttery, vanilla-kissed scent with deep, dark notes of melting chocolate? It’s the smell of pure, unadulterated kitchen happiness, and today, we’re making it gluten-free. I know, I know. Sometimes “gluten-free” can feel like a compromise, a “good for what it is” kind of situation. But let me stop you right there. These cookies are a full-stop, no-apologies, crowd-pleasing triumph. They’re the cookies you bake when you want a treat that’s soft and chewy in the middle, delightfully crisp on the edges, and so packed with chocolate that every bite is a little celebration.
I’ve been on a mission to perfect this recipe for years. It’s been through more test batches than I can count (my neighbors have become very willing taste-testers). The goal was simple: a one-bowl wonder that comes together faster than you can preheat the oven, uses simple ingredients, and delivers that iconic chocolate chip cookie experience—sans gluten. Whether you’re baking for dietary needs, a curious friend, or just your own adventurous taste buds, this recipe is your new kitchen staple. So, tie on your apron, grab your favorite mixing bowl, and let’s make some magic that proves deliciousness has no boundaries.
A Cookie Jar Full of Memories
My love for the humble chocolate chip cookie runs deep, right to the heart of my childhood kitchen. My dad, a man of few words but immense sweet-tooth energy, had one legendary kitchen move: the Midnight Cookie Mission. He’d wait until the house was quiet, then with the stealth of a pastry ninja, he’d whip up a batch of Toll House dough. He never baked them all. Oh no. The real treasure was the bowl, scraped clean of its raw, cookie-dough goodness, left with just a few chips for me to “discover” when I’d sneak down for a glass of water. It was our silent, sugary secret.
When I first had to explore gluten-free baking years later, that memory was my benchmark. Any gluten-free version had to evoke that same joy—the soft give of the center, the crackly top, the way a warm chip melts on your tongue. It had to feel like a hug, not a health food. This recipe, with its perfect chew and bold flavor, finally captured that spirit. It’s the cookie my dad would have stealthily made, and the one I’m now proud to share with you. Some traditions are just too good not to evolve.
Print
Gluten-Free Chocolate Chip Cookies
- Total Time: 20–25 minutes
- Yield: 20 cookies 1x
Description
These gluten-free chocolate chip cookies are a game-changer—soft in the center, crisp on the edges, and packed with melty chocolate chips. You won’t miss the gluten at all! Whether you’re baking for dietary needs or just looking for a new go-to treat, these cookies are guaranteed to win over any crowd. Simple ingredients, one bowl, and ready in under 30 minutes!
Ingredients
1½ cups gluten-free all-purpose flour (with xanthan gum)
½ tsp baking soda
¼ tsp salt
½ cup unsalted butter, softened
½ cup brown sugar
¼ cup granulated sugar
1 large egg
1 tsp vanilla extract
1 cup chocolate chips (semi-sweet or dark)
Instructions
Preheat oven to 350°F (175°C). Line a baking sheet with parchment paper.
Mix dry ingredients: In a bowl, whisk together gluten-free flour, baking soda, and salt.
Cream butter & sugars: In another bowl, beat butter, brown sugar, and white sugar until creamy. Add egg and vanilla; mix well.
Combine: Slowly add dry ingredients to wet, mixing just until combined. Fold in chocolate chips.
Scoop & bake: Scoop tablespoon-sized dough balls onto the baking sheet. Bake for 10–12 minutes or until edges are golden.
- Prep Time: 10 mins
- Cook Time: 10–12 minutes
- Category: Dessert
Your Cookie Blueprint: Simple, Smart Ingredients
Great cookies start with understanding your ingredients. Here’s everything you’ll need and why it’s in the bowl. I’ve also included my favorite swaps so you can bake with what you’ve got!
- 1½ cups gluten-free all-purpose flour blend (with xanthan gum) – This is the MVP. Using a blend (like Bob’s Red Mill 1-to-1 or King Arthur Measure for Measure) is key. They’re specially formulated to mimic wheat flour. The xanthan gum is crucial—it replaces the gluten’s binding power, giving our cookies structure and chew. Chef’s Insight: Don’t try to sub in a single flour like almond or coconut here; a pre-mixed blend is your best friend for perfect texture.
- ½ teaspoon baking soda – Our leavening agent! It helps the cookies rise and spread just enough, creating those lovely crispy edges and soft centers.
- ¼ teaspoon salt – Never skip it! Salt is the flavor enhancer that makes the sweetness and chocolate pop. It balances everything beautifully.
- ½ cup (1 stick) unsalted butter, softened – “Softened” is the operative word. It should be cool to the touch but yield easily when pressed. This creates air pockets when creamed with sugar, leading to a tender crumb. Sub Tip: For dairy-free, a high-quality vegan butter stick (like Miyoko’s or Earth Balance) works wonderfully.
- ½ cup packed brown sugar & ¼ cup granulated sugar – The dynamic duo! Brown sugar brings moisture, molasses flavor, and chew. White sugar encourages spread and crispness. This combo is the secret to perfect texture.
- 1 large egg, at room temperature – Binds the dough together and adds richness. A room-temp egg incorporates more evenly. Quick Hack: Place your egg in a bowl of warm water for 5 minutes if you forgot to take it out!
- 1 teaspoon pure vanilla extract – The aromatic soul of the cookie. Use the real stuff—it makes a world of difference.
- 1 cup chocolate chips – The star of the show! I prefer semi-sweet for classic flavor, but dark chocolate or even milk chocolate are fantastic. Pro Move: Save a small handful to press on top of the dough balls right before baking for that gorgeous, bakery-style look.
Let’s Bake! Step-by-Step to Cookie Perfection
Ready? This is where the fun happens. Follow these steps, and you’re golden (brown and delicious).
- Preheat & Prep: Fire up your oven to 350°F (175°C). Line a baking sheet with parchment paper. Why parchment? It prevents sticking and makes cleanup a breeze. No scrubbing pans—yes, please!
- Whisk the Dry Team: In a medium bowl, whisk together your gluten-free flour blend, baking soda, and salt. Whisking ensures the baking soda is evenly distributed, so you don’t get any bitter bites. Give it about 20 good turns and set it aside.
- Cream the Butter & Sugars: In a large mixing bowl, beat the softened butter, brown sugar, and granulated sugar together. Use a hand mixer or stand mixer on medium speed for about 1-2 minutes. You want it to be light, fluffy, and pale in color. Chef’s Hack: This step is non-negotiable for texture! Those tiny air bubbles you’re creating are what give the cookie its lovely lift.
- Add the Wet Partners: Crack in the egg and pour in the vanilla. Mix on medium until everything is beautifully combined and smooth, scraping down the sides of the bowl as needed. The mixture should look glossy and creamy.
- Bring It All Together: With your mixer on low, gradually add the dry ingredients to the wet. Mix just until no dry flour remains. Overmixing gluten-free dough can sometimes lead to denseness, so stop as soon as it’s cohesive. The dough will be thick and glorious.
- The Grand Finale—Chocolate! Using a sturdy spatula, fold in the chocolate chips. Feel free to sneak a taste of the dough (it’s gluten-free, so no worries!). This is the official “Isla-approved quality control” step.
- Scoop with Love: Using a tablespoon measure or a small cookie scoop, portion the dough into balls (about 1.5 tablespoons each). Place them about 2 inches apart on your prepared sheet. For thicker cookies, roll them into tall balls rather than flattening them.
- Bake to Golden Bliss: Bake for 10-12 minutes. Look for golden edges and a soft, puffy center that looks slightly underdone. They will firm up as they cool. Big Tip: Ovens vary! Start checking at 10 minutes. It’s better to under-bake slightly than over-bake.
- The Patient Cool-Down: This is the hardest part! Let the cookies cool on the baking sheet for 5 full minutes. They’re still setting up. Then, transfer them to a wire rack to cool completely… or enjoy warm with a glass of milk. I won’t judge.
Serving Your Masterpiece
Presentation is part of the joy! Pile these cookies high on a rustic wooden board or in a classic cookie jar. They’re perfect alongside a cold glass of milk, dunked into a mug of coffee, or crumbled over vanilla ice cream for the ultimate sundae. Want to gift them? Stack a few in a cellophane bag tied with baker’s twine – it’s a homemade gift that truly says “I care.”
Ride Your Own Flavor Wave: Recipe Variations
This dough is your canvas! Here are a few of my favorite twists:
- Sea Salt & Dark Chocolate: Use 1 cup dark chocolate chunks and sprinkle each dough ball with a pinch of flaky sea salt before baking.
- Kitchen Sink Cookies: Fold in ½ cup of your favorite mix-ins: chopped nuts, gluten-free pretzel pieces, or toasted coconut.
- Brown Butter Bliss: Brown your butter first (let it cool slightly), then proceed. It adds a deep, nutty, next-level flavor.
- “Everything-Free” Option: Use vegan butter, a flax egg (1 tbsp ground flax + 3 tbsp water, set for 5 mins), and ensure your chocolate chips are dairy-free.
- Espresso Chip: Whisk 1 tablespoon of instant espresso powder into the dry ingredients for a mocha kick.
Isla’s Chef Notes & Kitchen Confessions
This recipe has been a delicious journey. The first batch I ever made? Let’s just say they spread into one giant, flat cookie-sheet-cake. It was tasty, but not the goal! The key was finding the right flour blend and not being shy with the xanthan gum. Over time, I learned that chilling the dough for 30 minutes can yield an even chewier, taller cookie if you have the time—but the beauty of this recipe is you often don’t need to wait.
A funny story: I once was filming a video for these cookies and my dog, Bean, a notorious counter-surfer, somehow snagged an entire baked cookie off the cooling rack mid-shot. He looked so pleased with himself, I had to laugh and start over. The things we do for love (and cookies)! The point is, baking should be fun. Embrace the little messes and happy accidents.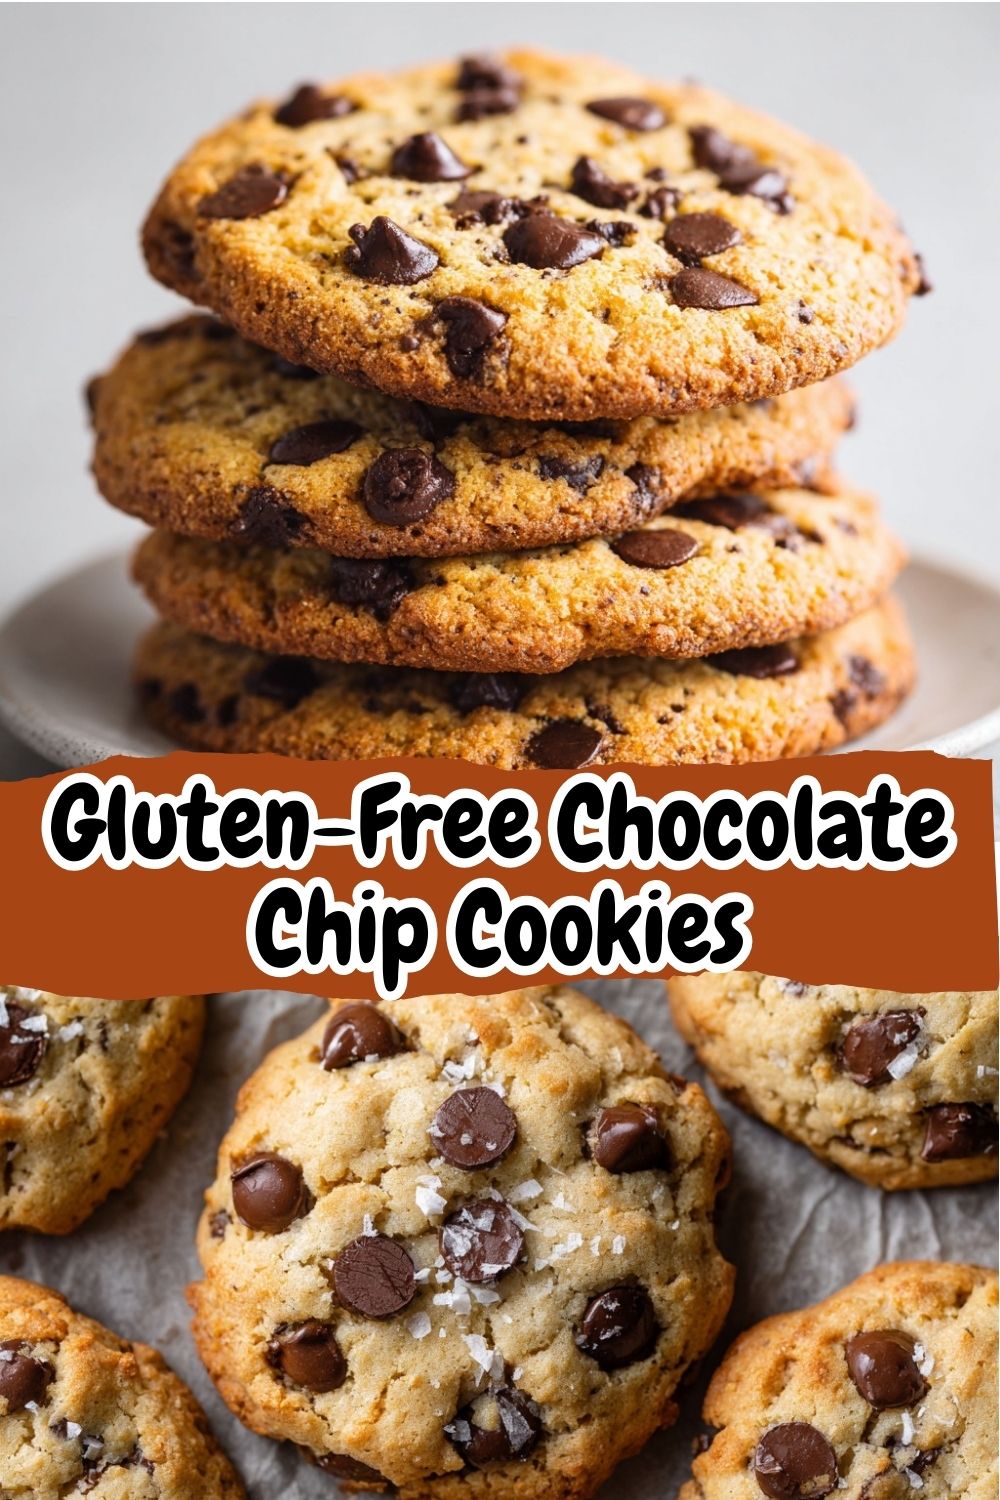
Your Questions, Answered (FAQs & Troubleshooting)
Q: My cookies spread too much and got thin. What happened?
A: This usually means your butter was too warm or melted. Make sure it’s just softened, not greasy. Also, double-check your flour blend—are you using one labeled “1-to-1” or “Measure for Measure” with xanthan gum? A different blend can change everything.
Q: They came out dry or crumbly. Help!
A: Two likely culprits: 1) Over-measuring the flour. The best way is to spoon the flour into your measuring cup and level it off. Don’t scoop directly from the bag! 2) Over-baking. Remember, they continue to cook on the hot tray. Taking them out when the centers look soft is key.
Q: Can I make the dough ahead and freeze it?
A: Absolutely! This is one of my favorite meal-prep hacks. Scoop the dough balls onto a sheet, freeze solid, then transfer to a freezer bag. You can bake straight from frozen, just add 1-2 minutes to the bake time. Fresh cookies on demand!
Q: My gluten-free flour doesn’t have xanthan gum. What do I do?
A: No problem! Simply add ½ teaspoon of xanthan gum to your dry ingredients when you whisk them. It’s a game-changer for texture.
Nutritional Information (Per Cookie)
Makes approximately 20 cookies.
Calories: 140 | Fat: 7g | Carbs: 18g | Sugar: 10g | Protein: 2g | Fiber: 1g | Sodium: 80mg
Prep Time: 10 mins | Cook Time: 10-12 mins | Total Time: 20-25 mins
These gluten-free chocolate chip cookies prove that you don’t need gluten to get that classic soft, chewy texture everyone loves. With crisp edges, gooey chocolate, and an easy one-bowl method, they’re perfect for last-minute cravings, sharing with friends, or stocking your cookie jar for the week. Whether you’re gluten-free by choice or necessity, this is one recipe you’ll come back to again and again.