Cherry Coconut Cream Pie: Your Passport to a Summer Daydream
Hey there, friend! Isla here, from my cozy kitchen to yours. Can we just take a moment to talk about summer cravings? They hit differently, don’t they? One minute you’re dreaming of something icy and refreshing, the next you’re craving the kind of creamy, dreamy dessert that makes you close your eyes and sigh with pure happiness. If you’ve ever wished you could bottle up the feeling of a perfect summer day—warm sun, a gentle breeze, and that sweet, carefree joy—I have just the recipe for you.
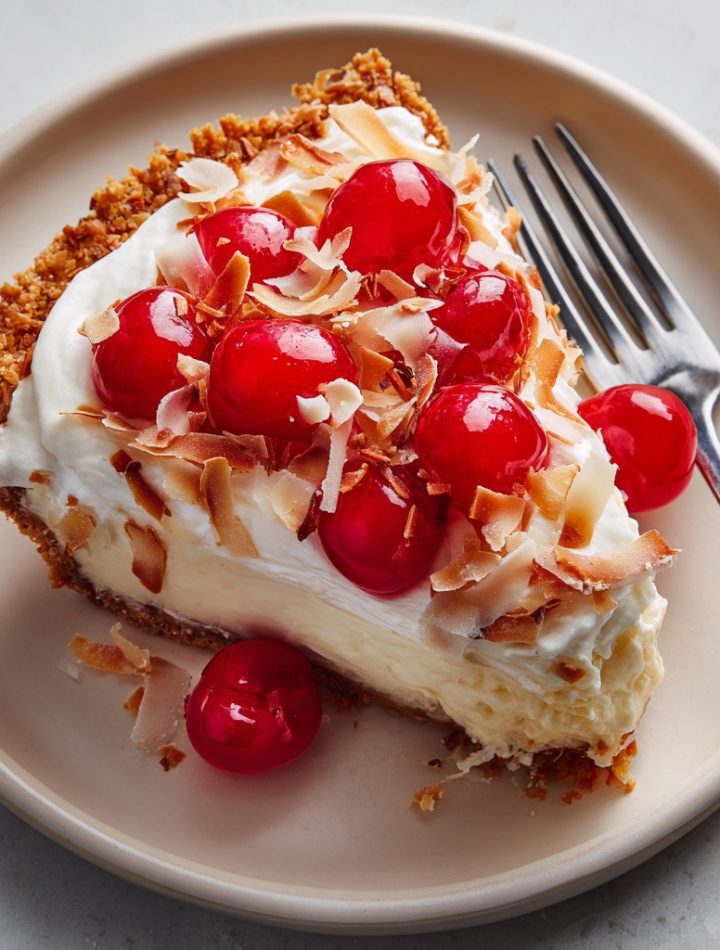
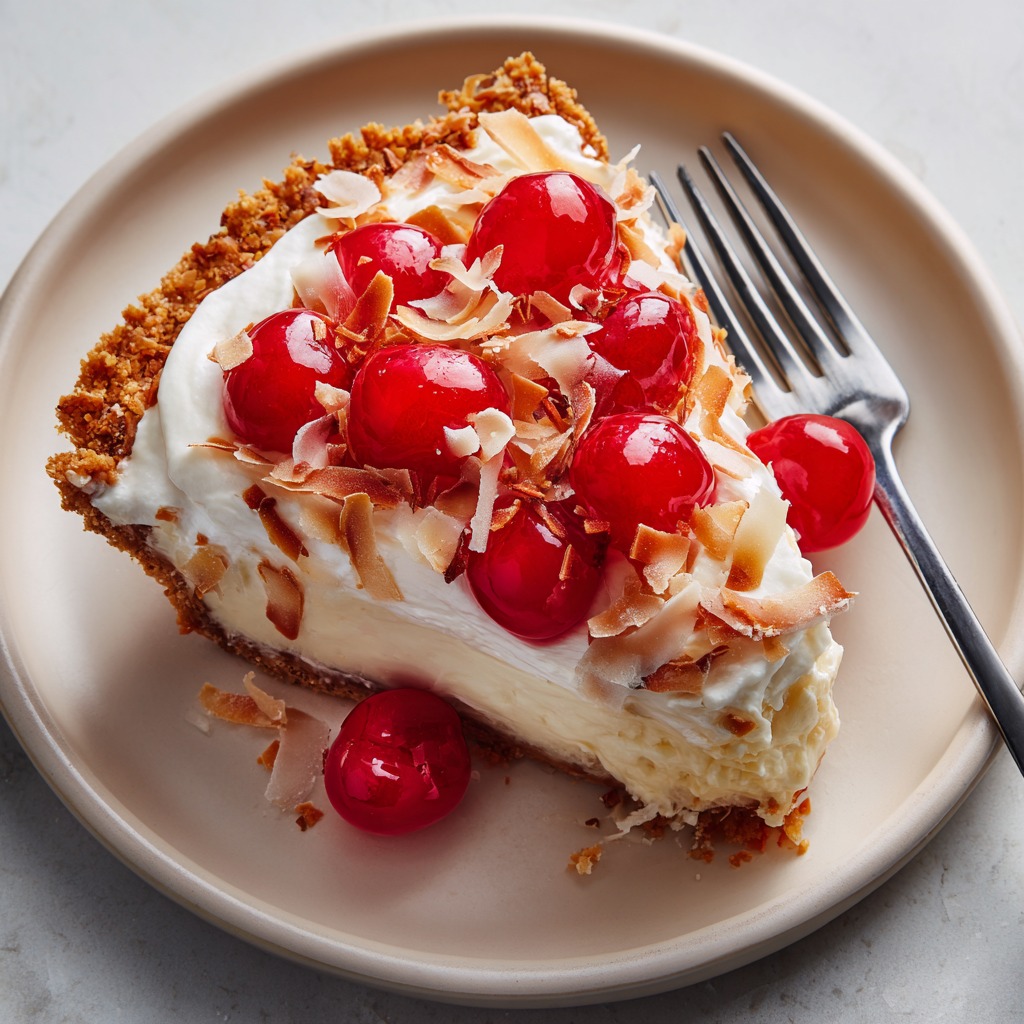
Today, we’re making my absolute Cherry Coconut Cream Pie. This isn’t just a dessert; it’s a tropical getaway on a plate. Imagine this: a crust that’s a crisp, buttery hug of graham cracker and toasted coconut. Then, a filling so silky and lush it practically whispers “vacation”—a perfect coconut cream that’s rich but not heavy, sweet but not cloying. And on top? A glorious, glossy blanket of fresh cherries that burst with a bright, tangy-sweet pop in every single bite. It’s cool, it’s creamy, it’s fruity, and it’s utterly, completely irresistible.
I promise you, this pie is magic. It looks like you fussed for hours, but the secret is that it’s built for real life. We’re using smart, simple techniques to create maximum wow-factor. So, whether you’re hosting a backyard bash, need a show-stopper for potluck pride, or just want to treat yourself to a slice of sunshine, this pie is your answer. Let’s turn up the tunes, grab our favorite mixing bowls, and create some delicious magic together.
A Slice of Summer Memory
This pie always takes me right back to my grandma’s screened-in porch. She didn’t live near the coast, but she had this incredible ability to create a tropical vibe with just her cooking. Her version was a simple coconut pie, but she’d always serve it with a big bowl of whatever fruit was practically screaming “EAT ME!” from the farmer’s market. One particularly sweltering July afternoon, it was cherries—deep, dark, almost burgundy ones that stained our fingers and lips.
I remember sitting on the porch swing with her, the metal chains creaking in rhythm with the cicadas. We’d eat our slices of cool coconut pie, then heap spoonfuls of those macerated cherries on top, laughing as the juice dripped down our chins. She’d wink and say, “Isla, darling, sometimes you have to let a dessert be a little messy. That’s where the fun is.” This recipe is my love letter to that afternoon—elevating her simple genius into a dedicated, glorious mash-up. It captures that same feeling of uncomplicated joy and the magic that happens when you pair creamy with bright, fruity freshness.
Print
Cherry Coconut Cream Pie : A Dreamy Summer Dessert with a Tropical Twist
- Total Time: 4 hours 25 minutes
- Yield: 8 slices 1x
Description
Cherry Coconut Cream Pie is the ultimate summer treat. With a crisp graham cracker and coconut crust, a silky coconut cream filling, and a fresh cherry topping, every bite is creamy, fruity, and irresistibly indulgent. Whether you’re baking for a summer party or just craving a chilled dessert, this pie delivers tropical flavor with a pop of cherry brightness.
Ingredients
For the crust:
1½ cups graham cracker crumbs
¼ cup shredded sweetened coconut
6 tbsp melted butter
2 tbsp sugar
For the coconut cream filling:
1 can (14 oz) full-fat coconut milk
1 cup whole milk
½ cup sugar
¼ cup cornstarch
¼ tsp salt
4 large egg yolks
1½ tsp vanilla extract
¾ cup sweetened shredded coconut
2 tbsp butter
For the cherry topping:
2 cups fresh or frozen cherries, pitted
2 tbsp sugar
1 tbsp lemon juice
1 tsp cornstarch (optional, for thickening)
Optional toppings:
Whipped cream
Toasted coconut flakes
Instructions
Make the crust: Preheat oven to 350°F. Mix graham crumbs, coconut, melted butter, and sugar. Press into a 9-inch pie dish. Bake for 10 minutes. Let cool.
Make the filling: In a saucepan, whisk coconut milk, whole milk, sugar, cornstarch, salt, and egg yolks. Cook on medium, whisking, until thickened. Off heat, stir in vanilla, shredded coconut, and butter. Pour into cooled crust and chill at least 4 hours.
Cherry topping: Cook cherries with sugar and lemon juice until soft and juicy. Add cornstarch if you want it thicker. Let cool. Spoon over set coconut filling.
Add whipped cream and toasted coconut just before serving if desired.
- Prep Time: 25 minutes
- Category: Dessert
Nutrition
- Sugar: 29g
- Fiber: 3g
- Protein: 5g
Gathering Your Flavor Crew
Here’s everything you’ll need to build this dreamy dessert. I’ve added my little chef insights because knowing your ingredients is the first step to fearless cooking!
- For the Crust:
- 1½ cups graham cracker crumbs: The classic, cozy base. I buy whole crackers and pulse them in my food processor for 30 seconds—it’s cheaper and you get the perfect texture! Chef’s Swap: Digestive biscuits or vanilla wafers work beautifully too.
- ¼ cup shredded sweetened coconut: We’re toasting this, which transforms it from chewy to nutty, fragrant, and CRUNCHY. It’s a game-changer for the crust texture.
- 6 tbsp melted butter: The glue. Unsalted is best so you control the saltiness. Make sure it’s properly melted for even distribution.
- 2 tbsp sugar: Just a touch to caramelize and help the crust hold together.
- For the Coconut Cream Filling (The Star!):
- 1 can (14 oz) full-fat coconut milk: DO NOT shake the can! You want that thick, luxurious cream that has separated and risen to the top. This is the key to a rich, non-watery filling.
- 1 cup whole milk: This balances the powerful coconut flavor and creates a perfectly silky custard. For a dairy-free version, use another cup of full-fat coconut milk.
- ½ cup sugar: Sweetens the deal. You can reduce this by a tablespoon if you prefer a less sweet filling.
- ¼ cup cornstarch: Our thickening superhero. It gives the filling that gorgeous, sliceable consistency without any eggs curdling.
- ¼ tsp salt: Crucial! It makes all the other flavors sing louder and cuts the sweetness perfectly.
- 4 large egg yolks: They add incredible richness, color, and help the custard set. Save the whites for a healthy omelet tomorrow!
- 1½ tsp vanilla extract: Use the good stuff. Pure vanilla adds a warm, floral depth that artificial just can’t match.
- ¾ cup sweetened shredded coconut: For texture! These little flecks throughout the creamy filling are delightful surprises.
- 2 tbsp butter: Stirred in at the end for a glossy, luxurious finish.
- For the Cherry Topping:
- 2 cups fresh or frozen cherries, pitted: Fresh are sublime in season, but frozen are fantastic year-round and often more affordable. No need to thaw if using frozen!
- 2 tbsp sugar: Draws out the cherries’ natural juices to create a simple syrup.
- 1 tbsp lemon juice: The bright acid that makes the cherry flavor pop and keeps the topping from being one-note sweet.
- 1 tsp cornstarch (optional): If you like a thicker, glazier topping (like in the photos), this is your friend. Mix it with a tablespoon of the cherry juice before adding.
Let’s Build This Beauty: Step-by-Step
Follow along, and I’ll guide you through every step with my favorite kitchen hacks to ensure pie perfection.
- Toast & Transform Your Crust: Start by preheating your oven to 350°F (175°C). Spread the ¼ cup of shredded coconut for the crust on a small baking sheet. Toast it for 5-7 minutes, stirring once, until it’s golden brown and smells incredible. WATCH IT LIKE A HAWK—it goes from perfect to burnt in seconds! Let it cool slightly. In a medium bowl, mix the graham cracker crumbs, the toasted coconut, the 2 tbsp sugar, and the melted butter. Stir until it resembles wet sand. Pro Tip: Pour the mixture right into your 9-inch pie dish and use the bottom of a measuring cup to press it firmly and evenly across the bottom and up the sides. This gives you a professional-looking crust. Bake for 10 minutes, then let it cool completely on a wire rack.
- Master the Creamy Coconut Filling: This is a stovetop custard, and my #1 tip is PATIENCE and constant stirring. In a medium saucepan, whisk together the coconut milk (scoop the thick cream off the top first, then add the liquid), whole milk, sugar, cornstarch, salt, and egg yolks. Get it smooth before you turn on the heat. Now, place the saucepan over medium heat and start whisking. Not occasionally—constantly. Scrape the bottom and corners. After about 8-10 minutes, you’ll feel it start to thicken. Keep going until it’s bubbling with large, lazy plops and is the consistency of thick pudding. Remove it from the heat immediately!
- Finish & Chill the Filling: Off the heat, whisk in the vanilla extract, the ¾ cup of shredded coconut (untoasted), and the 2 tbsp of butter until everything is melted and beautifully incorporated. Pour this luscious filling into your waiting, cooled crust. Smooth the top with a spatula. To prevent a skin from forming (ew, right?), press a piece of plastic wrap directly onto the surface of the filling. Chill in the fridge for at least 4 hours, but overnight is even better. This is the hardest part—waiting!
- Whip Up the Cherry Jewel Topping: About an hour before serving, make your topping. In a small saucepan, combine the cherries, 2 tbsp sugar, and lemon juice. Cook over medium heat, stirring gently, until the cherries soften and release their juices (about 5-7 minutes for fresh, 10 for frozen). If you want a thicker glaze, mix the optional cornstarch with a spoonful of the hot cherry juice in a small bowl to make a slurry, then whisk it back into the saucepan. Cook for another minute until glossy. Let this cool completely to room temperature before spooning it over the chilled pie.
- The Grand Finale – Assembly: Just before serving, remove the plastic wrap from the pie. Spoon the cooled cherry topping over the entire surface, leaving a little border of the creamy filling visible if you like. Add a final flourish! I love a generous cloud of freshly whipped cream (a splash of vanilla and a teaspoon of sugar in heavy cream, whipped to soft peaks) and a sprinkle of extra toasted coconut flakes. Slice with a sharp knife dipped in hot water for the cleanest cuts.
Serving Your Summer Masterpiece
Presentation is part of the fun! I like to serve this pie on a pretty, chilled plate. A dollop of whipped cream on the side never hurts, and a few whole, fresh cherries with their stems on make for a gorgeous, organic garnish. This pie is rich, so slice it modestly—you can always go back for seconds! It’s the ultimate dessert for a lazy weekend BBQ, a elegant dinner party finale, or a just-because-Tuesday treat that turns an ordinary day into a celebration.
Make It Your Own: Flavor Twists & Swaps
Love the base recipe? Here’s how to ride a different flavor wave!
- Tropical Mango: Swap the cherry topping for a puree of ripe mango simmered with a touch of lime juice and ginger.
- Chocolate Coconut Dream: Add ½ cup of finely chopped dark chocolate or chocolate chips to the hot filling after you take it off the heat. Stir until melted and ombre-swirled.
- Blueberry Bliss: Use blueberries instead of cherries! They pair amazingly with coconut. A pinch of cinnamon in the simmering berries is divine.
- Vegan-Friendly Version: Use a vegan butter substitute in the crust and filling. Swap the whole milk for almond or oat milk, and use a store-bought or aquafaba-based vegan whipped cream.
- Nutty Crust Upgrade: Replace ½ cup of the graham crumbs with finely ground toasted almonds or macadamia nuts for a deeper flavor.
Isla’s Kitchen Notes & Stories
This recipe has been my summer staple for years, and it’s evolved from my grandma’s simple pie into this layered beauty. The biggest lesson I learned? Don’t rush the chill. I once tried to serve it after only two hours because, well, I was impatient. It was delicious but soupy—a delicious, coconutty soup in a crust! Now I’m militant about the full chill time; it allows the cornstarch to fully set, giving you that perfect, clean slice.
Another funny kitchen story: I once tried to toast the coconut for the crust in a dry pan on the stovetop while also juggling a whipping cream situation. Let’s just say I got distracted by a text, smelled something burning, and had to start over. Now, I only toast coconut in the oven where it’s easier to control. Multitasking is great, but not when precious coconut is at stake! The moral? Give your ingredients (and yourself) a little grace. Even if you burn the first batch of coconut, the pie will still be incredible.
Your Questions, Answered!
Q: My filling didn’t thicken! What happened?
A: Don’t panic! This usually means it didn’t come to a full boil. Cornstarch needs to reach a bubbling boil to activate its full thickening power. If it’s still runny after cooling, you can pour it back into the saucepan, re-whisk, and cook it for a few more minutes until it truly thickens. Then pour it back into the crust and chill.
Q: Can I make this pie ahead of time?
A: Absolutely! That’s one of its best features. Make the entire pie 1-2 days ahead. Add the cherry topping and final whipped cream garnish the day you plan to serve it for the freshest look and texture.
Q: I can’t find fresh cherries. Are frozen okay?
A> They are more than okay—they’re brilliant! Frozen cherries are pitted, affordable, and available year-round. Use them straight from the freezer; no need to thaw. Just add a couple extra minutes to the simmering time.
Q: My crust is crumbling when I slice. Help!
A: This likely means it wasn’t pressed firmly enough into the pan. Next time, really use some muscle with that measuring cup! For now, serve it with a smile and call it “deconstructed.” It will taste exactly the same.
Nutritional Info (Per Serving, 1 of 8 slices)
Calories: ~440 | Fat: 27g | Saturated Fat: 19g | Carbohydrates: 48g | Sugar: 29g | Fiber: 3g | Protein: 5g | Cholesterol: 105mg | Sodium: 160mg
Note: This is an estimate calculated using standard ingredients. Values can vary based on specific brands and substitutions.