When Sunshine and Berries Meet Sourdough Magic
Hey there, fellow flavor surfer! Isla here, from my cozy kitchen to yours. Let’s talk about that magical moment when a craving hits you like a perfect wave. You know the one: you want something comforting yet exciting, wholesome but with a little sparkle. You want a slice of something that feels like a hug and a high-five at the same time. For me, that’s this Lemon Blueberry Sourdough Bread.
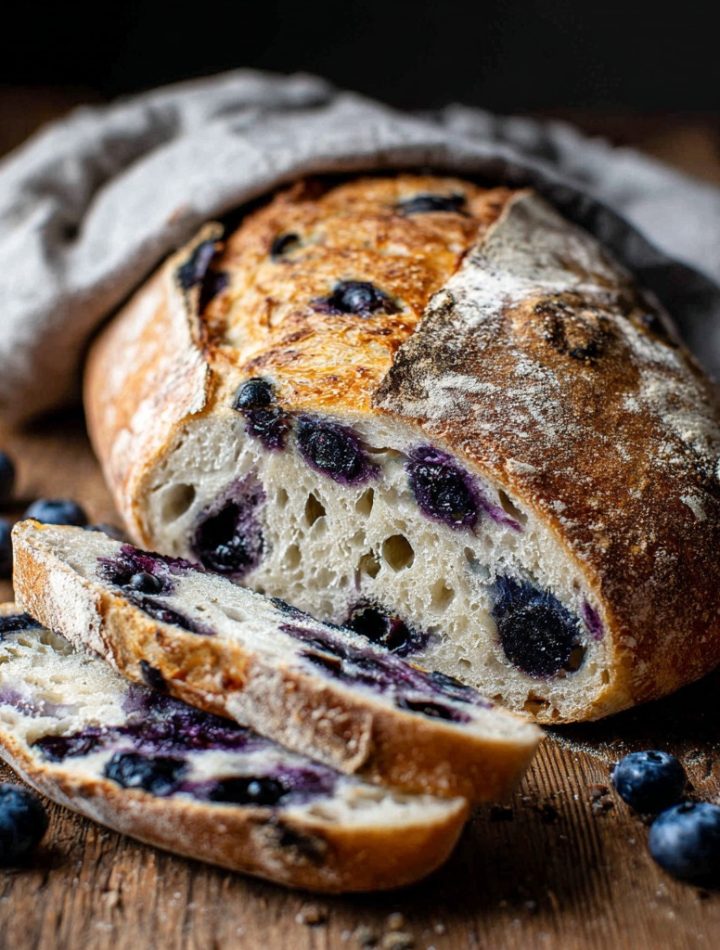
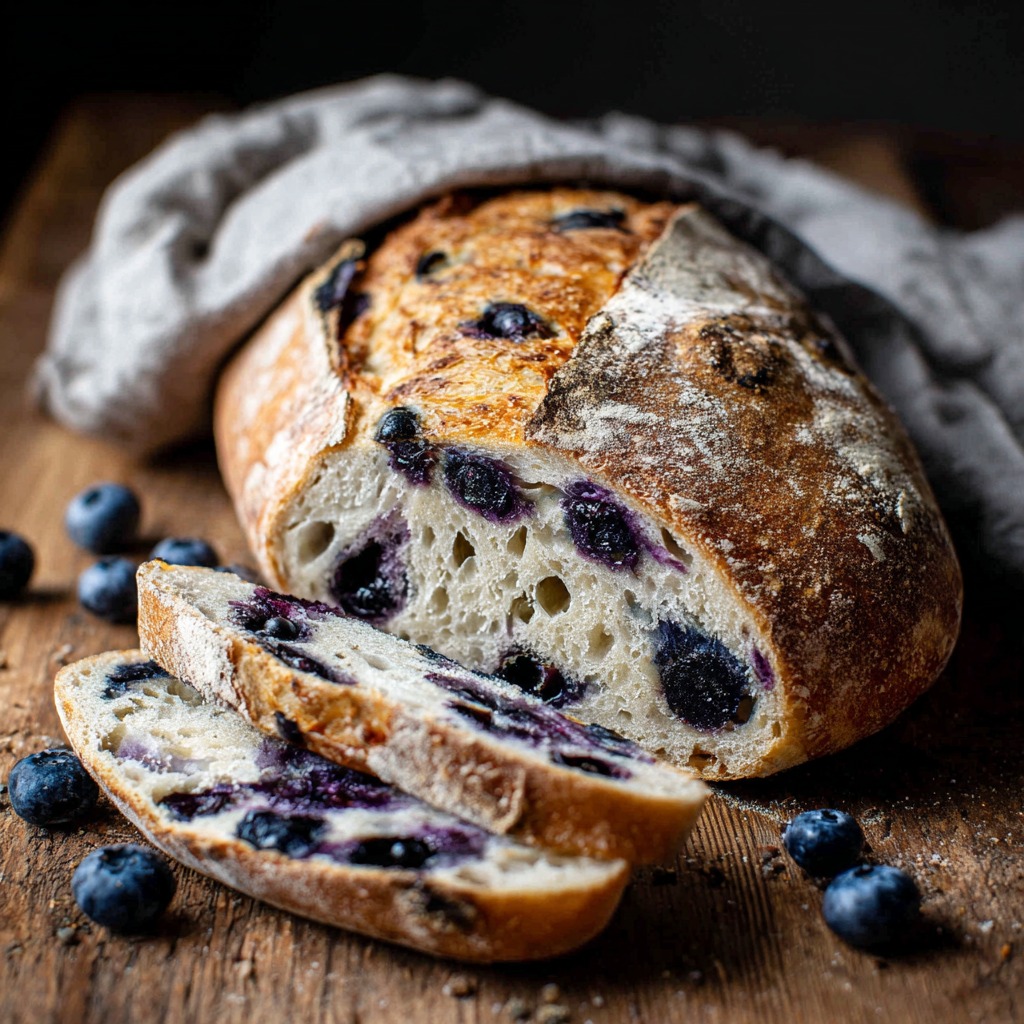
This isn’t just any loaf. This is a sun-drenched, berry-kissed, tangy masterpiece that turns your kitchen into a bakery and your morning toast into a celebration. Imagine the robust, earthy soul of a classic sourdough, but then—BAM!—it gets a confetti shower of juicy blueberries and a zesty kiss of bright lemon. The crust sings a crisp, golden song, while the inside stays tender, with little purple bursts of sweetness in every single bite.
I know sourdough can feel intimidating. It has its own rhythm, its own pace. But think of this recipe less as a rigid science project and more like a fun, flavorful dance. We’re going to ride the natural fermentation wave together, and I’ll be with you for every step and stretch and fold. Whether you’re a sourdough sage or a total starter newbie, this recipe is designed for real life. It’s for the days when you need a baking project that feels rewarding but won’t chain you to the kitchen. So, tie on your favorite apron, feed your starter, and let’s create something utterly delicious that will make your whole house smell like a dream. Ready to catch this flavor wave?
A Slice of Sunshine & Grandma’s Apron Strings
This recipe’s soul comes from my grandma’s sun-drenched kitchen. She wasn’t a “sourdough person,” but she was a blueberry lemon muffin wizard. Every summer, when the wild berries ripened along the coastal paths, we’d spend hours picking them, our fingers stained purple. Back in her kitchen, the air would grow thick with the scent of citrus and melting sugar as she whipped up batch after batch.
One year, deep into my own sourdough obsession, I hit a baking rut. My classic loaves were fine, but my heart wanted a party. Staring at a jar of my bubbly starter “Bubbles” and a pint of blueberries from the farmer’s market, I had a flash of my grandma, laughing as she zested a lemon directly over a bowl. What if… I thought. What if I swirled that summer feeling right into my sourdough? The first attempt was… messy. Blueberries bled everywhere, the dough was sticky, but the smell—oh, that smell baking in the oven! It was my grandma’s kitchen meeting my own. When I pulled out that first marbled, tangy, fruity loaf, I did a full-blown happy dance. It was a beautiful, delicious mess, and it tasted like memory. Now, every time I bake it, it’s like having a little bit of that sunshine and those apron strings right here with me.
Gathering Your Flavor Crew
Here’s your cast of characters! Simple, quality ingredients make all the difference. Let’s break them down.
- 1/2 cup active sourdough starter (fed and bubbly): This is your flavor engine! “Active” means it’s at its peak, about 4-8 hours after feeding, and will float in water. No sourdough starter? You can try a hybrid with 1/4 cup starter + 1/4 tsp instant yeast, but the pure, slow-fermented tang is the star here.
- 3 1/2 cups bread flour: The high-protein content in bread flour gives us that glorious, chewy structure and big oven spring. In a pinch, all-purpose flour works, but your loaf might be a tad less chewy.
- 1 1/4 cups water (plus 1–2 tbsp if needed): Water temperature matters! I use slightly warm water (about 80°F/27°C) to gently encourage fermentation. Adjustability is key—different flours drink differently.
- 1 1/4 tsp salt: Don’t skip it! Salt tightens the gluten, controls yeast activity, and makes all the flavors POP. I use fine sea salt.
- 1 tbsp honey or sugar: A tiny touch of sweetness to balance the tang and give the crust a lovely color. Honey adds a subtle floral note, but plain sugar is perfectly fine.
- Zest of 1 lemon: Use a microplane if you have one! We only want the bright yellow zest, not the bitter white pith. This is where the sunshine lives.
- 1 cup fresh or frozen blueberries (tossed in a little flour): Frozen berries work beautifully and often bleed less! Tossing them in a teaspoon of flour from your measured amount helps prevent them from sinking to the bottom during baking—a little chef hack for a better berry distribution.Print

Lemon Blueberry Sourdough Bread : Tangy, Fruity, and Naturally Leavened
- Total Time: 13 hours (including fermentation)
- Yield: 1 loaf 1x
- Diet: Vegetarian
Description
Lemon Blueberry Sourdough Bread is a tangy and fruity twist on classic sourdough, featuring juicy blueberries and zesty lemon for a naturally leavened loaf that’s as beautiful as it is flavorful.
Ingredients
Scale- 500g bread flour
- 100g active sourdough starter
- 350g water
- 10g salt
- 1 tablespoon lemon zest (from about 1 lemon)
- 150g fresh or frozen blueberries
- 1 tablespoon honey (optional, for slight sweetness)
Instructions
- In a large bowl, mix the flour and water until just combined. Let it rest for 30 minutes (autolyse).
- Add the sourdough starter, salt, lemon zest, and honey (if using) to the dough. Mix until fully incorporated.
- Perform stretch and folds every 30 minutes for 2 hours to build gluten.
- Gently fold in the blueberries during the second or third set of folds to avoid squishing them.
- Let the dough bulk ferment at room temperature for 4–6 hours until nearly doubled.
- Shape the dough into a round or oval loaf and place it into a floured proofing basket.
- Cover and refrigerate overnight (8–12 hours) for cold proofing.
- Preheat oven to 475°F (245°C) with a Dutch oven inside. When hot, transfer the dough into the Dutch oven, score the top, and bake covered for 20 minutes.
- Remove the lid and bake for another 20–25 minutes until golden brown and crusty.
- Cool completely on a wire rack before slicing.
Notes
- Use frozen blueberries straight from the freezer to reduce juice bleeding into the dough.
- You can swap lemon zest for orange zest for a different flavor twist.
- This bread is delicious toasted with butter or cream cheese.
- Prep Time: 1 hour (active time)
- Cook Time: 45 minutes
- Category: Bread
- Method: Baking
- Cuisine: American
Nutrition
- Serving Size: 1 slice (1/12 loaf)
- Calories: 180
- Sugar: 2g
- Sodium: 230mg
- Fat: 1g
- Saturated Fat: 0g
- Unsaturated Fat: 0.5g
- Trans Fat: 0g
- Carbohydrates: 37g
- Fiber: 2g
- Protein: 5g
- Cholesterol: 0mg
Keywords: lemon blueberry sourdough, sourdough fruit bread, naturally leavened bread, flavored sourdough, tangy sweet bread
The Rhythm of the Dough: Step-by-Step
Okay, team, let’s get our hands in there! This process is about patience and feel, not perfection. Put on some good music and enjoy the flow.
- Mix & Mingle (The Autolyse): In a large bowl, combine your bubbly starter, water, and honey. Give it a good whisk until it looks a bit frothy. Dump in all the flour and stir with a sturdy spatula or your hands until there are no dry patches left. It will be a shaggy, rough mess—that’s exactly right! No need to knead. Cover the bowl and let it rest for 30 minutes. This autolyse (fancy word for rest) lets the flour fully hydrate and starts developing gluten on its own, making our job easier.
- Season & Zest: Uncover your bowl. Sprinkle the salt and lemon zest right over the dough. Now, wet your hand (to prevent sticking) and reach down to the bottom of the bowl. Grab a portion of the dough, stretch it up, and fold it over the top. Rotate the bowl and repeat for about 1-2 minutes until the salt and zest are fully incorporated and the dough starts to feel smoother.
- Bulk Fermentation & Stretch & Folds: This is the main rising period. Cover the bowl and let it sit at room temperature (ideally 70-75°F/21-24°C) for 4-6 hours. During this time, we’ll do 3-4 sets of “stretch and folds,” spaced 30-45 minutes apart. For each set, wet your hand, grab an edge of the dough, stretch it up high, and fold it over the center. Do this 4 times, turning the bowl each time, until you’ve folded all four “sides.” This builds incredible strength without traditional kneading! After the last set, let the dough rest undisturbed for the remainder of the bulk ferment. It should look puffy and bubbly.
- Berry Bonanza: Gently turn the dough out onto a lightly floured surface. Using your hands, pat it into a rough rectangle. Sprinkle about 2/3 of your floured blueberries over the surface. Fold one third of the dough over the center, then fold the opposite side over (like a letter). Sprinkle the remaining berries on top, then fold the dough in half again. Gently knead/fold just until the berries are distributed. Don’t overwork it, or you’ll crush the berries and stain the dough purple (which is still tasty, just less marbled!).
- Shape & Sleep (Cold Proof): Now, shape your dough into a tight round (boule) or oval (batard). Cup your hands around it and drag it gently on the surface to create tension on top. Generously flour a banneton or a bowl lined with a clean, floured tea towel. Place the dough seam-side UP into the basket. Cover (a shower cap is perfect for this!) and place it in the fridge for 8-12 hours, preferably overnight. This slow, cold proof develops amazing flavor and makes the dough easier to score.
- Bake It Hot! The next day, preheat your oven to 475°F (245°C) with your Dutch oven (or heavy pot) inside for a full 45-60 minutes. Carefully take your dough from the fridge. Place a piece of parchment paper over the basket, flip it over, and gently lift the basket away. The dough should hold its shape. Using a lame or very sharp knife, score the top with one confident slash or a fun pattern—this lets the bread expand! Carefully transfer the dough (using the parchment as handles) into the SCORCHING HOT Dutch oven. Cover with the lid.
- The Big Bake: Bake covered for 20 minutes. This creates a steamy environment for a great oven spring. Then, reduce the heat to 450°F (230°C), remove the lid, and bake for another 20-25 minutes until the crust is a deep, glorious golden brown. Don’t be shy on the color—that’s flavor! The loaf should sound hollow when tapped on the bottom.
- The Hardest Part – Wait! Transfer your masterpiece to a wire rack and let it cool completely, for at least 3-4 hours. I KNOW it’s torture, but slicing into hot bread ruins the texture and makes it gummy. Trust me, the wait is worth it for that perfect, non-gummy crumb.
How to Serve This Slice of Joy
Presentation is part of the fun! Let this loaf cool completely, then slice it with a serrated bread knife. The contrast of the golden crust, the creamy crumb, and the purple berry streaks is a showstopper all on its own. For breakfast, a simple smear of good salted butter is divine. Elevate it with a swipe of lemon curd or honey-sweetened mascarpone. For an epic dessert, toast a slice and top it with a dollop of vanilla ice cream or whipped cream. Honestly, it’s incredible just torn apart with your hands, shared with friends over coffee, and accompanied by the satisfied silence of a truly good bite.
Ride Your Own Flavor Wave: Fun Variations
Feel like mixing it up? This recipe is your canvas!
- Lavender Blueberry Dream: Add 1 teaspoon of culinary dried lavender to the flour. The floral note with the lemon and berry is next-level elegant.
- Lemon Poppyseed Twist: Swap the blueberries for 2 tablespoons of poppy seeds added with the lemon zest. Classic, zesty, and perfect for afternoon tea.
- Orange Cranberry Winter Spice: Use orange zest instead of lemon and dried cranberries instead of blueberries. Add a pinch of cinnamon or cardamom with the salt for a cozy winter loaf.
- Savory Herb & Cheese: Omit the honey, lemon, and berries. Add 1 cup of grated sharp cheddar and 2 tablespoons of chopped fresh rosemary or thyme when you add the salt. A whole new savory direction!
- Gluten-Free Option: This is trickier with sourdough, but you can try using a 1:1 gluten-free bread flour blend and adding 1/2 tsp xanthan gum. Your starter will need to be gluten-free as well (fed with GF flour). The texture will be different but can still be delicious.
Isla’s Kitchen Confidential
This recipe has evolved through many, many loaves (and a few purple kitchen countertops!). My biggest lesson? Embrace the wiggle room. Your kitchen temp, your starter’s vigor, your flour—they all play a part. If your dough feels tight during folds, use a bit more water next time. If it’s spreading like a pancake, it might need more folds or less bulk time. It’s a conversation with your dough.
I also learned the hard way: freeze your berries if you want a cleaner marbled look. Frozen berries are less likely to burst during folding. And if they do bleed? Who cares! You get gorgeous purple swirls. It all tastes incredible. This bread freezes beautifully, too. Slice the cooled loaf, bag it up, and freeze for up to 3 months. Pop a slice straight into the toaster for instant summer vibes, any time of year.
Your Questions, Answered!
Q: My starter isn’t “active” or I don’t have one. Can I use commercial yeast?
A: You can! For a hybrid loaf, use 1/4 cup of unfed starter (or discard) + 1/4 tsp instant yeast. The bulk fermentation will be much faster (maybe 2-3 hours), so watch the dough, not the clock. For a 100% commercial yeast version, use 1 tsp instant yeast, 1 1/4 cups warm water, and skip the starter. Mix and proceed, with a much shorter first rise.
Q: My blueberries all sank to the bottom! What happened?
A> Two things: 1) Make sure you toss them in that little bit of flour—it’s a lifesaver. 2) When you incorporate them, make sure your dough has enough strength (from those stretch and folds). A weak, runny dough can’t hold up the berries. Also, avoid over-mixing once the berries are in.
Q: My bread is dense and didn’t rise much in the oven.
A> This usually points to under-fermentation or over-proofing. If your starter wasn’t peppy, it might not have had the power. Next time, ensure your starter passes the float test. Also, the cold proof in the fridge shouldn’t go much beyond 14 hours for most starters, or it can run out of steam. Your dough should still feel light and airy, not sluggish, when it goes into the fridge.
Q: Can I make this without a Dutch oven?
A> Yes! Preheat a baking sheet. Place your scored dough on a parchment-lined upside-down sheet pan or pizza stone. Pour 1 cup of hot water into a preheated pan on the rack below to create steam. Bake, but expect slightly less oven spring and a different crust texture.
Nutritional Information*
*Approximate values per slice (based on 12 slices per loaf):
Calories: ~160 | Total Carbohydrates: 30g | Protein: 4g | Total Fat: <1g | Fiber: 2g
Note: This is an estimate provided for informational purposes. Exact values can vary based on specific ingredients used and slice size.