Ditch the Bread, Keep the Flavor: Your New Favorite Grab-and-Go Bite!
Hey there, friend! Isla here, from my kitchen to yours. Can we talk about lunch for a second? Not the fancy, plated-lunch kind, but the real-life, “it’s-noon-and-my-stomach-is-growling” kind. The one where you’re staring into the fridge, willing something delicious and satisfying to materialize without a sink full of dishes. And don’t even get me started on party appetizers—the pressure to make something everyone will love that doesn’t chain you to the oven all night!
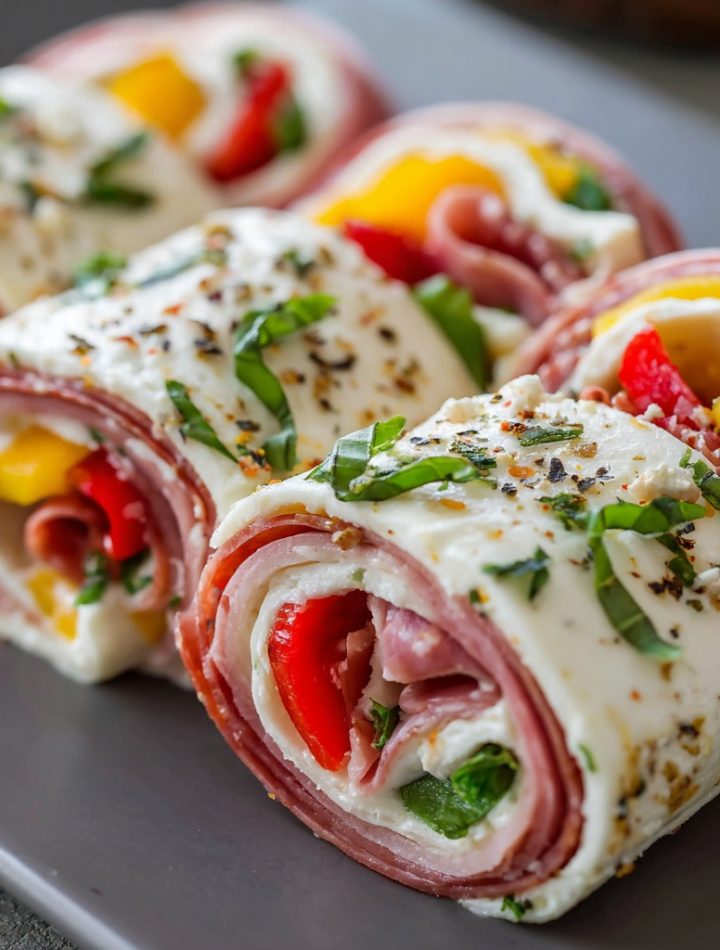
What if I told you the solution to both of these universal hunger puzzles is ridiculously simple, requires zero cooking, and packs more flavor per square inch than your favorite Italian sub? Meet my Italian Deli Roll-Ups. These little flavor torpedoes are my secret weapon for busy weekdays, last-minute gatherings, and anytime I need a high-protein snack that actually excites my taste buds. They’re fresh, crunchy, creamy, and salty all at once—a perfect bite that proves the best food doesn’t need to be complicated. So, let’s roll up our sleeves (and some deli meat) and make something amazing together!
Print
Italian Deli Roll Ups : Easy No-Bread Lunch or Party Appetizer
- Total Time: 10 minutes
- Yield: 8 roll ups 1x
- Diet: Gluten Free
Description
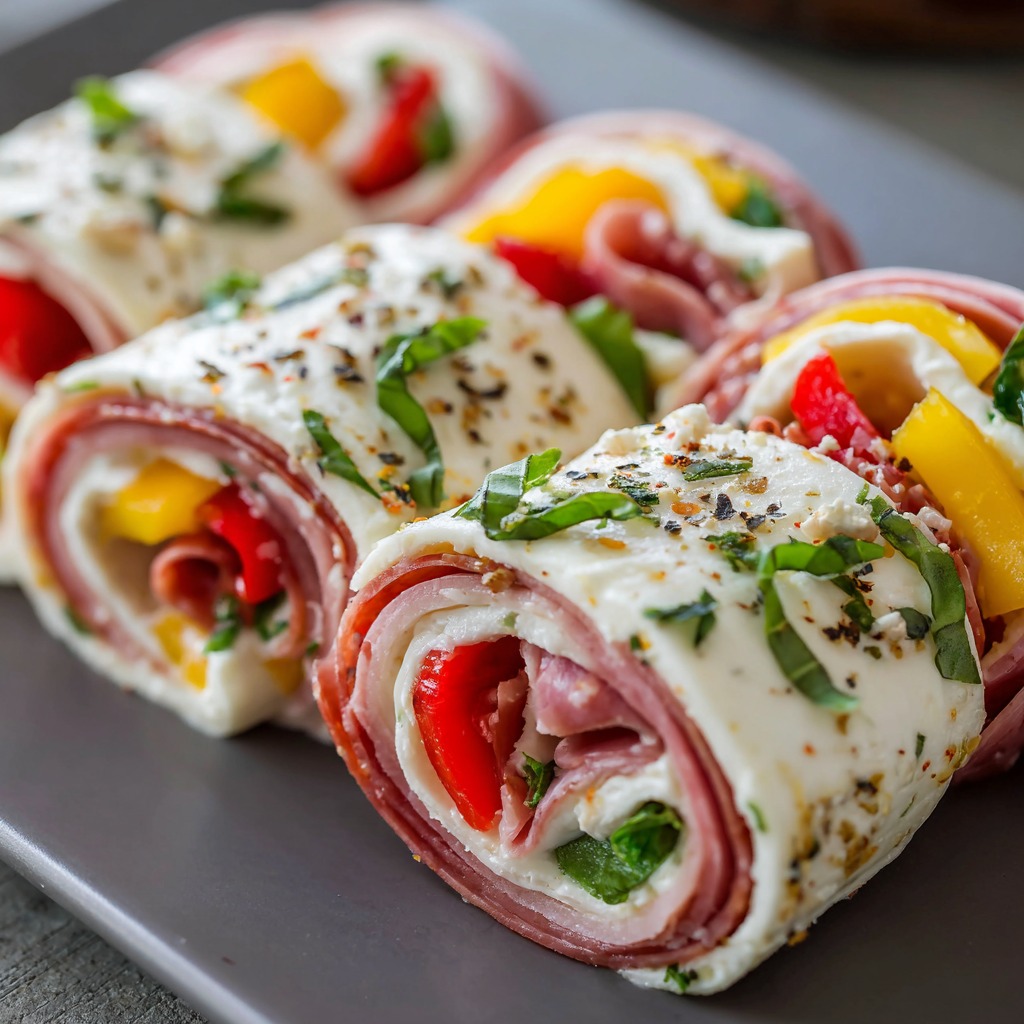
Italian Deli Roll Ups are an easy, no-bread lunch or party appetizer made with classic Italian meats, cheese, and crisp veggies rolled into flavorful bites. They’re quick to assemble, protein-rich, and perfect for low-effort entertaining or meal prep.
Ingredients
- 8 slices deli salami
- 8 slices deli pepperoni
- 8 slices deli ham or prosciutto
- 8 slices provolone or mozzarella cheese
- 1/2 cup roasted red peppers, sliced
- 1/4 cup banana peppers or pepperoncini, sliced
- 1/4 cup fresh basil leaves or arugula
- 2–3 tbsp Italian dressing or balsamic glaze (optional)
- Freshly ground black pepper, to taste
Instructions
- Lay a slice of deli meat flat on a clean surface.
- Place a slice of cheese on top, trimming if needed to fit.
- Add a few strips of roasted red peppers, banana peppers, and a few basil leaves.
- Drizzle lightly with Italian dressing or balsamic glaze if using, and add black pepper.
- Roll tightly from one end to the other.
- Secure with a toothpick if desired.
- Repeat with remaining ingredients.
- Serve immediately or chill until ready to serve.
Notes
- Use lettuce wraps inside for extra crunch.
- Swap cheeses with Swiss, cheddar, or havarti.
- Add a thin spread of cream cheese for a creamy variation.
- Great for meal prep—store rolled tightly.
- Slice into pinwheels for party platters.
- Prep Time: 10 minutes
- Cook Time: 0 minutes
- Category: Lunch, Appetizer
- Method: No-Cook
- Cuisine: Italian-Inspired
Nutrition
- Serving Size: 2 roll ups
- Calories: 210
- Sugar: 2g
- Sodium: 680mg
- Fat: 16g
- Saturated Fat: 7g
- Unsaturated Fat: 8g
- Trans Fat: 0g
- Carbohydrates: 3g
- Fiber: 0g
- Protein: 14g
- Cholesterol: 45mg
Picnic Tables & Paper Plates: Where This Recipe Was Born
This recipe is pure nostalgia for me, wrapped up in a slice of salami. It takes me straight back to the chaotic, sun-drenched picnics of my coastal childhood. My dad, a man of few words but many grilling tools, would be manning the barbecue, while my mom and grandma laid out what seemed like a hundred Tupperware containers on a checkered blanket. There were always the “main event” dishes, but my eyes—and hungry little hands—would always go straight for the platter of something rolled up.
My Nonna called them “involtini,” and hers were often more elaborate, but the spirit was the same: take what you have, layer it with love, and roll it into something you can eat with your fingers while laughing with your people. No forks required. That’s the feeling I want to bring to your table (or your lunchbox, or your patio). It’s food that’s meant to be shared, enjoyed without pretense, and perfect for making new memories, whether you’re feeding a crowd or just treating yourself on a Tuesday.
Gathering Your Flavor Crew: What You’ll Need
Here’s the beautiful part: this is less of a strict recipe and more of a flavorful framework. Think of this list as your playlist—you can swap out the songs (ingredients) based on what you’re craving!
- 8 slices Genoa Salami: This is our flavor base! Genoa salami is garlicky, lightly fermented, and has that perfect marbled fat that means big taste. Chef’s Insight: If you can, get it sliced thin at the deli counter, not pre-packaged. The texture is far superior! No salami? Prosciutto or capacollo are fabulous swaps.
- 8 slices Deli Turkey or Ham: This layer adds a milder, leaner protein and helps create a sturdier “wrap.” I love the savory-sweet hint of a good black forest ham here. Pro Tip: Ask for your meat sliced “medium” thickness—too thin tears, too thick won’t roll nicely.
- ½ cup Whipped Cream Cheese or Herbed Spreadable Cheese: Our glue and our creaminess! Whipped cream cheese spreads like a dream. For a major upgrade, use a store-bought garlic & herb spread or whip your own by mixing soft cream cheese with a pinch of Italian seasoning. Dietary Swap: Dairy-free cream cheese or a thin layer of hummus works wonderfully.
- 1 cup Mixed Bell Peppers, thinly sliced: CRUNCH FACTOR. I use a mix of colors (red, yellow, orange) for sweetness and visual pop. Slice them into thin matchsticks (julienne) so they roll neatly. Don’t have peppers? Thin asparagus spears, cucumber sticks, or shredded carrots are great.
- Handful of Fresh Basil or Spinach Leaves: The fresh, herbal note that cuts through the richness. Basil screams Italian flavor, but spinach is a milder, always-available option. A little arugula would add a lovely peppery kick, too!
- Optional: Cracked Black Pepper, Banana Peppers, Pepperoncini: This is where you personalize! A grind of black pepper is classic. For a tangy, spicy punch, add a few slices of banana pepper or pepperoncini inside the roll. A drizzle of balsamic glaze or a sprinkle of everything bagel seasoning on the outside? Yes, please!
Let’s Build Some Flavor Rolls: Step-by-Step
Ready? This is the fun, almost therapeutic part. Put on some music, clear a little space on your counter, and let’s assemble.
- Set the Stage. Grab a clean cutting board. Lay out your first slice of Genoa salami. Top it immediately with a slice of turkey or ham. This double-layer gives us a sturdy foundation and ensures every bite has a perfect meat-to-filling ratio.
- Spread the Love. Using a small butter knife or offset spatula, spread about 1 tablespoon of your cream cheese evenly over the top slice of meat. Get it almost to the edges, but not quite—this will help prevent too much squishing out when you roll. Little Chef Hack: If your cream cheese is cold and stubborn, let it sit at room temp for 15 minutes first. Spreading is a breeze when it’s soft!
- Layer the Crunch & Green. Now for the confetti! Place a small bundle of your bell pepper matchsticks and 2-3 fresh basil leaves about one-third of the way up from the bottom of your meat stack. The key is not to overstuff—you want just enough to feel the crunch without the roll bursting. Add those optional banana pepper slices here if you’re using them.
- The Tight Roll. This is the only “technique” involved, and it’s easy. Starting from the bottom (where your veggies are), gently but firmly roll the meats and fillings up and away from you. Think “tight cigar,” not “loose burrito.” Apply even pressure as you go. You’ll see the beautiful spiral forming!
- Seam Side Down. Place your finished roll with the seam side down on a plate. This little rest lets the cream cheese “glue” set and holds everything together. Repeat with the remaining ingredients until you have a proud little army of rolls.
- Slice & Reveal! Grab a sharp knife. For party appetizers, I love slicing each roll diagonally into 2-3 pieces. The diagonal cut looks fancier and shows off the gorgeous interior spiral. For a lunchbox, I often leave them whole! Transfer to a serving platter.
- The Finish Line. For a final touch of chef’s flair, garnish the whole platter with extra chopped herbs, a crack of black pepper, or that drizzle of balsamic glaze I mentioned. Serve immediately or pop them in the fridge to firm up for 30 minutes.
How to Serve These Flavorful Little Bundles
Presentation is part of the fun! For a party, arrange the sliced rolls on a simple white platter or a slab of marble, with the spirals facing up. Tuck in some extra fresh herbs and lemon wedges around the edges for color. For lunch, pack 2-3 whole rolls in a container alongside some olives, cherry tomatoes, and a few nuts for the ultimate adult lunchable. They are best served chilled, making them the ultimate make-ahead hero.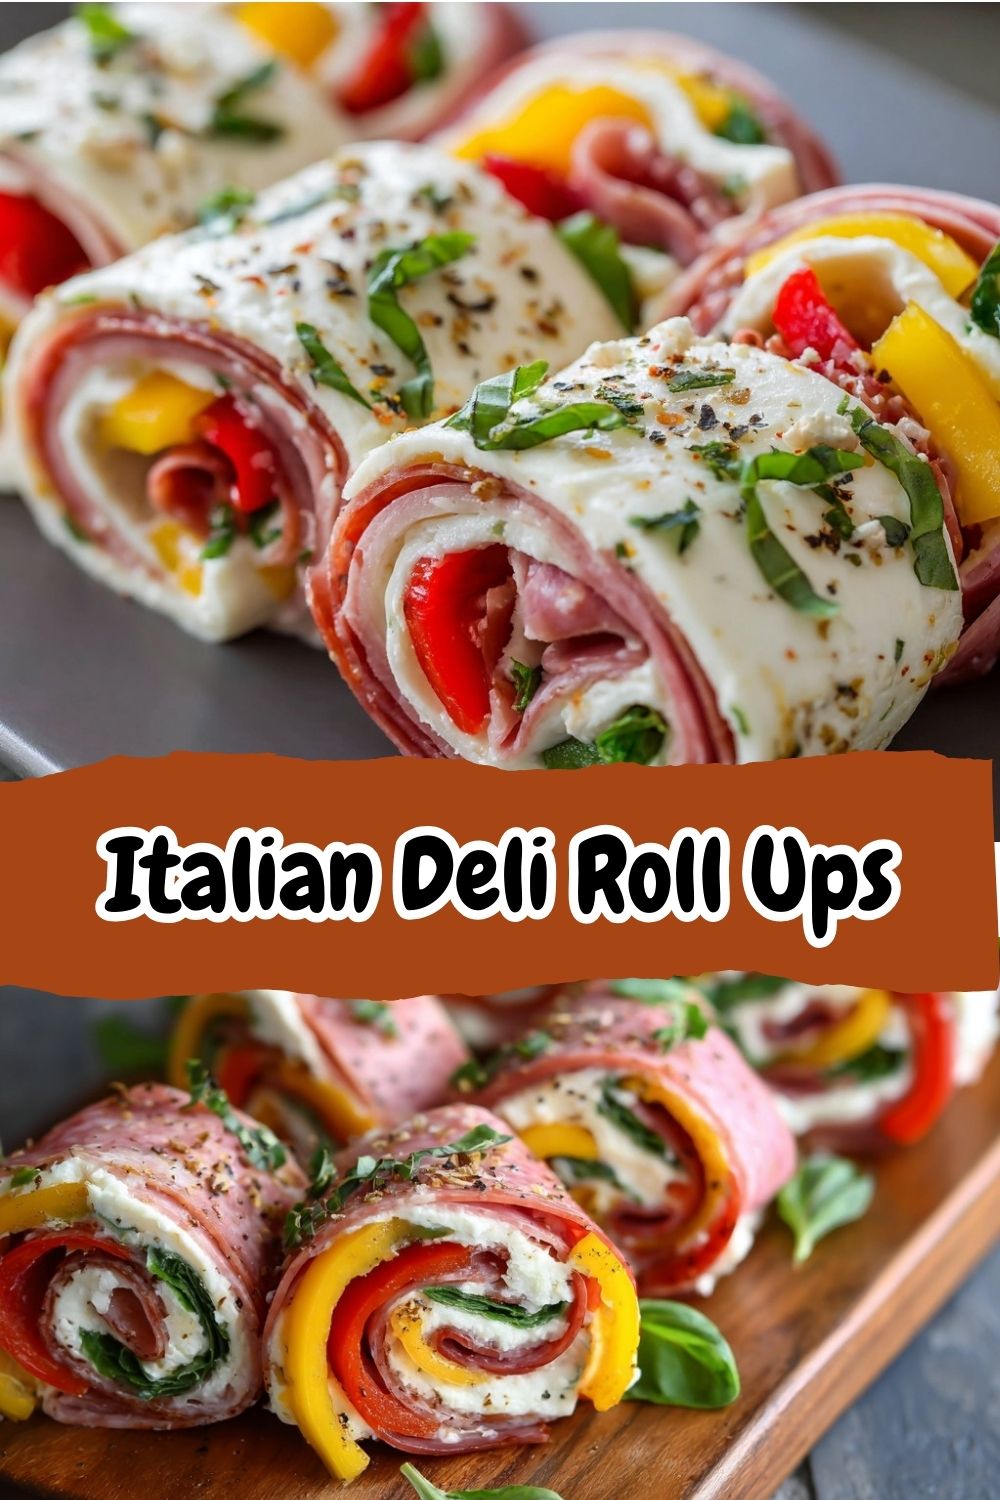
Ride Your Own Flavor Wave: Creative Twists!
- The Greek Islander: Swap meats for sliced grilled chicken and salami. Use a dill-feta spread, add cucumber sticks, red onion, and a Kalamata olive in the center.
- The Ranch Club: Use smoked turkey and ham. Mix ranch seasoning into the cream cheese, and fill with shredded romaine and crispy baked bacon bits.
- The Veggie-Packed: Skip the turkey layer! Use a large, flexible lettuce leaf (like butter or romaine) under the salami. Load up with hummus, shredded carrots, sprouts, and avocado slices.
- The Spicy ‘Nduja: For the bold! Mix a teaspoon of spicy ‘nduja or Calabrian chili paste into the cream cheese. Use soppressata for the meat and pickled jalapeños for the crunch.
Isla’s Kitchen Notes & Stories
This recipe has been a living, evolving thing in my kitchen. I first made a version for my husband’s fantasy football draft—he needed “man food” that wasn’t just chips. They were gone in 10 minutes, and I got three texts asking for the recipe. The real test was my kids: they turned their noses up at the visible veggies, so I started shredding the peppers super fine and using spinach. They devoured them, none the wiser. Victory!
My biggest lesson? Don’t stress the perfect roll. Your first one might be a bit loose or lopsided—that’s just the “chef’s sample.” Eat it immediately for quality control (wink). The beauty is in the imperfect, homemade feel. These roll-ups have been with me through beach picnics, last-minute potlucks, and countless “I don’t want to cook” nights. They’re a little reminder that good food is about joy, not perfection.
Your Questions, Answered!
Q: Can I make these ahead of time?
A: Absolutely! They are the BEST make-ahead. Assemble them, place seam-side down in a single layer in an airtight container, and refrigerate for up to 24 hours. I recommend slicing just before serving for the freshest look.
Q: My rolls keep falling apart! What am I doing wrong?
A: Two likely culprits: 1) Overstuffing. Less is more with the fillings. 2) The cream cheese is too cold. A softer spread acts as better glue. Also, ensure you’re giving them that 15-minute fridge rest after rolling—it makes a world of difference.
Q: Are these keto-friendly/low-carb?
A: Yes! With zero bread and sugar-free fillings, they are a perfect fit for keto and low-carb lifestyles. Just double-check your deli meats for added sugars if you’re strict.
Q: What’s the best way to slice them without squishing?
A: Use a very sharp, non-serrated knife. A gentle sawing motion works better than pressing straight down. Wiping the knife clean between slices also keeps things neat.
Nutritional Information*
*Estimated for 2 whole roll-ups (using standard ingredients)
Calories: ~180 | Protein: 12g | Carbohydrates: 3g | Dietary Fiber: 1g | Total Fat: 14g | Sodium: 850mg
Remember, this is a framework! Using lower-sodium meats, fat-free cream cheese, or loading up on extra veggies will alter these numbers to fit your needs.