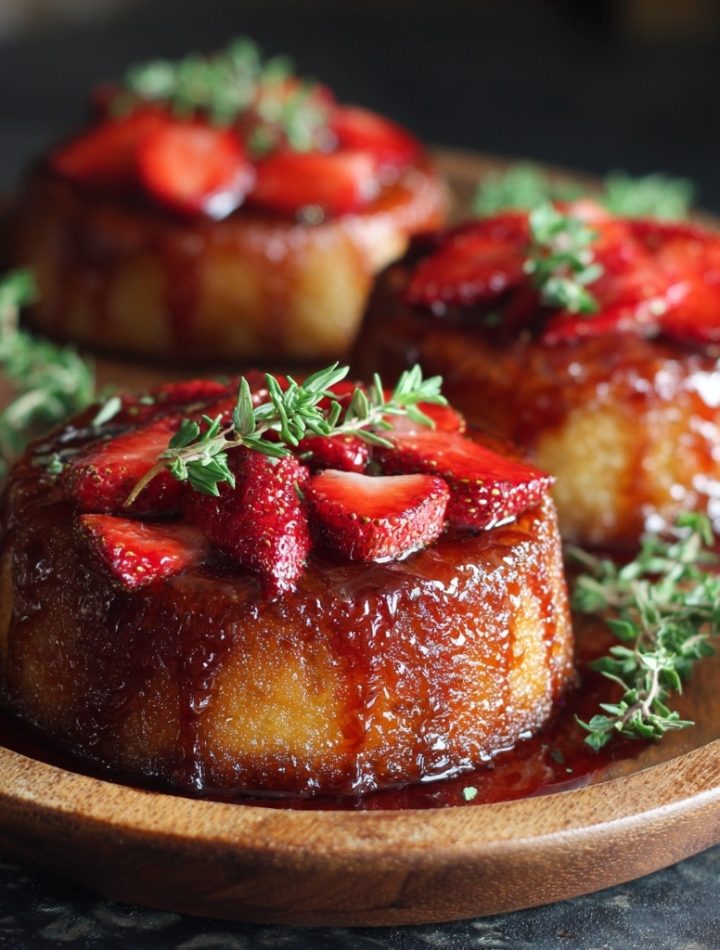

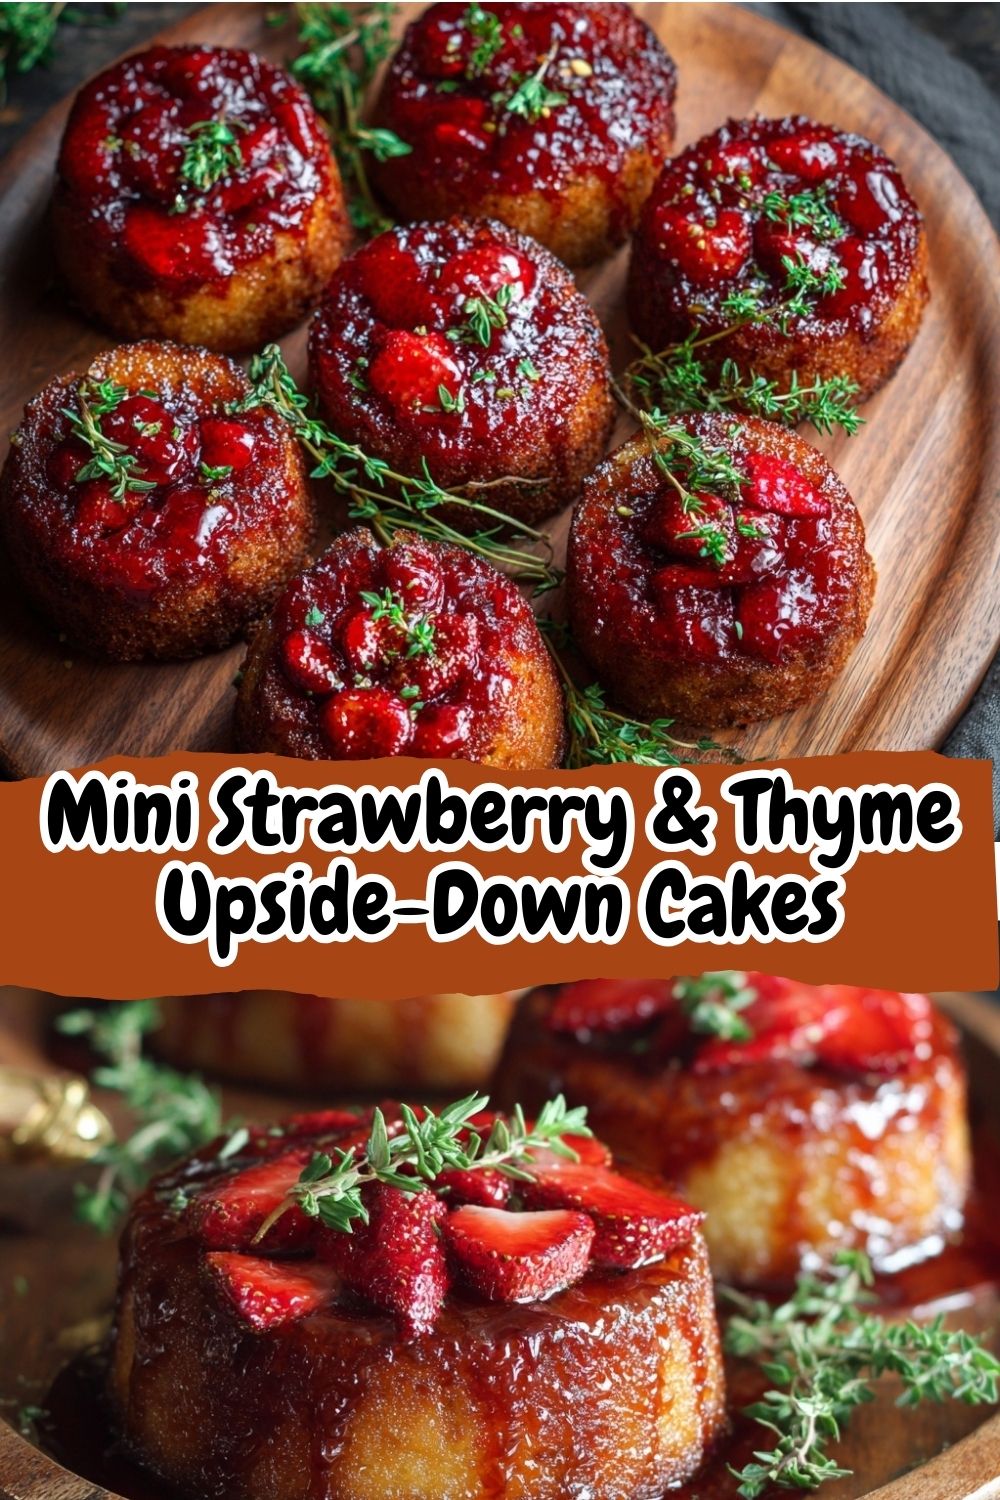
Mini Strawberry & Thyme Upside-Down Cakes: Your New Favorite Holiday Dessert
Hey there, friend! Isla here from BiteTide. Can we talk about holiday desserts for a second? I love a grand, towering pie or a decadent layered cake as much as the next person, but sometimes—especially during the whirlwind of the season—I crave something a little different. Something that feels special, looks stunning, but doesn’t have me chained to the kitchen for hours while the party happens without me.
That’s exactly why I’m so head-over-heels for these Mini Strawberry & Thyme Upside-Down Cakes. They are the perfect answer. Imagine this: tender, golden buttermilk cake, baked right over a layer of jammy, caramelized strawberries and fragrant thyme. When you flip one out onto a plate, you reveal this gorgeous, jewel-toned top that looks like you fussed for ages. The secret? You totally didn’t. These little cakes are deceptively simple, wonderfully forgiving, and pack a flavor punch that’s equal parts cozy comfort and sophisticated wow.
They’re rustic enough for a casual weeknight treat but elegant enough to be the star of your holiday dessert board. They bake up in a standard muffin tin, cook in under 25 minutes, and are portioned perfectly for sharing (or not sharing—I won’t judge). So, if you’re ready to bake something that brings all the festive joy without any of the holiday stress, grab your favorite mixing bowl. We’re about to make some magic.
Print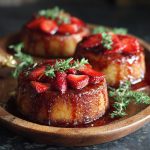
Mini Strawberry & Thyme Upside-Down Cakes : Rustic, Elegant & Perfect for the Holidays
- Total Time: 40 mins
Description
These Mini Strawberry & Thyme Upside-Down Cakes are a charming twist on the classic — tender, golden cakes baked over a layer of caramelized strawberries and infused with earthy thyme. With warm flavors and an elegant, rustic look, they’re perfect for intimate holiday gatherings or a cozy cottagecore dessert board.
Ingredients
Topping:
1 1/2 cups fresh strawberries, sliced
3 tbsp brown sugar
2 tbsp butter
1 tsp fresh thyme leaves
Cake Batter:
1 cup all-purpose flour
1/2 tsp baking powder
1/4 tsp baking soda
Pinch of salt
1/4 cup unsalted butter, softened
1/2 cup granulated sugar
1 large egg
1/2 tsp vanilla extract
1/2 cup buttermilk
Instructions
Preheat oven to 350°F (175°C). Grease a muffin tin or mini cake pan.
In a saucepan, melt butter and brown sugar until bubbling. Stir in thyme and divide mixture evenly into 6 cavities. Top with strawberry slices.
In a bowl, cream butter and sugar until light. Beat in egg and vanilla.
In a second bowl, whisk dry ingredients. Add dry mix and buttermilk to wet in alternating additions.
Spoon batter over the strawberry layer in each mold.
Bake 18–22 minutes until golden and set. Cool slightly, then invert onto a tray while warm.
Garnish with fresh thyme sprigs and serve warm or room temp.
- Prep Time: 20 minutes
- Cook Time: 20 minutes
- Category: Dessert
Nutrition
- Calories: 240
- Fat: 12g
- Carbohydrates: 28g
The Story Behind the Cake: Grandma’s Upside-Down Wisdom
This recipe takes me right back to my grandma’s kitchen, with its checkered curtains and the constant, sweet scent of something baking. She was the queen of “making do” and creating beauty from simplicity. Her signature move was a giant pineapple upside-down cake, baked in a cast-iron skillet. I was mesmerized by the process—the bubbling brown sugar, the careful fruit arrangement, and the grand, theatrical flip onto a platter. It felt like a magic trick every single time.
One summer, when I was about ten, we didn’t have a pineapple. What we did have was a pint of strawberries from the farmer’s market that were almost too ripe and a thriving thyme plant on the windowsill. “Well,” Grandma said with a wink, “let’s see what happens.” We made mini versions in her old muffin tins, and that’s when the real lesson sunk in: the best recipes aren’t about rigid rules. They’re about playing, pairing what you love, and trusting your instincts. That day, the earthy whisper of thyme against the sweet-tart strawberries created a flavor combo that stuck with me for decades. This recipe is my love letter to that kitchen experiment—a little nod to tradition, with a fresh, flavorful twist that’s all my own.
Gathering Your Flavor Allies: The Ingredients
Part of the beauty of this recipe is its short, sweet ingredient list. Every item plays a crucial role in creating that perfect bite. Here’s what you’ll need and why it matters:
For the Caramelized Strawberry Topping:
- 1 1/2 cups fresh strawberries, hulled and sliced: The star of the show! Ripe, in-season berries have the best flavor and natural sweetness. Chef’s Insight: Don’t stress about perfect slices. Rustic, uneven pieces create a beautiful, textured top. If fresh aren’t available, frozen whole strawberries (thawed and patted very dry) can work in a pinch.
- 3 tbsp brown sugar: We’re using brown sugar here for its rich molasses notes. It creates a deeper, more complex caramel with the butter than white sugar would. It’s the secret to that gorgeous, glossy finish.
- 2 tbsp unsalted butter: Combined with the sugar, this creates the luscious caramel base that the fruit bakes into. Using unsalted lets you control the salt level in your dessert.
- 1 tsp fresh thyme leaves: This is the “wow” factor. The herbal, slightly lemony note of thyme cuts through the sweetness and makes the strawberry flavor sing. Substitution Tip: If you’re not a thyme person, try a teaspoon of finely chopped fresh rosemary or a 1/2 teaspoon of vanilla bean paste for a different aromatic twist.
For the Cake Batter:
- 1 cup all-purpose flour: The reliable foundation of our cake. For a slightly denser, more rustic crumb, you could swap in half whole wheat pastry flour.
- 1/2 tsp baking powder & 1/4 tsp baking soda: Our leavening dream team. The baking powder gives the initial lift, and the baking soda reacts with the buttermilk for a tender, fluffy texture.
- A generous pinch of salt: Never, ever skip the salt in baking! It balances the sweetness and amplifies every other flavor in the bowl.
- 1/4 cup unsalted butter, softened: This gives the cake its rich flavor and tender crumb. Pro Tip: “Softened” means it should indent easily when you press it but not be melted or greasy. Take it out of the fridge 30-60 minutes before you start.
- 1/2 cup granulated sugar: Sweetens and helps create a light, airy texture when creamed with the butter.
- 1 large egg, at room temperature: Binds everything together and adds structure. A room-temp egg incorporates much more smoothly into the creamed butter and sugar.
- 1/2 tsp vanilla extract: The classic flavor enhancer. It rounds out the flavors beautifully.
- 1/2 cup buttermilk, at room temperature: The key to super-moist, tangy cake! No Buttermilk? No Problem! Make your own “sour milk”: Add 1/2 tablespoon of lemon juice or white vinegar to a liquid measuring cup, then fill with regular milk to the 1/2 cup line. Stir and let it sit for 5 minutes until it curdles slightly. Good to go!
Let’s Get Baking: Step-by-Step with Chef Isla
Ready? Put on some festive music, tie on your apron, and let’s do this. I’ll walk you through each step with all my favorite hacks to ensure success.
- Preheat & Prep. Crank your oven to 350°F (175°C). This is non-negotiable for even baking. Now, grab a standard 6-cup muffin tin. This is my number one tip: Grease the living daylights out of it! Use butter or non-stick spray, getting into every corner. These cakes need to slide out easily for the big reveal. (If you’re using a non-stick pan, you can be a little less vigorous, but still, don’t skip this step).
- Create the Magic Topping. In a small saucepan over medium heat, melt the 2 tablespoons of butter and brown sugar together. Stir it constantly with a wooden spoon until it’s bubbling, fragrant, and looks like a thin caramel sauce—this takes about 2-3 minutes. Remove it from the heat and stir in the fresh thyme leaves. The heat will wake up the thyme’s beautiful oils. Carefully divide this heavenly syrup evenly among the 6 muffin cups. Now, artfully arrange your strawberry slices over the syrup in each cup. This will be the top of your cake, so have fun with it!
- Mix the Dry Team. In a medium bowl, whisk together your flour, baking powder, baking soda, and that all-important pinch of salt. Whisking by hand for 30 seconds does two things: it combines everything evenly and aerates the flour a bit, which contributes to a lighter cake.
- Cream the Butter & Sugar. In a separate, larger bowl, use a hand mixer (or a stand mixer with the paddle attachment) to beat the softened 1/4 cup butter and granulated sugar together. We’re going for light, pale, and fluffy. This should take 2-3 minutes on medium speed. This step isn’t just about mixing; it’s about incorporating tiny air bubbles that will help our cakes rise. Don’t rush it!
- Bring in the Wet Crew. Beat in the egg and vanilla extract to the creamed mixture until fully combined. It might look a little curdled at this point—that’s totally okay! Scrape down the sides of the bowl to make sure everything is incorporated.
- The Grand Addition. Here’s the method for a perfectly smooth batter: Add about one-third of your dry flour mixture to the wet ingredients and mix on low speed until *just* combined. Follow with half of the buttermilk. Mix. Repeat with another third of flour, the rest of the buttermilk, and finally the last of the flour. Mix only until you no longer see streaks of dry flour. A few small lumps are fine! Overmixing is the enemy of tender cake—it develops the gluten in the flour and can make things tough.
- Fill & Bake. Use a spoon or cookie scoop to divide the beautiful batter evenly over the strawberry layer in each muffin cup. Smooth the tops gently. Slide the tin into your preheated oven and bake for 18 to 22 minutes. You’ll know they’re done when the tops are golden, the edges are pulling slightly away from the pan, and a toothpick inserted into the *cake* part (try to avoid hitting a strawberry below) comes out clean or with a few moist crumbs.
- The Dramatic Flip! This is the fun part. Take the tin out of the oven and let it rest on a wire rack for exactly 5 minutes—no more, no less. This allows the hot caramel to set just enough. Place a baking sheet or large plate over the top of the muffin tin. With confidence (and oven mitts!), firmly grasp the tin and plate together and flip it over in one smooth, decisive motion. Gently lift the muffin tin away. You should hear a satisfying *plop* as each perfect little cake releases. If a strawberry or two sticks, just use a spoon to gently nudge it back onto the cake. They’re very forgiving!
How to Serve These Little Beauties
Presentation is half the fun! Let these cakes cool for about 10 minutes so the caramel isn’t molten, but they are absolutely divine served warm. I love placing each one on a simple, rustic plate or even a small piece of parchment paper for a cottagecore vibe. For the holidays, a dusting of powdered sugar looks like a light snowfall. A dollop of lightly sweetened whipped cream or a small scoop of vanilla bean ice cream takes it over the top. Garnish with a tiny, fresh sprig of thyme for that elegant finishing touch. They’re perfect for a dessert board, paired with cheeses, nuts, and other sweet bites.
Make It Your Own: Flavor Variations & Swaps
The beauty of this recipe is its adaptability. Here are a few ways to ride a different flavor wave:
- Berry Bliss: Swap strawberries for raspberries, blackberries, or a mix. Blueberries work too, but toss them in a teaspoon of flour first to prevent them from sinking too much.
- Herb Swap: Try rosemary instead of thyme for a more piney, intense fragrance. Lemon thyme is also a gorgeous choice.
- Citrus Zing: Add the zest of one orange or lemon to the cake batter for a bright, sunny note.
- Ginger Spark: Add 1/4 teaspoon of ground ginger to the dry ingredients and use 1 tablespoon of finely chopped crystallized ginger in the strawberry topping for a warm, spicy kick.
- Gluten-Free Friendly: Use a 1:1 gluten-free all-purpose flour blend (like Bob’s Red Mill or King Arthur). The result will be slightly more delicate but just as delicious.
Isla’s Chef Notes & Kitchen Confessions
This recipe has been my holiday go-to for years, and it’s evolved with me. The first time I made them for a friendsgiving, I was so nervous about the flip that I practiced on an empty, greased tin first! (Not a bad idea for first-timers, honestly). Over time, I’ve learned that these cakes are incredibly resilient. I’ve forgotten the thyme, used different sugars, and even subbed in yogurt for buttermilk once in a pantry emergency—they’ve always turned out delicious.
My biggest lesson? Embrace the rustic look. Sometimes the caramel might pool a little on the plate, or a strawberry might be off-center. That’s not a mistake; it’s character! It tells the story of a dessert made by hand, with love. These cakes have this magical ability to make everyone feel like a master baker. So, breathe, have fun, and get ready for the compliments to roll in.
Your Questions, Answered: FAQs & Troubleshooting
Q: My cakes stuck to the pan! What did I do wrong?
A: The most common culprits are not greasing the pan thoroughly or not flipping the cakes while they’re still warm. That 5-minute cooling window is key. If they do stick, don’t panic. Use a small offset spatula or a butter knife to gently loosen the edges, then re-flip. You can always patch any strawberries back on—a little whipped cream covers a multitude of sins!
Q: Can I make these ahead of time?
A: Absolutely! They are fantastic make-ahead desserts. Bake and cool them completely, then store in an airtight container at room temperature for up to 1 day. You can also freeze the un-topped cakes for up to a month. To serve, thaw and warm gently in a 300°F oven for 5-10 minutes. I don’t recommend making the caramel topping ahead, as it can seep too far into the cake.
Q: My caramel topping seeped into the cake and made the bottom soggy. Help?
A: A little seepage is normal and delicious! But if it’s excessive, it’s likely because the caramel was too thin. Next time, let the butter-sugar mixture cook for an extra 30 seconds until it thickens slightly more before dividing it into the cups. Also, make sure your cake batter is thick enough to sit on top of the fruit without immediately sinking.
Q: I don’t have a muffin tin. Can I use something else?
A: Yes! A jumbo muffin tin will make 4 larger cakes (increase bake time by 5-7 mins). You can also use a 9-inch round cake pan to make one large cake—bake for 30-35 minutes. For a truly rustic look, small (6-ounce) oven-safe ramekins work beautifully, baked directly on a sheet pan.
Nutritional Info (Per Mini Cake)
Calories: ~240 kcal | Carbohydrates: 28g | Protein: 3g | Fat: 12g | Sugar: 16g
Note: Nutritional information is an estimate provided for informational purposes. It may vary based on specific ingredients used and portion sizes.