Pizza Night, Reinvented: Meet Your New Favorite Appetizer
Hey there, flavor friend! Isla here. Can we talk about pizza for a second? I mean, truly, is there anything more universally loved than that perfect combination of cheesy, saucy, carb-y goodness? It’s the food of celebrations, late-night cravings, and “I-don’t-want-to-cook” nights. But let’s be real—sometimes, even ordering a pizza feels like a commitment. Do we get one topping? Three? And who gets the last slice? The struggle is real.
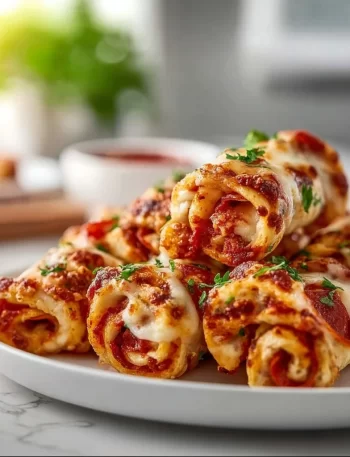
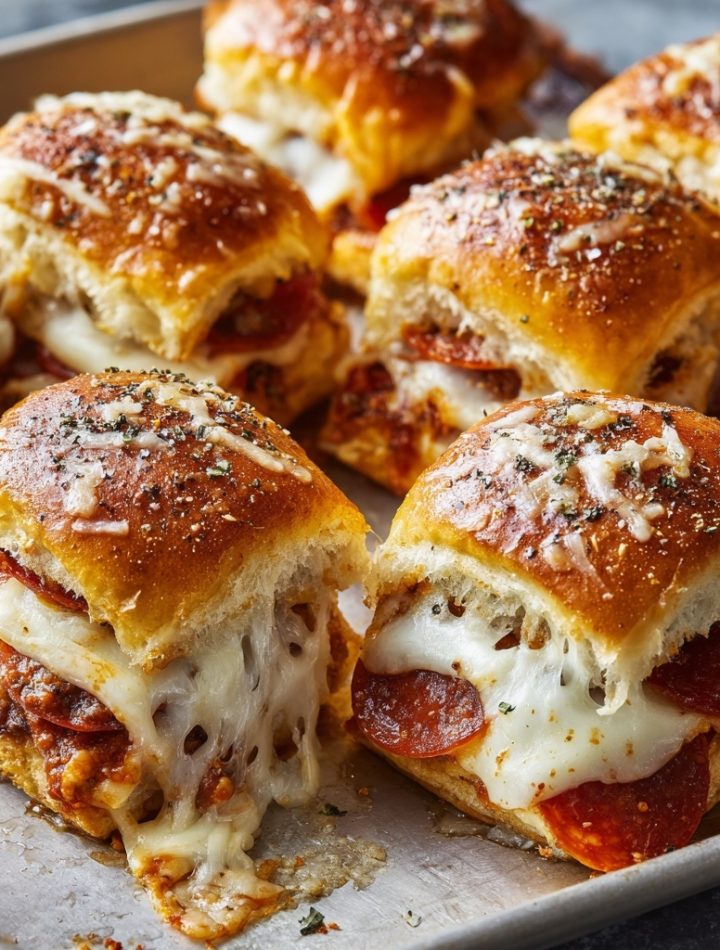
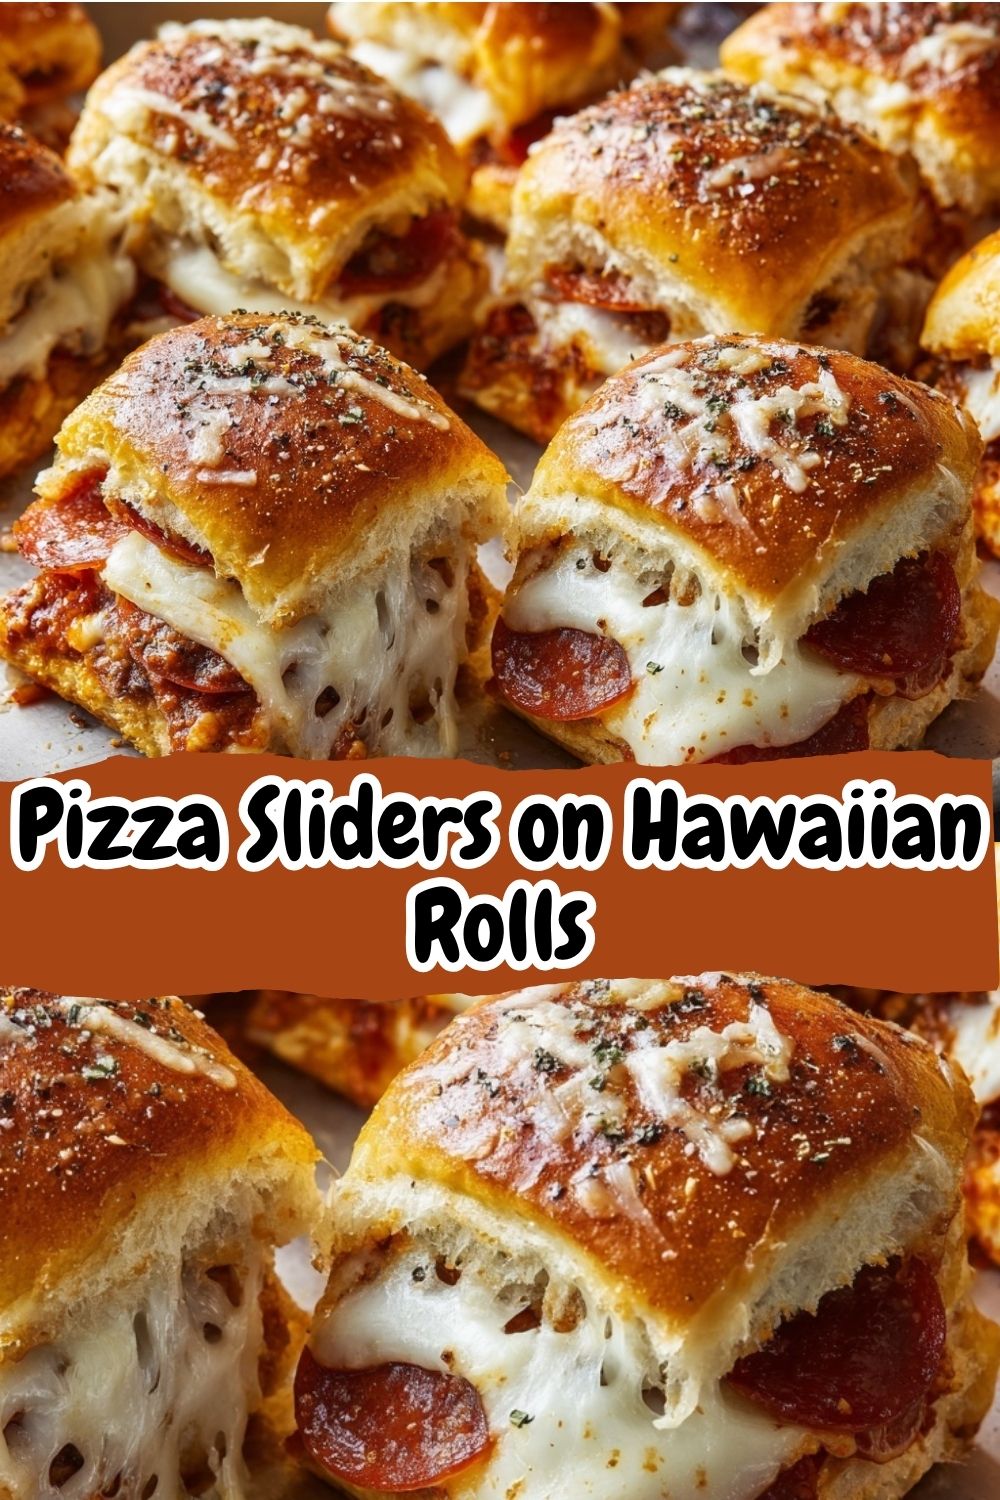
That’s exactly why I’m so ridiculously excited to share this recipe with you today. We’re taking everything we adore about a classic pepperoni pizza and transforming it into the most shareable, craveable, and downright fun party appetizer or easy weeknight dinner you’ve ever met: Pizza Sliders on Hawaiian Rolls.
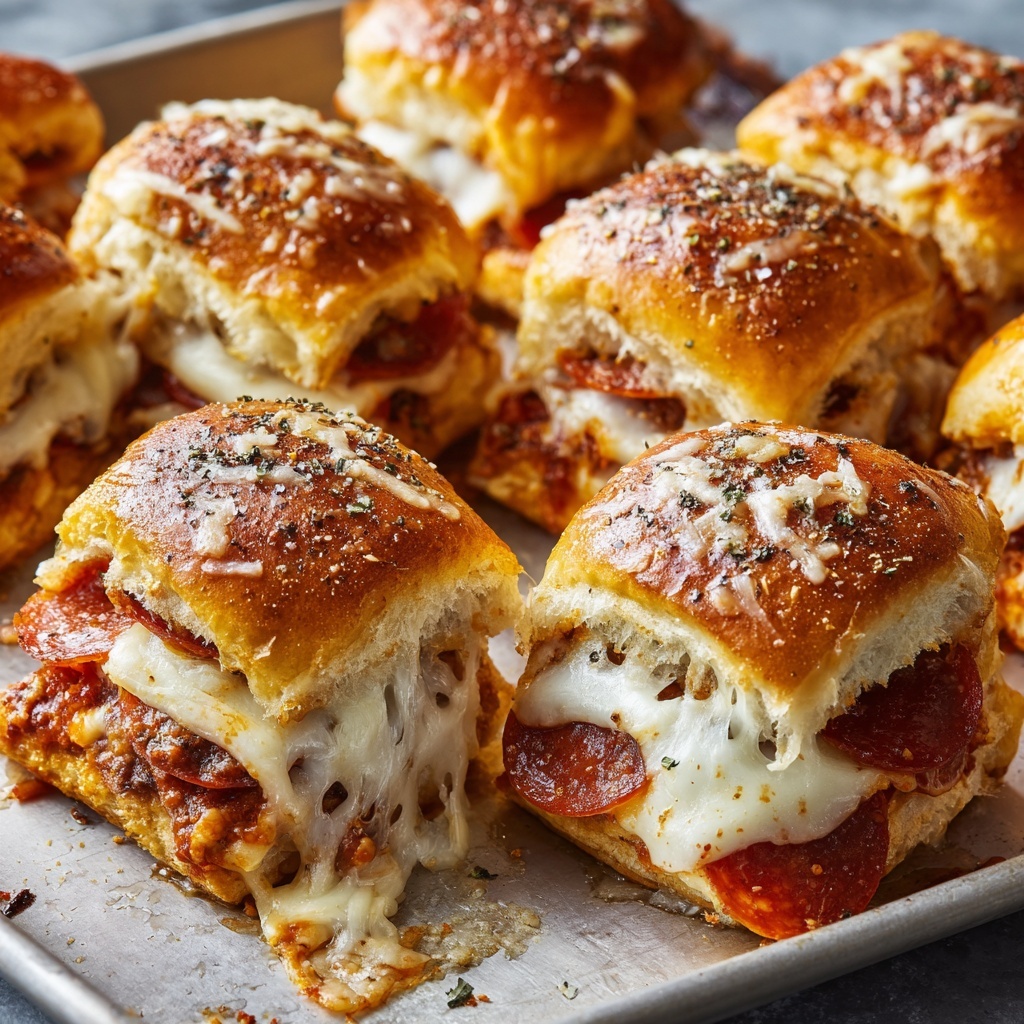
Imagine this: soft, slightly sweet Hawaiian rolls hugging a generous layer of zesty pizza sauce and a ridiculous amount of melted mozzarella cheese. We’re stuffing them with mini pepperoni, brushing the tops with garlicky, herbed butter, and baking them until the cheese is a glorious, pull-apart waterfall and the tops are golden brown. They’re like a pizza party and a slider party had a delicious baby, and we’re all invited. The best part? You go from zero to hero in about 30 minutes, with barely any cleanup. So, tie back your hair, preheat that oven, and let’s make some magic happen.
A Slice of Memory: Why These Sliders Hit Different
This recipe always takes me right back to my best friend’s house in high school. Her mom, Sarah, was the unofficial “Snack Queen” of our friend group. Every Friday night, without fail, her kitchen would become our headquarters, filled with music, gossip, and the incredible smell of whatever she was whipping up for us.
One particularly chaotic night, we had a last-minute movie marathon planned, and Sarah realized she had forgotten to order the pizzas. The groans from a pack of hungry teenagers were deafening. But with a wink, she raided the fridge and pantry. She emerged with a pack of rolls, some leftover spaghetti sauce, a bag of shredded cheese, and pepperoni. In what felt like mere minutes, she assembled this incredible pan of gooey, buttery sliders and slid them into the oven. The moment she pulled that bubbling, golden tray out, we fell silent. It was a miracle. We devoured the entire pan, and I remember thinking, “This is it. This is the secret to feeding a happy crowd.” It wasn’t fancy, but it was made with love and a little bit of kitchen genius—exactly the kind of food I built BiteTide on.
Print
Pizza Sliders on Hawaiian Rolls : Cheesy, Saucy, and Pull-Apart Perfection
- Total Time: ≈ 25‑30 mins
- Yield: 12 sliders 1x
Description
Soft, sweet Hawaiian‑roll buns layered with pizza sauce, melty cheese and pepperoni (or your favourite toppings), brushed with garlic‑butter and baked to pull‑apart perfection.
Ingredients
- 1 package (12‑count) Hawaiian sweet rolls (kept connected as a slab)
- ¾ to 1 cup pizza or marinara sauce
- 2½ cups shredded mozzarella cheese (divided)
- ≈ 30–40 slices pepperoni (or other pizza topping)
- ½ stick (≈ ¼ cup / 57 g) unsalted butter, melted
- 2 Tbsp grated Parmesan cheese
- 2 tsp dried Italian seasoning (or oregano)
- ½ tsp garlic powder (or 1 clove fresh garlic, minced)
- Salt & pepper, to taste
Instructions
- Pre‑heat the oven to 375 °F (≈ 190 °C). Lightly spray a 9×13‑inch baking dish (or similar) with non‑stick cooking spray. :contentReference[oaicite:0]{index=0}
- Keeping the buns connected, use a large serrated knife to slice the roll slab horizontally so you have a bottom layer and a top layer of buns. :contentReference[oaicite:1]{index=1}
- Place the bottom half in the prepared baking dish, cut side up.
- Spread the pizza (or marinara) sauce evenly over the bottom layer of rolls. :contentReference[oaicite:2]{index=2}
- Sprinkle half of the shredded mozzarella cheese over the sauce.
- Arrange the pepperoni slices (or your chosen toppings) evenly over the cheese.
- Sprinkle the remaining mozzarella cheese over the pepperoni layer.
- Place the top half of the rolls back over the layered bottom half.
- In a small bowl, combine the melted butter, grated Parmesan, garlic powder (or minced garlic), Italian seasoning, and a pinch of salt and pepper. Whisk to combine. :contentReference[oaicite:3]{index=3}
- Brush the butter‑cheese mixture evenly over the tops of the rolls (and allow some to drizzle into the crevices). :contentReference[oaicite:4]{index=4}
- Cover the baking dish with aluminum foil and bake for about 12‑15 minutes, until the cheese is melted and the rolls are heated through. :contentReference[oaicite:5]{index=5}
- Remove the foil and bake for an additional 3‑5 minutes (or until the tops are lightly golden and the butter mixture has soaked in). :contentReference[oaicite:6]{index=6}
- Remove from oven, let rest for 2‑3 minutes to set slightly, then cut between each roll to separate into individual sliders and serve warm.
- Prep Time: 10 mins
- Cook Time: 15‑20 mins
- Category: Appetizer
- Method: Baked slab sliders
Nutrition
- Serving Size: 1 slider
- Sugar: ≈ 3‑5 g†
- Fat: ≈ 9‑12 g†
- Saturated Fat: ≈ 4‑6 g†
- Unsaturated Fat: ≈ 3‑5 g†
- Trans Fat: ≈ 0 g
- Fiber: ≈ 1 g
Gathering Your Flavor Crew: The Ingredients
Here’s your shopping list for pull-apart perfection! I’ve included some of my favorite chef insights and swaps so you can make this recipe your own.
- 1 pack (12-count) Hawaiian Rolls: Don’t you dare separate these little clouds of joy! We’re slicing the entire sheet horizontally to create a top and bottom “slab.” Their signature hint of sweetness is the perfect counterpoint to the savory pizza fillings. Chef’s Insight: If you’re in a pinch, any soft dinner rolls will work, but the Hawaiian rolls are a game-changer for flavor and texture.
- 1 cup Pizza Sauce or Marinara: This is the flavor foundation. Use a good-quality jarred sauce you love, or if you’re feeling fancy, whip up a batch of your own. Substitution Tip: No pizza sauce? A can of crushed tomatoes seasoned with a pinch of salt, dried oregano, and a garlic clove works beautifully.
- 2 cups Shredded Mozzarella Cheese: We’re going for maximum meltiness here. I like to shred a block of low-moisture mozzarella myself because it melts better than the pre-shredded kind (which has anti-caking agents). Chef’s Insight: For an extra flavor boost, use a mix of mozzarella and provolone!
- ½ cup Mini Pepperoni or Chopped Regular Pepperoni: The mini ones are just so cute and fit perfectly, but chopping regular slices works just as well. They get a little crispy around the edges as they bake. Substitution Tip: Not a pepperoni person? Diced ham, cooked Italian sausage, or even salami are fantastic alternatives.
- ½ teaspoon Italian Seasoning: We’re amplifying those classic pizza parlor vibes. This little sprinkle makes a big difference.
- 2 tablespoons Butter, melted: This, my friends, is the secret to that gorgeous, glossy, golden-brown top.
- 1 Garlic Clove, minced: We’re infusing the butter with fresh garlic for an aromatic punch that will make your kitchen smell incredible.
- Optional Toppings: This is your canvas! I love adding sliced black olives for a briny bite, diced green peppers for crunch, or a sprinkle of red pepper flakes for heat. Get creative!
Let’s Get Building: Your Step-by-Step Guide to Slider Stardom
Okay, team! Let’s assemble our masterpiece. I’m walking you through each step with all my favorite little hacks to ensure your sliders are absolutely flawless.
- Preheat and Prep: First things first, get that oven heating to a cozy 375°F (190°C). While it’s warming up, line a 9×13 baking dish with foil or parchment paper. Chef’s Hack: This isn’t just for easy cleanup! It also makes lifting the entire block of sliders out of the pan a breeze for cutting and serving.
- The Great Slice: Take your entire sheet of Hawaiian rolls and, using a long, serrated bread knife, slice them in half horizontally. You want one even top slab and one even bottom slab. Keep them connected! Chef’s Tip: A gentle sawing motion works best here—don’t press down or you’ll squish the rolls. Place the bottom half of the rolls snugly into your prepared baking dish.
- Sauce It Up: Now, grab your pizza sauce and spread it evenly over the bottom layer of rolls. A small offset spatula is perfect for this, but the back of a spoon works great, too. Get all the way to the edges! Chef’s Insight: Don’t over-sauce! A thin, even layer is key. Too much sauce can make the bottom rolls a bit soggy.
- The Cheesy, Meaty Layer: Time for the good stuff! Sprinkle on that glorious mountain of shredded mozzarella, making sure to cover every nook and cranny. Then, scatter your mini pepperoni (and any other toppings you’re using) evenly over the cheese. Chef’s Hack: For the ultimate cheesy pull, I like to reserve a small handful of cheese to sprinkle on top of the pepperoni as well. It acts like glue to hold everything together.
- Put a Lid On It: Gently place the top half of the rolls back on, like you’re putting the lid on the most delicious sandwich ever.
- The Golden Glaze: In a small bowl, mix your melted butter with the minced garlic and Italian seasoning. Using a pastry brush, generously brush this magical mixture all over the tops of the rolls. Don’t be shy! This is what gives them that beautiful color and incredible flavor. Chef’s Tip: If you have any leftover butter mixture, you can even carefully brush a little on the sides of the rolls.
- Bake to Perfection: Loosely cover the entire pan with aluminum foil. This is crucial! It traps the steam and gently heats the sliders through without over-browning the tops. Bake covered for 15 minutes. Then, remove the foil, and let them bake for another 5-7 minutes, uncovered, until the cheese is bubbly and the tops are a perfect golden brown.
- The Hardest Part—The Wait: Pull the pan out of the oven and let it rest for about 5 minutes. I know, the aroma is torture, but this rest time allows the cheese to set just enough so that when you slice them, they hold their shape beautifully instead of oozing out everywhere at once.
- Slice and Serve! Use a sharp knife to slice along the roll seams, creating 12 perfect, individual sliders. Transfer them to a platter, watch everyone’s eyes light up, and get ready for the compliments to roll in.
How to Serve These Pull-Apart Stars
Presentation is part of the fun! I love serving these right in the baking dish for a rustic, family-style vibe. Place the whole pan in the middle of the table with a stack of napkins and let everyone dig in. For parties, transfer them to a large wooden board or platter. A little bowl of extra warmed pizza sauce or ranch dressing for dipping is never a bad idea. They’re the ultimate party appetizer, a superstar game-day snack, or a fun, hands-on dinner paired with a simple green salad or some carrot and celery sticks.
Ride the Flavor Wave: Creative Twists & Swaps
The beauty of this recipe is its versatility. Don’t be afraid to play with the fillings! Here are a few of my favorite variations:
- Supreme Style: Add diced green bell pepper, thinly sliced red onion, and sliced black olives with the pepperoni.
- Hawaiian Pizza Twist: Swap the pepperoni for diced ham and add a layer of well-drained crushed pineapple. Sweet, salty, and so good.
- Meat Lover’s Dream: Mix cooked and crumbled Italian sausage, chopped bacon, and pepperoni for the ultimate meaty experience.
- Veggie Delight: Skip the meat and load it up with sautéed mushrooms, spinach, sliced olives, and artichoke hearts.
- Breakfast Sliders: Use scrambled eggs, cooked crumbled bacon or sausage, and cheddar cheese for an amazing brunch option.
Isla’s Chef’s Notes: A Few Parting Thoughts
This recipe has become such a staple in my own kitchen, and it’s evolved in so many fun ways. I once made a “Thanksgiving Leftover” version with shredded turkey, cranberry sauce, and brie—don’t knock it ‘til you try it! The basic formula is your best friend: rolls + sauce + cheese + toppings + buttery top.
A funny story: I was making these for a big family potluck once and my nephew, who was about five at the time, stood by the oven the entire time they were baking, chanting “pizza cakes, pizza cakes!” The name stuck with our family, and now whenever I make them, that’s what we call them. It just goes to show that the best recipes aren’t just about feeding people; they’re about creating those little moments of joy and inside jokes. I hope this recipe finds its way into your own family’s rotation and creates some happy, delicious memories for you, too.
Your Questions, Answered! FAQs & Troubleshooting
I’ve made these a million times, so I’ve tackled most of the common questions and hiccups. Here’s the scoop!
Q: Can I make these ahead of time?
A: Absolutely! You can assemble the entire pan (including the butter brush) up to a day in advance. Cover it tightly with plastic wrap and keep it in the fridge. When you’re ready to bake, let it sit on the counter for 20-30 minutes to take the chill off, then bake as directed. You might need to add 2-3 extra minutes to the bake time since you’re starting from cold.
Q: My bottom rolls got a bit soggy. What happened?
A: This usually happens from one of two things: too much sauce or not baking them long enough. Next time, make sure you’re using just a thin, even layer of sauce. Also, ensure your oven is fully preheated and don’t skimp on the covered baking time—that steam is essential for heating everything through properly without over-browning the top.
Q: The cheese leaked out the sides! Is that normal?
A> A little cheesy leakage is totally normal and, in my opinion, a beautiful thing! It gets all crispy and delicious around the edges. To minimize it, make sure your cheese and toppings are contained within the “frame” of the bottom rolls and aren’t spilling over the sides. But honestly, don’t stress about it—it’s a sign of a generously stuffed slider!
Q: Can I use something other than Hawaiian rolls?
A: Of course! Any soft, split-top slider buns or even small, soft dinner rolls will work. The flavor and texture will be different, but still delicious. If using a less sweet roll, you might want to add a tiny pinch of salt to the butter glaze.
Quick Nutrition Note
Prep Time: 10 minutes | Cook Time: 20 minutes | Total Time: 30 minutes | Servings: 12 sliders
Per Slider (approximate): Calories: 230 | Protein: 9g | Fat: 11g | Carbohydrates: 22g | Sugar: 4g | Fiber: 1g