Crispy Fried Mac and Cheese Bites: Your New Party Hero is Here!
Hey there, flavor friend! Isla here from BiteTide, and I am practically buzzing with excitement to share this recipe with you. Let’s be real, sometimes you need a snack that’s not just a snack. It’s an event. It’s the kind of thing that makes people’s eyes light up, the dish that gets a chorus of “Oh, you MADE these?” at a party, and the treat that has you sneaking just one more from the cooling rack before anyone else gets a chance.
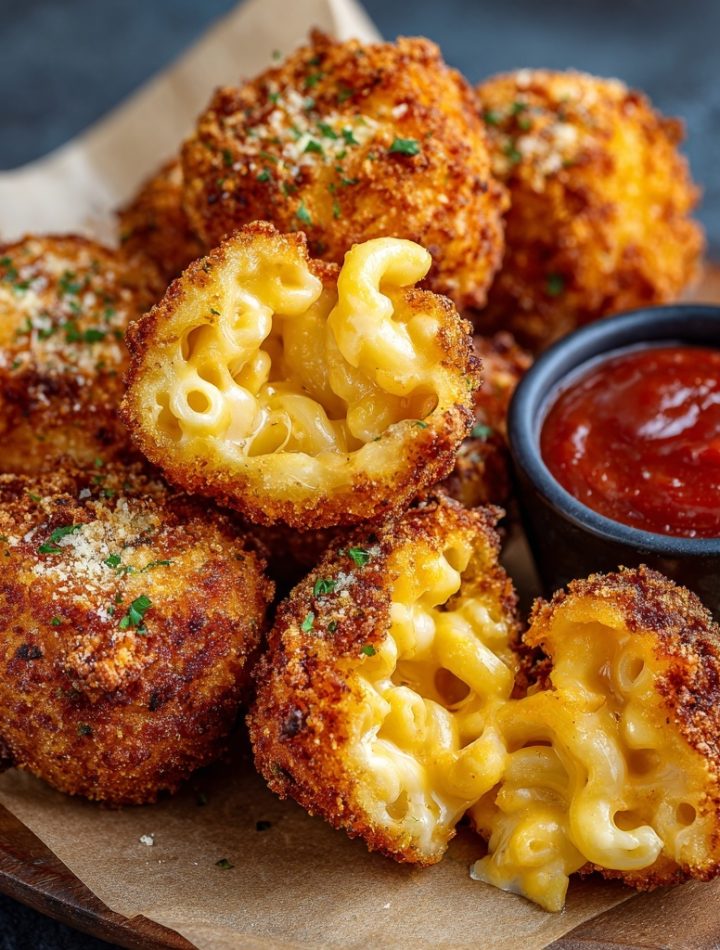
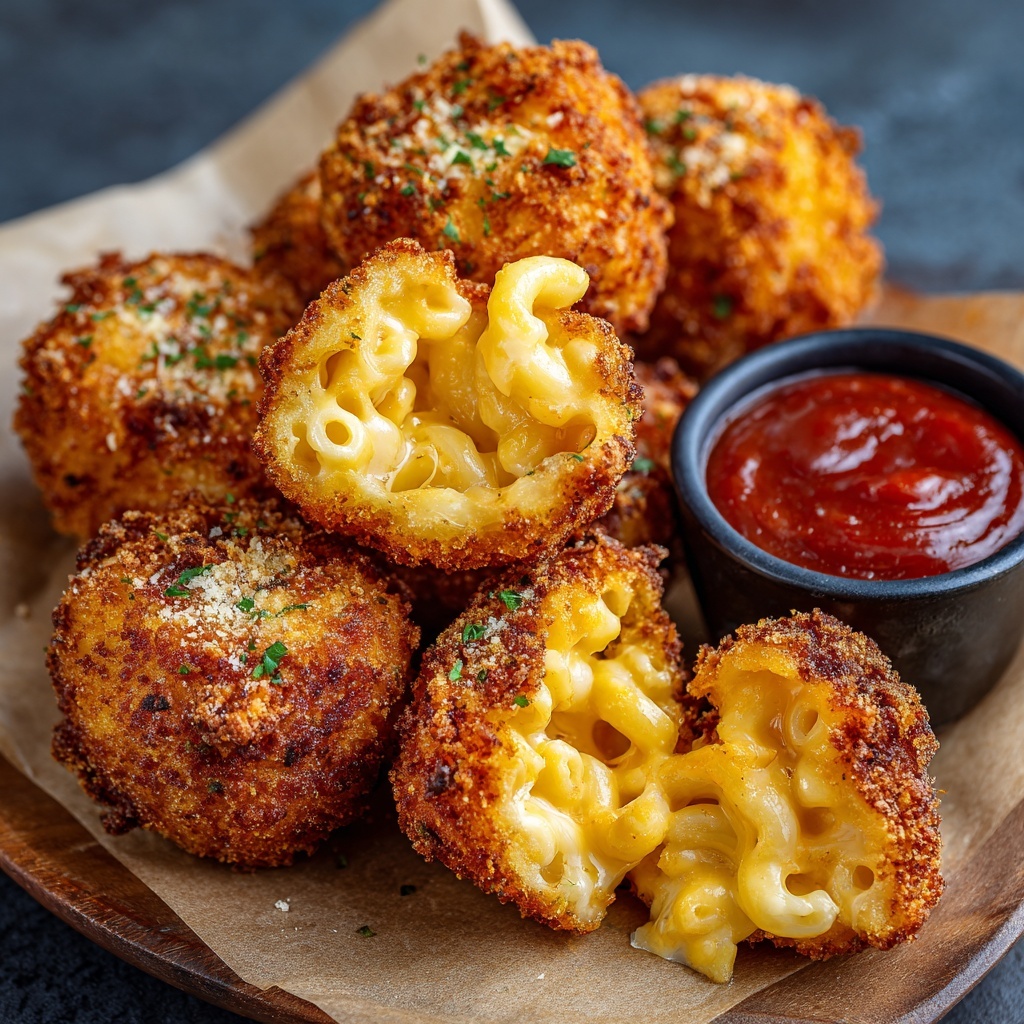
Welcome to the glorious world of Crispy Fried Mac and Cheese Bites. We’re taking the ultimate comfort food—creamy, dreamy, cheesy mac and cheese—and giving it a crunchy, golden, utterly irresistible upgrade. Imagine a perfect little sphere that shatters with a gentle crunch to reveal a river of hot, stretchy, velvety cheese and pasta. It’s a textural dream come true, and I promise you, they are so much fun to make.
I know frying at home can sound a little intimidating, but trust me, we’re keeping it fuss-free. This is a recipe built for real life, for those moments when you want to impress without the stress. Whether you’re gearing up for game day, hosting a movie night, or just rewarding yourself for making it through a Wednesday, these bites are your answer. So, tie on your favorite apron, crank up some good music, and let’s turn that classic mac and cheese into something truly legendary. The flavor wave is coming, and it’s deliciously crispy!
The Messy, Magical Beginning of My Mac & Cheese Love Affair
My love for mac and cheese runs deep, all the way back to my grandma’s sun-drenched kitchen in my coastal hometown. She wasn’t a fancy cook, but she was a brilliant one. Her mac and cheese was a thing of beauty—baked until the top was craggy and brown, with a sauce so rich it could cure any bad day. One rainy afternoon, we had a mountain of the stuff left over. My dad, ever the pragmatist, looked at the solidified block in the baking dish and declared, “We can’t let this go to waste.”
With a twinkle in his eye, he scooped up a cold square, rolled it in some leftover breadcrumbs from our weekend fish fry, and plopped it into a skillet of sizzling oil. What emerged a few minutes later was my first taste of fried mac and cheese. It was a revelation! The outside was shatteringly crisp, a perfect contrast to the hot, molten center. We stood at the stove, burning our fingers and mouths, laughing as cheese stretched from our chins. It was messy, it was spontaneous, and it was pure joy. That’s the spirit I’ve tried to bottle with this recipe—a little bit of nostalgia, a whole lot of flavor, and the happy, unplanned mess that makes cooking so much fun.
Print
Crispy Fried Mac and Cheese Bites : Ooey Gooey Snack Perfection
- Total Time: ≈ 40‑60 minutes including chill
- Yield: about 20‑24 bites (depending on size) — serves ~6‑8 as an appetizer 1x
- Diet: Vegetarian
Description
Golden‑brown, crunchy‑on‑the‑outside bites filled with creamy, gooey macaroni and cheese—perfect for snacking, entertaining, or turning your leftovers into show‑stoppers.
Ingredients
- 4 cups (≈ 500 g) prepared macaroni and cheese (homemade is best) ‑ chilled until firm
- 1 cup (≈ 100 g) extra shredded cheddar (or a blend of cheddar + Monterey Jack) to help bind and make gooey
- ½ cup (≈ 50 g) all‑purpose flour (for dredging)
- ¼ teaspoon garlic powder
- ¼ teaspoon onion powder
- ½ teaspoon salt
- ¼ teaspoon freshly ground black pepper
- 2 large eggs, beaten
- 2 tablespoons milk
- 1½ cups (≈ 135 g) panko breadcrumbs (or seasoned breadcrumbs) for coating
- Vegetable oil (or canola/peanut) for frying — enough for ≈2–3 inches depth or as per fry method
- Optional garnishes: chopped parsley, flaky sea salt, dipping sauce such as marinara or ranch
Instructions
- Prepare your macaroni and cheese ahead and allow to cool completely. Then refrigerate until firm—this helps it hold its shape when forming bites. :contentReference[oaicite:0]{index=0}
- Once firm, stir in the extra shredded cheddar (or cheese blend) into the chilled macaroni so every bite has extra gooey cheese.
- Scoop out portions of the chilled mac & cheese—about 1½‑2 inches diameter (or use a small ice cream scoop) and shape into balls (or slightly flattened rounds) on a parchment‑lined baking sheet. Freeze for ~30 minutes (or until very firm) to help them hold when frying. :contentReference[oaicite:1]{index=1}
- Prepare three shallow dishes: One with flour + garlic powder + onion powder + salt + pepper; second with beaten eggs + milk; third with panko breadcrumbs.
- Remove chilled macaroni bites from freezer. One by one: dredge in the seasoned flour (tap off excess), then dip into egg‑wash, then roll thoroughly in the panko breadcrumbs to coat. For extra crispness, you can repeat the egg‑wash + panko step twice (double‑coat). :contentReference[oaicite:2]{index=2}
- Heat your oil in a heavy‐bottomed pot or deep fryer to about 350‑375 °F (≈175‑190 °C). Use a thermometer for accuracy. :contentReference[oaicite:3]{index=3}
- Fry the bites in batches—do not overcrowd—until golden brown on all sides, about 2‑4 minutes depending on size/thickness. Transfer to a wire rack or paper‑towel lined tray to drain. :contentReference[oaicite:4]{index=4}
- Serve immediately while hot and crunchy. Garnish with chopped parsley and a sprinkle of flaky sea salt if desired. Offer your favourite dipping sauce on the side (e.g., marinara, ranch, or spicy ketchup).
Notes
- Cold firm macaroni and cheese is much easier to shape and holds together better. If your mac is too loose or crumbly, add extra shredded cheese while still warm, then chill until firm. :contentReference[oaicite:5]{index=5}
- If you prefer a lighter version, you can also bake or air‑fry instead of deep‑frying. For example: after coating, bake at ~200 °C (≈400 °F) for ~15‑20 minutes or air‑fry at ~180 °C (≈360 °F) for ~5‑10 minutes each side until crisp. :contentReference[oaicite:6]{index=6}
- These make fantastic party appetizers or game‑day snacks. They’re best consumed immediately to enjoy their crisp outer coating and gooey interior.
- You can flavour the mac & cheese base however you like—smoked Gouda, bacon bits, jalapeño, or other mix‑ins—just ensure the mixture is firm before shaping and coating.
- Leftover fried bites can be stored in the fridge in an airtight container and reheated in the oven or air‑fryer to retain crispness. But they’re best fresh.
- Prep Time: 20 minutes (plus chill time ~30‑60 minutes)
- Cook Time: 10 minutes (frying) plus heating oil time
- Category: Appetizer / Snack
- Method: Forming + Breaded + Frying
- Cuisine: American Comfort / Finger Food
Nutrition
- Serving Size: 3–4 bites
- Calories: approx. 200‑250 kcal
- Sugar: approx. 2‑g
- Sodium: approx. 350‑mg
- Fat: approx. 12‑g
- Saturated Fat: approx. 6‑g
- Unsaturated Fat: approx. 5‑g
- Trans Fat: 0 g
- Carbohydrates: approx. 18‑g
- Fiber: approx. 1 g
- Protein: approx. 7‑g
- Cholesterol: approx. 25‑mg
Keywords: fried mac and cheese bites, mac & cheese balls, crunchy mac cheese snack, cheese appetizer, party finger food
Gathering Your Flavor Arsenal: What You’ll Need
Here’s your grocery list for cheesy bliss. I’ve included some of my favorite insights and swaps so you can make this recipe your own!
For the Mac and Cheese Base:
- 4 cups elbow macaroni: The classic choice! Its little curves are perfect for holding onto all that cheesy sauce. You can use cavatappi or shells for a fun twist, but elbows are my go-to for maximum nostalgia.
- 4 cups sharp cheddar cheese, shredded: Please, please shred this yourself! The pre-shredded stuff is coated to prevent clumping, which means it won’t melt into that silky-smooth sauce we’re dreaming of. Sharp cheddar gives us that tangy, bold backbone of flavor.
- 2 cups mozzarella cheese, shredded: This is our secret weapon for that epic, Instagram-worthy cheese pull. Its super-stretchy quality is non-negotiable for the perfect ooey-gooey center.
- 4 tbsp butter & 4 tbsp all-purpose flour: This dynamic duo is your roux—the foundation of any great cheese sauce. It’s what thickens the milk into a luscious base.
- 4 cups whole milk: I recommend whole milk for the richest, creamiest result. The fat content is your friend here! For a lighter version, 2% works, but avoid skim milk as the sauce can become thin.
- Salt and pepper to taste: Season as you go! Taste your sauce before adding the pasta and don’t be shy.
- Chef’s Flavor Boost (Optional but Highly Recommended):
- ½ tsp garlic powder: Adds a subtle, savory depth.
- ½ tsp smoked paprika: This is my magic dust. It gives a whisper of smokiness that makes the cheese flavor even more complex.
For the Crispy Breading Station:
- 2 cups all-purpose flour: The first coat! This dry layer helps the egg wash stick, creating a glue for the breadcrumbs.
- 6 eggs, beaten: Your edible glue! A quick beat with a fork is all you need. This is what creates the sealed, crispy shell.
- 4 cups breadcrumbs: I’m a panko girl through and through. Their flaky, light texture gives you an extra-crunchy, shatteringly crisp coating that’s just unbeatable.
- Vegetable oil for frying: You’ll need enough to come up about 2-3 inches in your pot. Canola, peanut, or vegetable oil are perfect with their high smoke points and neutral flavor.
- Flavor Hack for the Breading: Stir ½ cup of grated Parmesan cheese right into your breadcrumbs. It adds a salty, savory, cheesy crunch that takes these bites to a whole new level.
Let’s Get Cooking: The Step-by-Step Magic
Okay, team! Here’s where the fun begins. I’ll walk you through every step with all my favorite chef hacks to ensure your success.
- Cook Your Pasta: Bring a large pot of well-salted water to a rolling boil. Add your elbow macaroni and cook it until it’s just al dente (that means it still has a little bite to it). Why? Because it’s going to keep cooking a bit in the cheese sauce and again when we fry it. We don’t want mushy pasta! Drain it well and set it aside.
- Create the Cheese Sauce (The Roux is Key!): In a large saucepan or Dutch oven, melt the butter over medium heat. Once it’s foaming, whisk in the flour. Now, here’s a pro tip: cook this roux for a full 1-2 minutes, whisking constantly. You want to cook out that raw flour taste. It should smell a little nutty and look bubbly. Slowly, and I mean slowly, pour in the milk while whisking like your snack depends on it (it does!). This constant whisking is the secret to preventing lumps.
- Thicken and Cheese It Up: Keep whisking until the sauce thickens enough to coat the back of a spoon. This usually takes 5-7 minutes. Don’t rush it! Turn the heat down to low. Now, start adding your shredded cheeses by the handful, stirring with a wooden spoon until each addition is fully melted before adding the next. This patience gives you the smoothest sauce. Once all the cheese is in, stir in your salt, pepper, garlic powder, and smoked paprika. Taste it! This is the best part. Adjust the seasoning if needed.
- The Big Combine and The Essential Chill: Dump your drained pasta into the glorious cheese sauce and stir until every single noodle is coated in cheesy happiness. Now, here is the MOST IMPORTANT STEP for forming your bites: transfer the mac and cheese into a greased 9×13 inch baking dish, spread it evenly, and press it down. Pop it into the fridge, uncovered, for at least 2 hours, but ideally overnight. You need it to be completely cold and firm. Trying to roll soft, warm mac and cheese is a recipe for frustration—trust me, I’ve been there!
- Form and Bread Your Bites (The Assembly Line): Once your mac and cheese is firm, use a small cookie scoop or a tablespoon to portion it out. Roll them into tight, compact balls—about the size of a ping pong ball. Now, set up your breading station: one bowl with flour, one with the beaten eggs, and one with the breadcrumbs (and Parmesan, if using). The key to a clean process is to use one hand for the dry ingredients (flour and breadcrumbs) and your other hand for the wet (egg). Roll a ball in flour, shake off the excess, dip it in the egg, let the excess drip off, then roll it in the breadcrumbs, pressing gently to make sure they adhere. Place the finished bites on a baking sheet.
- Fry to Golden Perfection: In a heavy-bottomed pot or Dutch oven, heat your oil to 350°F (175°C). If you don’t have a thermometer, test it by dropping a small breadcrumb in; if it sizzles immediately and floats to the top, you’re good to go. Carefully lower a few bites into the oil using a slotted spoon—don’t overcrowd the pot! Fry them in batches for 2-3 minutes, turning once, until they are a deep, golden brown. The smell will be incredible. Remove them and let them drain on a wire rack set over a baking sheet (this keeps them crispier than draining on paper towels).

Plating Up & Dipping Into Deliciousness
Serve these bites immediately while they’re hot and the cheese is at its peak stretchiness! I love piling them high on a big platter or in a rustic wooden bowl. For the full experience, offer a trio of dipping sauces. My holy trinity is a cool and creamy ranch dressing, a tangy marinara sauce for a pizza-parlor vibe, and a dash of hot sauce or sriracha for those who like a little kick. Scatter some fresh chopped parsley or chives over the top for a pop of color and freshness that cuts through the richness perfectly.
Ride Your Own Flavor Wave: Fun Variations to Try!
Once you’ve mastered the classic, get creative! Here are a few of my favorite twists:
- Bacon & Jalapeño: Stir ½ cup of cooked, crumbled bacon and ¼ cup of finely diced pickled jalapeños into the mac and cheese before chilling.
- Truffle Shuffle: Add a drizzle of truffle oil to the cheese sauce and use Italian-seasoned breadcrumbs for a gourmet touch.
- Buffalo Chicken: Mix in 1 cup of shredded cooked chicken tossed in buffalo sauce. Serve with blue cheese dressing for dipping. Game day heaven!
- Baked, Not Fried (Lighter Option): Arrange the breaded bites on a parchment-lined baking sheet, spray generously with cooking spray, and bake at 425°F (220°C) for 15-20 minutes, flipping halfway, until golden and hot.
- Gluten-Free: Use your favorite GF pasta, a 1:1 GF flour blend for the roux and dredging, and gluten-free panko breadcrumbs.
Isla’s Chef’s Notes: A Few Parting Thoughts
This recipe has evolved so much since that first messy kitchen experiment with my dad. I’ve made it for countless parties, and I’ve learned a thing or two. The biggest lesson? Don’t skip the chill time. I once tried to rush it for a last-minute get-together, and let’s just say I ended up with more of a “mac and cheese fritter” situation than neat little bites. It was still delicious, but not nearly as pretty!
Also, embrace the fact that your hands will get messy during the breading process. It’s part of the fun! I like to put on some great music and get into a rhythm. And finally, be prepared for these to disappear fast. I always make a double batch and freeze half before frying (just place the breaded bites on a sheet tray, freeze solid, then transfer to a freezer bag). You can fry them straight from frozen, just add an extra minute or two to the cooking time. It’s my secret weapon for instant, impressive snacks!
Your Questions, Answered! (FAQs & Troubleshooting)
Q: My cheese sauce broke/got greasy. What happened?
A: This usually happens if the heat is too high when you add the cheese. Cheese should always be melted over low, gentle heat. If it does break, don’t panic! Remove it from the heat and whisk in a tablespoon of cold milk or cream. This can often bring it back together.
Q: Can I make these ahead of time?
A> Absolutely! You have two great options. 1) Make the mac and cheese base and let it chill in the fridge for up to 2 days before forming and frying. 2) Form and bread the bites completely, then freeze them on a sheet pan before transferring to a freezer bag. They’ll keep for up to 3 months. Fry from frozen, no need to thaw!
Q: My bites are falling apart in the oil! Help!
A> This is almost always a chilling issue. The interior needs to be very cold so it sets quickly in the hot oil, creating a seal. Make sure you chill for the full 2 hours, and if your kitchen is warm, even longer. Also, ensure your oil is at the correct temperature (350°F). If it’s too cool, the bites will sit there and absorb oil before sealing, causing them to fall apart.
Q: What’s the best oil for frying?
A> You want an oil with a high smoke point and neutral flavor. My top choices are vegetable, canola, or peanut oil. Avoid olive oil as it has a lower smoke point and will impart its own flavor.
A Quick Nutritional Note
Let’s be real, this is a celebratory treat! Each bite is a little bundle of joy, and here’s a rough estimate of what’s inside. Remember, these are approximations and can vary based on specific ingredients and oil absorption.
- Prep Time: 30 minutes (plus 2+ hours chilling)
- Cook Time: 15 minutes
- Total Time: 45 minutes active
- Yield: About 40 delicious bites
- Per Bite (approx.): Calories: 120 | Protein: 4g | Fat: 7g | Carbs: 10g