
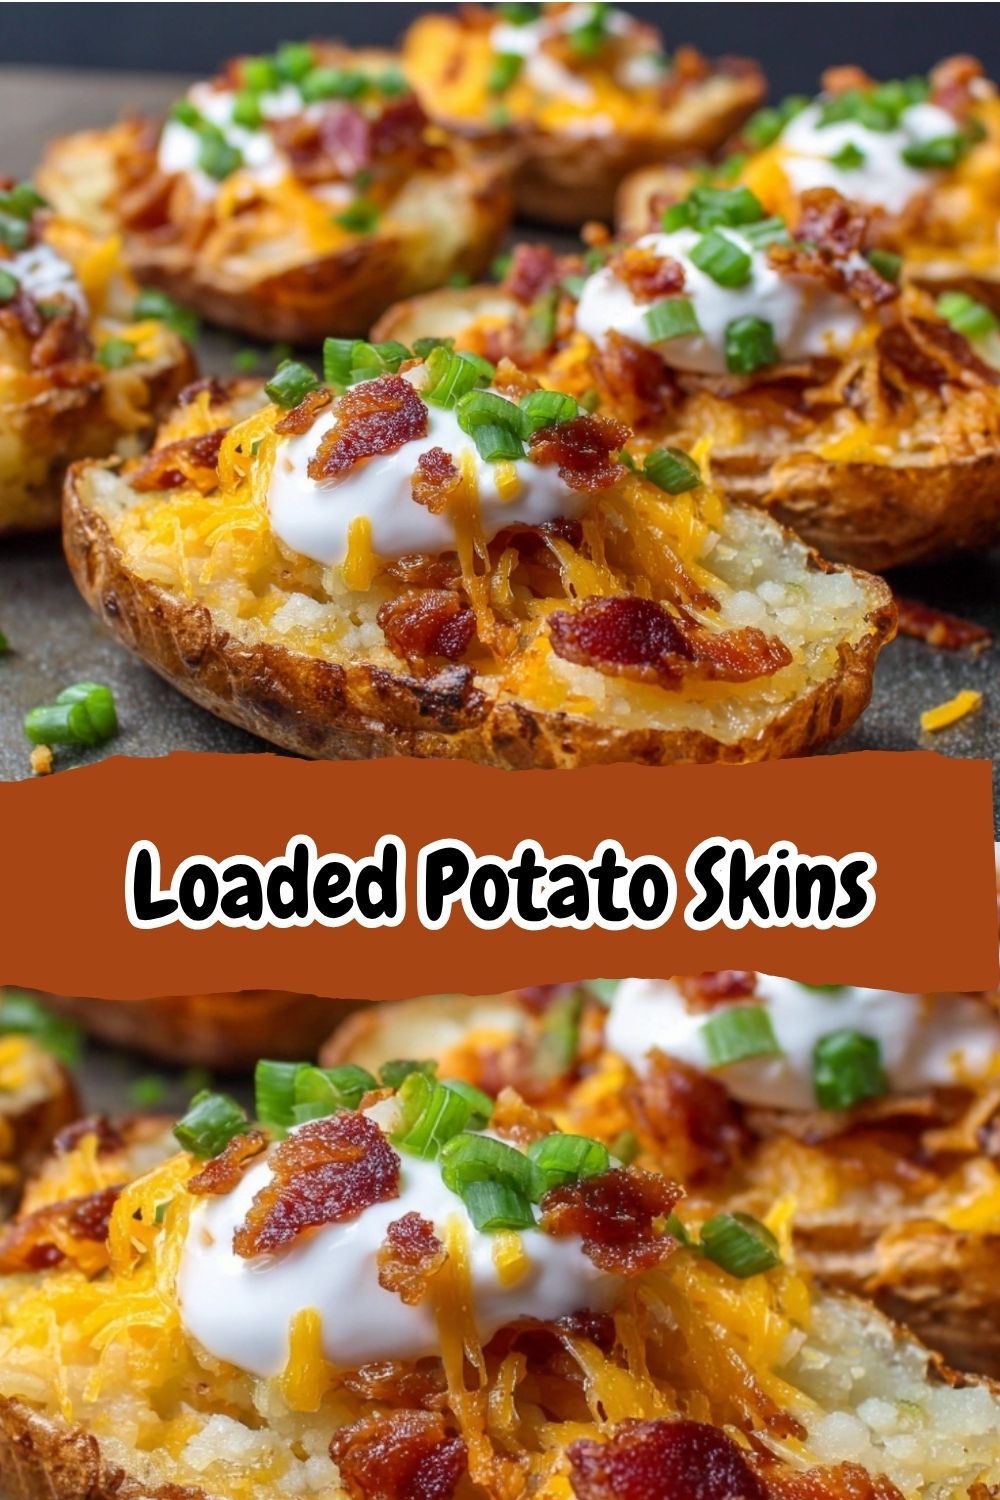
Crispy Loaded Potato Skins with Bacon, Cheddar & Sour Cream
Let’s Make Some Game Day Magic!
Hey there, flavor friend! Isla here from BiteTide, and I am just buzzing with excitement to share today’s recipe. We’re diving headfirst into the ultimate comfort food, the undisputed champion of party snacks, the one and only… Loaded Potato Skins! If you’ve ever found yourself hovering over a platter of these at a party, secretly calculating how many you can take without looking suspicious, then you and I are already on the same wavelength.
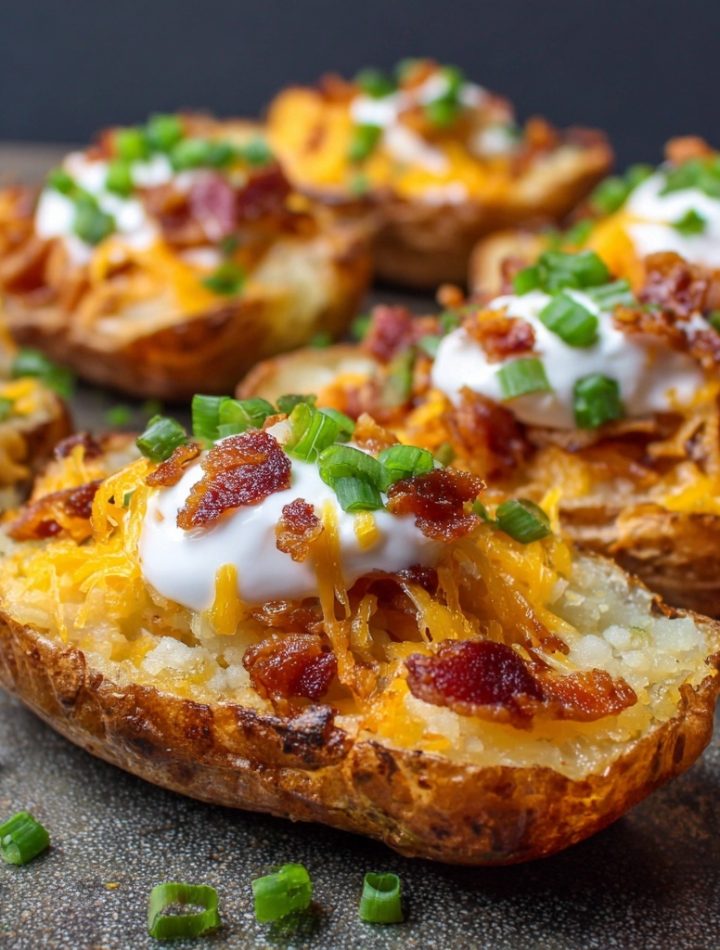
These aren’t just any potato skins. We’re talking about a symphony of textures and flavors that will have you doing a little happy dance right there by the oven. Imagine this: a crispy, golden-brown potato shell that gives you the most satisfying crunch. That shell cradles a river of perfectly melted, sharp cheddar cheese, which in turn hugs a generous scattering of smoky, salty, crumbled bacon. And just when you think it can’t get any better, we finish it all off with a cool, creamy dollop of sour cream and a confetti of fresh, zippy green onions. It’s the perfect bite, every single time.
The best part? While these taste like they came straight from a sports bar’s kitchen, they are incredibly simple to make at home. I’ve stripped away any fussy steps because, let’s be real, we’ve got hungry crowds to feed and games to watch! This recipe is your new secret weapon for tailgates, Saturday night gatherings, or even just a “treat yourself” kind of Tuesday. So, tie on your favorite apron, and let’s turn some humble spuds into the star of the show!
A Tale of Two Halves: My First Potato Skin
I’ll never forget my first encounter with a loaded potato skin. I was about ten years old, and my dad had a bunch of his friends over to watch the big game. The whole house was buzzing with energy, and the kitchen counter was a glorious buffet of snack foods. My dad, who usually ruled the grill, decided to try his hand at something new. He had a bunch of baked potatoes left over from the night before, and with a “waste not, want not” shrug, he started scooping and frying and loading them up.
The smell of frying potato skins and crisping bacon filled our little coastal home, mixing with the salty sea air. I was his official taste-tester, and when he handed me that first, dangerously hot, cheesy half, it was a revelation. The crunch was deafening in the best way, and the combination of hot cheese, cool sour cream, and bacon was a flavor bomb my young taste buds had never experienced. It was more than a snack; it was an event. That memory is baked right into this recipe—a little bit of nostalgia, a whole lot of flavor, and the joyful understanding that the best food is often born from a little kitchen creativity.
Print
Loaded Potato Skins : Crispy, Cheesy & Tailgate-Ready
- Total Time: 1 hour 10 minutes
Description
These Loaded Potato Skins are the definition of game day comfort. Crispy potato shells are filled with melty cheddar, smoky bacon, and finished with cool sour cream and green onions. They’re the perfect grab-and-go snack for tailgates, parties, or anytime you need a salty, cheesy crowd-pleaser.
Ingredients
These Loaded Potato Skins are the definition of game day comfort. Crispy potato shells are filled with melty cheddar, smoky bacon, and finished with cool sour cream and green onions. They’re the perfect grab-and-go snack for tailgates, parties, or anytime you need a salty, cheesy crowd-pleaser.
Instructions
6 medium russet potatoes
2 tablespoons olive oil
Salt and pepper, to taste
1½ cups shredded cheddar cheese
6 slices cooked bacon, crumbled
½ cup sour cream
3 green onions, thinly sliced
Optional twist: Add a sprinkle of smoked paprika, drizzle with ranch, or swap in blue cheese crumbles for a bold twist.
Notes
Preheat oven to 400°F (200°C).
Scrub potatoes clean and pierce with a fork. Bake for 45–50 minutes or until tender. Let cool slightly.
Cut each potato in half lengthwise and scoop out most of the flesh, leaving a ¼-inch shell. Save scooped potato for another use.
Brush potato skins with olive oil, season with salt and pepper, and return to oven for 10 minutes, cut-side down.
Flip, fill each skin with cheddar cheese and crumbled bacon. Bake for another 5–7 minutes until cheese is melted.
Top with sour cream and green onions. Serve hot.
- Prep Time: 10 mins
- Cook Time: 1 hour
- Category: Snack
Gathering Your Flavor Crew
One of the things I love most about this recipe is the beautiful simplicity of the ingredients. This is where we build our flavor foundation, so let’s break it down. You probably have most of this in your kitchen already!
- 6 medium russet potatoes – Russets are our MVP here! Their thick, starchy skin gets incredibly crispy in the oven, and their fluffy interior scoops out cleanly. Don’t be tempted by waxy potatoes like red or Yukon Golds for this specific recipe—trust me on this one!
- 2 tablespoons olive oil – This is our crispy-coating secret weapon! A good brush of oil helps the skins blister and turn into golden, edible bowls. Avocado oil works great too if that’s what you have on hand.
- Salt and pepper, to taste – Season at every stage, my friend! We’ll salt the skins before their second bake to ensure every inch is perfectly seasoned.
- 1½ cups shredded cheddar cheese – I’m a big fan of using a block of sharp or extra-sharp cheddar and shredding it yourself. Pre-shredded cheese is coated to prevent clumping, which can sometimes make it less melty. For that glorious, oozy cheese pull, freshly grated is the way to go!
- 6 slices cooked bacon, crumbled – The smoky, salty superstar! I like to bake my bacon on a sheet pan for easy, hands-off cooking, but pan-frying works perfectly too. For a time-saver, feel free to use real bacon bits from the store, but the flavor of freshly cooked bacon is truly next-level.
- ½ cup sour cream – This is our cool, creamy finish that balances the richness. For a tangier kick, try using Greek yogurt! It works beautifully.
- 3 green onions, thinly sliced – A pop of fresh, oniony flavor and a gorgeous splash of green color. They add a necessary brightness that cuts through all the decadence.
Let’s Get Building: Your Step-by-Step Roadmap to Crispy Perfection
Okay, team! This is where the magic happens. I’ll walk you through each step, sharing all my favorite chef hacks to ensure your potato skins are the crispiest, cheesiest, and most crowd-pleasing version possible. Let’s do this!
- Preheat and Prep: First things first, get that oven roaring hot. Crank it to 400°F (200°C). While it’s heating up, give your russet potatoes a good scrub under cold water. We want to eat those skins, so let’s make sure they’re nice and clean! Pat them dry, then use a fork to pierce each potato 4-5 times. This is a non-negotiable step—it lets the steam escape so your potatoes don’t turn into little spud bombs in your oven!Chef’s Hack: For an even crispier skin, after you scrub and dry the potatoes, rub them lightly with a bit of the olive oil and a sprinkle of salt before the first bake. It gives the skin a head start on the crispiness!
- The First Bake: Place your pierced potatoes directly on the oven rack. I know it’s tempting to use a pan, but this allows the hot air to circulate all around them, giving you an evenly cooked, perfectly tender potato. Bake them for 45-50 minutes. You’ll know they’re ready when you can easily pierce them with a fork and they feel soft and yielding. Now, here comes the hard part… you have to let them cool! I know, the anticipation is real. But handling scorching hot potatoes is a recipe for burnt fingers. Give them about 10-15 minutes to cool down enough to handle.Chef’s Hack: If you’re in a serious time crunch, you can cook the potatoes in the microwave. Pierce them, microwave on high for about 10-12 minutes (turning halfway), until tender. BUT, and this is a big but, you MUST finish them in the oven for the skins to get truly crispy. The microwave will give you a soft skin, so the second bake is crucial!
- Scoop & Save: Once your potatoes are cool enough to handle, slice each one in half lengthwise. Now, using a spoon, carefully scoop out the fluffy potato interior, leaving about a ¼-inch thick shell all the way around. Don’t get too greedy—if you scoop too much, the shell might tear! And whatever you do, DON’T throw that gorgeous scooped-out potato away! It’s pure gold. Store it in an airtight container in the fridge. You can use it for the fluffiest mashed potatoes, thicken a soup, or make killer potato pancakes tomorrow. Zero waste for the win!
- The Crispening (Second Bake): This is the step that separates the good potato skins from the LEGENDARY ones. Brush or lightly rub the inside and outside of each potato shell with olive oil. Don’t be shy! Then, season the insides generously with salt and pepper. Now, place them cut-side DOWN on a baking sheet. This direct contact with the hot pan is the secret to an ultra-crispy bottom and edges. Pop them back in the oven for a solid 10 minutes. You’re looking for that beautiful, golden-brown color and a texture that’s starting to firm up.
- The Grand Finale (Cheese & Bacon!): Take the baking sheet out of the oven (carefully, it’s hot!). Flip the skins over so they’re now cut-side UP. It’s time for the filling! Evenly divide the shredded cheddar cheese among all 12 skins, followed by the glorious crumbled bacon. Get it right into every nook and cranny. Return the pan to the oven for just 5-7 more minutes, or until the cheese is completely melted, bubbly, and just starting to get those lovely browned spots.
- Garnish and Serve: The final flourish! Pull those cheesy, bacony, crispy masterpieces out of the oven. Let them rest for just a minute (the cheese is like molten lava!). Then, artfully dollop each one with a spoonful of cool sour cream and a generous scattering of fresh green onions. Serve them immediately while they’re hot and the cheese is at its peak ooey-gooeyness!
How to Serve These Golden Beauties
Presentation is part of the fun! I love serving these on a big, rustic wooden board or a vibrant platter. Scatter a few extra green onions and maybe a little extra bacon over the top for a “chef’s kiss” look. They are the ultimate finger food, so have plenty of napkins handy. For a full game-day spread, pair them with a big bowl of my Creamy Jalapeño Dip, some classic buffalo wings, and a crisp, cool veggie platter to balance it all out. They’re also a fantastic appetizer to kick off a casual dinner party—your guests will be raving before the main course even hits the table!
Ride Your Own Flavor Wave: Fun Variations!
The beauty of this recipe is its versatility. Once you’ve mastered the classic, feel free to get creative and make it your own! Here are a few of my favorite twists:
- Buffalo Chicken: Mix some shredded rotisserie chicken with your favorite buffalo sauce and spoon it in with the cheese. Top with blue cheese crumbles and a drizzle of ranch after baking.
- Fully Loaded: Add a spoonful of seasoned ground beef or taco-seasoned turkey along with the cheese. After baking, top with sour cream, diced tomatoes, and a slice of jalapeño.
- BBQ Bliss: Swap the bacon for shredded pulled pork and use a Monterey Jack cheese. Top with a drizzle of BBQ sauce and a sprinkle of crispy fried onions.
- Veggie Delight: Skip the bacon and load up with sautéed mushrooms, bell peppers, and onions. A sprinkle of smoked paprika will give you that smoky flavor you’re missing.
- Pizza Party: Fill with shredded mozzarella and pepperoni slices. After baking, top with a dollop of warm marinara sauce and fresh basil.
Isla’s Kitchen Notes & Stories
This recipe has been a part of my life for so long, it’s practically evolved with me. I remember one time, early in my blogging days, I was filming a video for these and I was so focused on talking to the camera that I completely forgot to flip the skins cut-side down for the second bake. The result? Soggy-bottomed potato skins. A total chef fail! But you know what? We laughed, we ate them anyway (because let’s be honest, melted cheese and bacon is still delicious), and I learned a valuable lesson about double-checking my steps. It’s a reminder that even the “fails” in the kitchen can be tasty and that cooking should never be taken too seriously.
Over the years, I’ve found that letting the potatoes cool completely before scooping actually makes it easier to get a clean shell. Sometimes, if I’m super organized, I’ll bake the potatoes the day before, scoop them, and keep the shells in the fridge. On game day, all I have to do is the second bake and filling—it cuts the prep time down to almost nothing! This recipe is a living, breathing thing in my kitchen, and I hope it becomes the same in yours.
Your Potato Skin Questions, Answered!
Over the years, I’ve gotten so many wonderful questions about this recipe. Here are the answers to the most common head-scratchers to ensure your success!
- Q: Can I make these ahead of time?A: Absolutely! You can complete steps 1-3 (baking, cooling, and scooping) up to a day in advance. Just store the empty potato shells in an airtight container in the fridge. When you’re ready, let them come to room temp for about 20 minutes, then proceed with the oil, seasoning, and second bake. They might need an extra minute or two in the oven since they’re starting from cold.
- Q: My potato skins are soggy. What happened?A: The number one culprit for soggy skins is skipping the crucial second bake where you put them cut-side down. That direct heat is essential for crisping up the shell. Another reason could be not using enough oil, or not getting the oven hot enough. Make sure your oven is fully preheated and you’re generous with that olive oil brush!
- Q: What else can I do with the scooped-out potato?A: Oh, so many things! My top three are: 1) Perfect Mashed Potatoes: Just add warm milk, butter, salt, and pepper. 2) Potato Soup Starter: Sauté some onions and celery, add broth and the potato flesh, simmer and blend. 3) Potato Pancakes: Mix the potato with an egg, a little flour, and some seasoning, then pan-fry until golden. It’s a bonus meal!
- Q: Can I air fry the potato skins?A: You sure can! The air fryer is fantastic for this. After scooping, brush with oil and air fry at 375°F (190°C) for about 6-8 minutes, then flip, add toppings, and air fry for another 3-4 minutes until the cheese is melted. Keep an eye on them, as all air fryers are a little different!
Quick Nutrition Breakdown
(Please note: This is an estimate and can vary based on specific ingredients and portion sizes.)
Per Serving (1 potato skin): Calories: 180 | Fat: 10g | Saturated Fat: 4.5g | Carbohydrates: 14g | Fiber: 1g | Sugar: 1g | Protein: 7g | Sodium: 240mg