Your New Favorite Holiday Showstopper: Christmas Cranberry Poke Cake
Hey there, friend! Isla here from BiteTide, coming at you from my flour-dusted kitchen with a recipe that’s about to become the star of your holiday table. Let’s be real: the holiday season is a magical, beautiful, and sometimes totally chaotic whirlwind. Between wrapping gifts, decking the halls, and trying to remember where you stored the “good” tablecloth, the last thing you need is a dessert that demands a culinary degree and three days of your life.
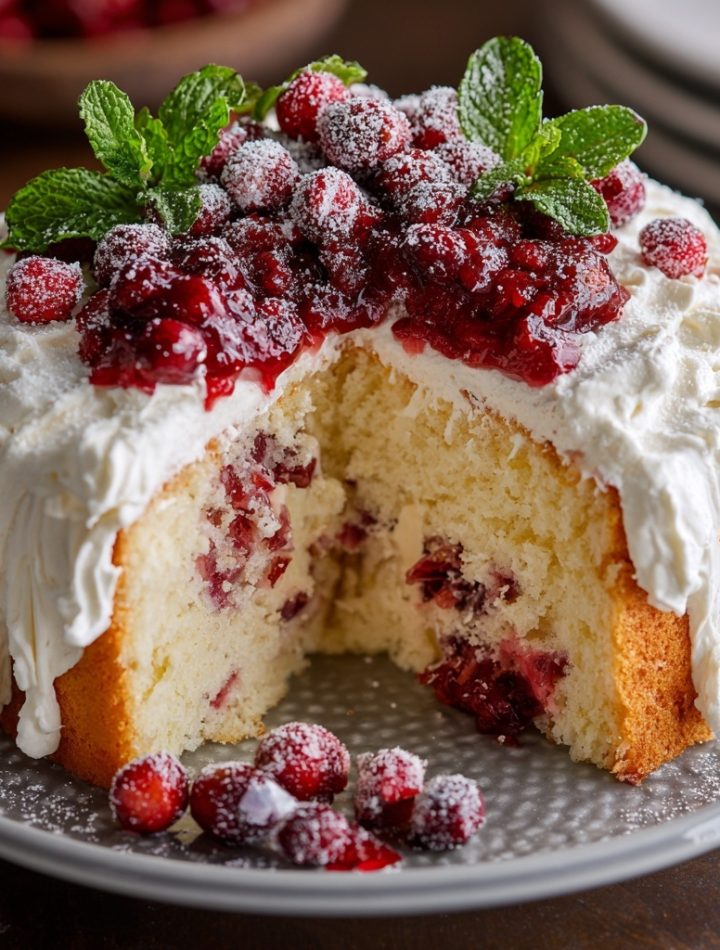
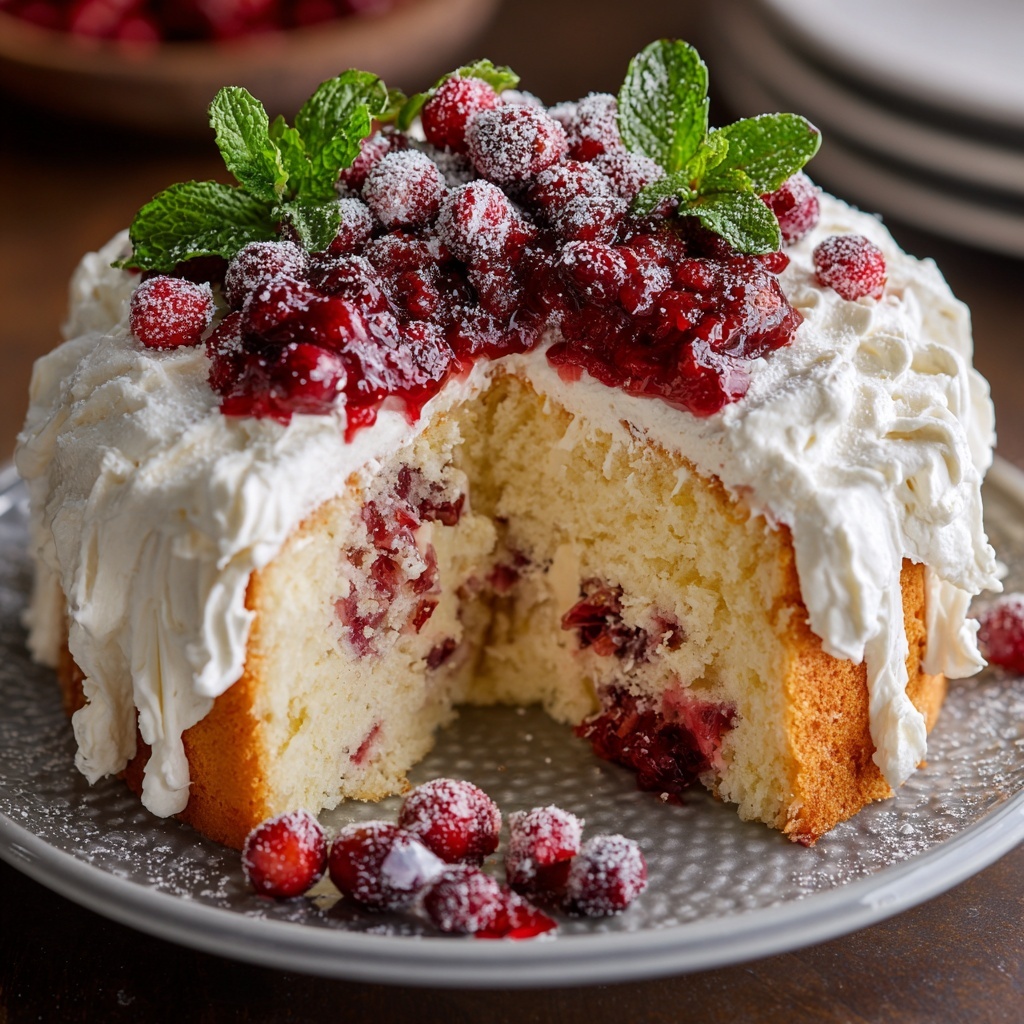
That’s exactly why I’m so obsessed with this Christmas Cranberry Poke Cake. Imagine this: a cloud-like, fluffy white cake, still warm from the oven, gets poked all over with little wells of potential. Then, we pour a vibrant, tangy, and sweet homemade cranberry sauce right over the top, letting it cascade into every nook and cranny. To finish? A billowy blanket of freshly whipped vanilla cream that’s as light as snowfall. The result is a cake that’s impossibly moist, bursting with a gorgeous sweet-tart flavor, and so visually stunning your guests will think you slaved for hours.
This cake is the edible embodiment of holiday joy—it’s festive, fun, and fuss-free. It’s for the busy parent who needs a quick dessert between school plays, the host who wants to impress without the stress, and anyone who believes that a great dessert should make you do a little happy dance. So, tie on your favorite apron, put on some holiday tunes, and let’s make a memory (and a seriously delicious cake) together.
A Splash of Crimson and a Dash of Grandma’s Wisdom
This cake always takes me right back to my grandma’s cozy, cinnamon-scented kitchen. She was the queen of “making do” and creating magic from simple ingredients. One particularly snowy December, she was set to make her famous jelly roll for a church potluck, only to discover a crack right down the center of the delicate sponge. My little heart sank, thinking the dessert was ruined.
But Grandma just winked, crumbled the cake into a dish, poked it with the handle of a wooden spoon, and poured her leftover cranberry-orange compote all over it. She topped it with a dollop of sweetened cream, and what emerged from that “disaster” was the most delicious, messy, joyful dessert I’d ever tasted. It taught me a powerful lesson that I carry into my kitchen every single day: the best recipes aren’t about perfection. They’re about heart, a little improvisation, and the beautiful, flavorful surprises that happen along the way. This Christmas Cranberry Poke Cake is my polished homage to her brilliant, no-waste spirit.
Print
Christmas Cranberry Poke Cake
- Total Time: 3 hours (including chilling)
- Yield: 12–16 servings 1x
- Diet: Vegetarian
Description
Christmas Cranberry Poke Cake is a festive holiday dessert made with tender white cake, tart cranberry sauce, and creamy whipped topping. The cake is ‘poked’ to absorb sweet-tart cranberry flavor, creating a moist and vibrant treat perfect for gatherings.
Ingredients
- 1 box white cake mix (plus ingredients listed on the box)
- 1 can (14 oz) whole berry cranberry sauce
- 1/4 cup water
- 1/4 cup sugar
- 1 tsp vanilla extract
- 1 tub (8 oz) whipped topping (like Cool Whip), thawed
- Optional: sugared cranberries, orange zest, or white chocolate shavings for garnish
Instructions
- Preheat oven and prepare cake mix according to package instructions. Bake in a 9×13-inch pan and let cool slightly.
- In a saucepan, combine cranberry sauce, water, sugar, and vanilla. Simmer until slightly thickened, about 5–7 minutes. Let cool slightly.
- Use the handle of a wooden spoon to poke holes all over the cake.
- Pour or spoon warm cranberry mixture evenly over the cake, allowing it to seep into the holes. Let the cake cool completely.
- Spread whipped topping evenly over the cooled cake.
- Refrigerate for at least 2 hours before serving. Garnish as desired before serving.
Notes
- Use homemade cranberry sauce if preferred.
- Add orange zest to the cranberry mixture for extra flavor.
- Top with sugared cranberries or chopped pistachios for a festive touch.
- Best made a few hours in advance to allow flavors to meld.
- Prep Time: 20 minutes
- Cook Time: 30 minutes
- Category: Dessert
- Method: Baking
- Cuisine: American
Nutrition
- Serving Size: 1 slice
- Calories: 240
- Sugar: 22g
- Sodium: 220mg
- Fat: 10g
- Saturated Fat: 4g
- Unsaturated Fat: 5g
- Trans Fat: 0g
- Carbohydrates: 35g
- Fiber: 1g
- Protein: 2g
- Cholesterol: 20mg
Keywords: cranberry poke cake, Christmas dessert, holiday cake, festive cranberry cake, poke cake
Gathering Your Flavor Crew
Here’s your shopping list for this festive masterpiece! Don’t be shy about making swaps—cooking should be fun, not rigid.
For the Cake:
- 1 box (15 oz) white cake mix: This is our secret weapon for a reliably fluffy and tender base. I always keep a box in the pantry for last-minute magic! Chef’s Insight: Using a white cake mix lets the tart cranberry flavor truly shine, but a yellow cake mix works beautifully for a richer, buttery base.
- 3 large eggs: They provide structure and richness, giving our cake that perfect, stable crumb. Make sure they’re at room temperature for the best volume when you mix the batter.
- ½ cup vegetable oil: Oil keeps the cake incredibly moist and tender, more so than butter, which is key since we’re pouring sauce over it. Substitution Tip: You can swap this for an equal amount of melted (and slightly cooled) coconut oil if you love that subtle tropical note.
- 1 cup water: The simple hydrator for our cake mix. For an extra flavor boost, try using orange juice instead! It pairs phenomenally with cranberry.
- 1 tsp vanilla extract: The classic flavor enhancer that adds a warm, sweet depth to the simple cake base. Don’t skip it!
For the Cranberry Sauce:
- 1½ cups fresh cranberries: The star of the show! Their bright, tart pop is what makes this cake so special and not overly sweet. Chef’s Insight: You can use frozen cranberries in a pinch—no need to thaw, just add a minute or two to the cooking time.
- 1 cup granulated sugar: This sweetens the naturally tart cranberries into a luscious, spoonable sauce. Feel free to adjust to your taste—if you love tart flavors, you can reduce this to ¾ cup.
- ½ cup water: This helps the cranberries break down and creates the syrupy consistency we need for poking.
- 1 tbsp lemon juice: A splash of acidity brightens all the flavors and makes the cranberry taste even more, well, cranberry-ish! It’s a little flavor magic trick.
For the Topping & Garnish:
- 1 cup heavy cream: Also called heavy whipping cream. We’re whipping it ourselves for a light, not-too-sweet topping that’s far superior to any canned version. Pro Tip: Chill your bowl and beaters in the freezer for 10 minutes before you start for the fluffiest, fastest-whipping cream.
- ¼ cup powdered sugar: It dissolves instantly into the cream, giving us a smooth sweetness without any graininess.
- 1 tsp vanilla extract: Because vanilla and cream are a match made in dessert heaven.
- Garnish (optional but highly encouraged!): A handful of fresh cranberries, a few mint leaves for a pop of green, and some shaved white chocolate for a little elegance and creamy sweetness. Go wild and make it pretty!
Let’s Build Some Cake Magic: A Step-by-Step Guide
Ready to create? Follow these steps, and you’ll have a flawless, festive cake in no time. I’ve packed each step with my favorite chef hacks to make you feel like a pro.
Step 1: Bake the Cake
- Preheat and Prep: Fire up your oven to a cozy 350°F (175°C). Now, take your 9×13-inch baking pan and give it a good greasing and flouring. Chef Hack: I like to use the butter wrapper to grease the pan, then add a tablespoon of flour and tap and shake it around until the whole pan is coated. Dump out any excess. This guarantees a clean release every single time!
- Mix the Batter: In a large mixing bowl, combine the cake mix, eggs, oil, water, and that teaspoon of lovely vanilla. Using an electric hand mixer (or a stand mixer with the paddle attachment), beat on medium speed for about 2 minutes. You’re looking for a smooth, pale, and beautifully pourable batter. Little Tip: Don’t overmix! Once the ingredients are combined and smooth, stop. Overmixing can lead to a tough cake.
- Bake to Perfection: Pour that gorgeous batter into your prepared pan and smooth the top with a spatula. Slide it into the preheated oven and bake for 25-30 minutes. The cake is done when the top is a light golden brown and a toothpick poked right into the center comes out clean or with a few moist crumbs. Trust your instincts here!
Step 2: The “Poke” and The Soak
- Cool & Poke: As soon as the cake comes out of the oven, let it cool in the pan on a wire rack for just 10 minutes. It needs to be warm, but not scalding hot. Now for the fun part! Take the round handle of a wooden spoon, the end of a chopstick, or even the tines of a fork, and poke holes all over the surface of the cake. Chef’s Commentary: Don’t be shy! Poke plenty of holes and make sure you go all the way down to the bottom. These are the flavor tunnels for our cranberry sauce!
- Whip Up the Cranberry Sauce: While the cake is cooling, let’s make the sauce. In a medium saucepan, combine the fresh cranberries, sugar, water, and lemon juice. Bring it to a boil over medium-high heat, stirring just until the sugar dissolves. Once it’s bubbling, reduce the heat to a simmer and let it cook for 10-12 minutes. You’ll hear the cranberries pop and sizzle—that’s the sound of flavor being made! The sauce is ready when it’s thickened and coats the back of a spoon. Let it cool for about 5 minutes; it should still be warm and pourable.
- The Big Soak: Slowly and carefully, pour the warm cranberry sauce over the warm cake. Use a spatula to spread it evenly, gently nudging it into all those beautiful holes you created. Watch as the crimson red sauce seeps down, creating a stunning marbled effect inside. This is the moment of transformation!
Step 3: The Fluffy Cloud Topping
- Whip the Cream: Now, let your cake cool completely. This is crucial, or your whipped topping will melt! Once the cake is at room temperature, grab that chilled bowl and beaters. Pour in the heavy cream, powdered sugar, and vanilla. Start beating on low speed, then gradually increase to high. Whip it until soft peaks form—that means when you lift the beaters, the peak of cream curls over gently. Pro Hack: Be careful not to over-whip, or you’ll end up with butter! Stop as soon as you have those lovely, billowy soft peaks.
- Spread the Joy: Dollop all of the whipped cream onto the cranberry-covered cake. Using an offset spatula or the back of a spoon, spread it into an even, swoopy layer, covering the entire cake. This creamy white blanket over the vibrant red underneath is just so festive!
Step 4: Garnish and Serve
- Make it Pretty: This is your chance to be an artist! Scatter a few fresh cranberries across the top, tuck in some bright green mint leaves, and sprinkle with delicate shavings of white chocolate. It instantly elevates the cake from homemade to bakery-beautiful.
- The Final Chill: For the absolute best texture, pop the cake into the refrigerator for at least 30 minutes before slicing. This allows everything to set, making for clean, beautiful slices. Then, all that’s left to do is serve it up and soak in the compliments!
How to Serve Your Masterpiece
I love serving this cake straight from the pan—it’s cozy, approachable, and perfect for a holiday buffet. Use a sharp knife to slice it into 12 generous squares, wiping the blade clean between cuts for pristine edges. For an extra touch of elegance, you can plate each slice and add a small sprig of mint or a few extra cranberries on the side. It pairs wonderfully with a hot cup of coffee, a glass of cold milk, or even a sparkling mimosa for your brunch gathering. The contrast of the cool, creamy topping with the moist, fruity cake is pure bliss.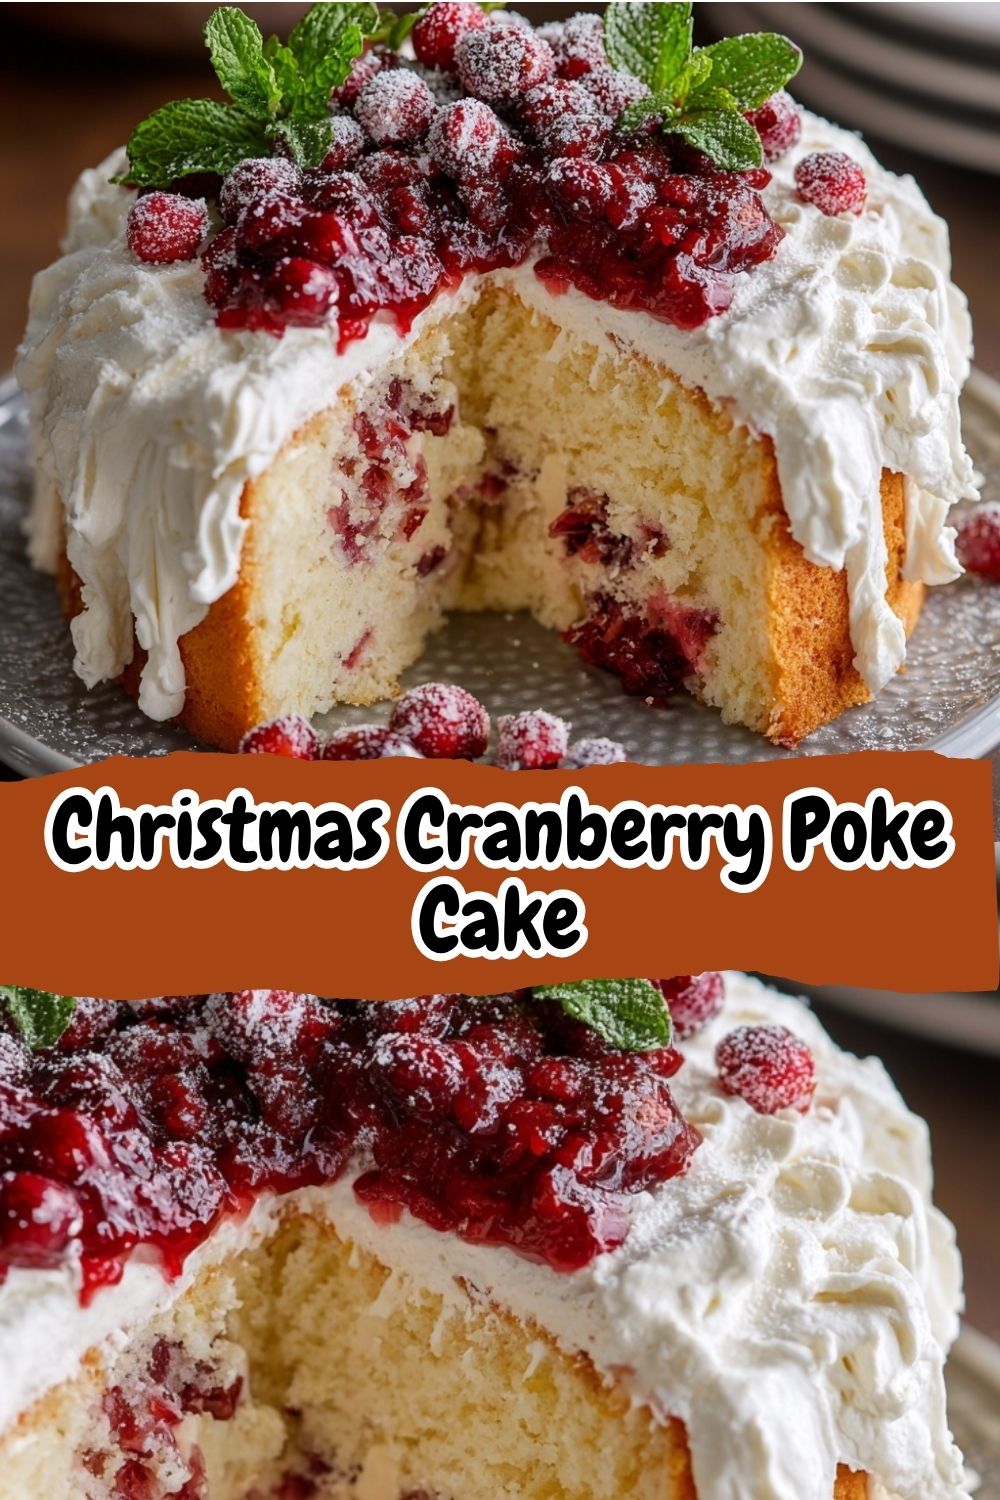
Ride Your Own Flavor Wave: Fun Variations!
This recipe is a fantastic canvas for your creativity! Here are a few of my favorite twists:
- Orange Dream: Add the zest of one orange to the cake batter and use orange juice instead of water in both the cake and the cranberry sauce for a sunny, citrus-kissed version.
- Gingerbread Spice: Swap the white cake mix for a gingerbread cake mix. The warm spices with the tart cranberry is a holiday flavor explosion.
- Coconut Cream Dream: Fold ½ cup of toasted coconut into the whipped cream topping and garnish with more toasted coconut for a tropical holiday twist.
- Lighter Option: Use a sugar-free cake mix and replace the whipped cream with a layer of light Cool Whip or Greek yogurt sweetened with a little honey.
- Boozy & Bold: Stir a tablespoon of orange liqueur like Cointreau or Grand Marnier into the cooled cranberry sauce before pouring it over the cake. Wowza!
Isla’s Chef Notes & Kitchen Confessions
This recipe has been a part of my holiday repertoire for years, and it’s evolved in the best ways. One year, in a frantic pre-Christmas panic, I realized I was out of fresh cranberries. I grabbed a can of whole-berry cranberry sauce from the pantry, gave it a quick whisk to loosen it up, and used that instead. It worked like a charm! So, if you’re in a true pinch, that’s a 5-minute shortcut that still delivers on flavor.
My other favorite kitchen confession? I am physically incapable of poking the holes in a neat, orderly pattern. It always ends up looking like a random constellation, and I’ve decided that’s part of its charm. Every slice is a surprise, with different pockets of tangy cranberry. So please, don’t stress about perfection. Embrace the mess, laugh if some sauce drips down the side of the pan (that’s just extra flavor), and remember what my grandma taught me: the best food is made with joy.
Your Questions, Answered!
I’ve gotten so many wonderful questions about this cake over the years! Here are the answers to the most common ones.
Can I make this cake ahead of time?
Absolutely! This cake is a fantastic make-ahead dessert. You can assemble the entire cake (including the whipped topping) up to 24 hours in advance. Just keep it covered tightly in the refrigerator. The flavors actually meld and get even better overnight. Add any fresh garnishes like mint right before serving so they stay bright and perky.
My cranberry sauce is too runny/thick. What did I do wrong?
This is a common one, and it’s an easy fix! Sauces can vary based on your stovetop and the juiciness of the berries. If it’s too runny, just simmer it for a few more minutes until it reduces to a syrupy consistency. If it’s too thick and jam-like, simply whisk in a tablespoon of warm water at a time until it’s pourable again. Remember, it will thicken a bit more as it cools.
Why did my whipped cream get watery or deflate?
This usually happens for one of two reasons. First, your cream or your tools weren’t cold enough. Cream whips best when it’s icy cold. Second, the cake wasn’t fully cooled before you added the topping. A warm cake will melt the cream. Always ensure both the cake and the cranberry layer are at room temperature before you add the whipped cream.
Can I use a different type of cake mix?
You sure can! While white cake is my favorite, this method is incredibly versatile. A yellow cake, lemon cake, or even a vanilla cake mix would be delightful. I’d avoid chocolate, as it might clash with the cranberry, but otherwise, feel free to experiment with your favorite flavor!