
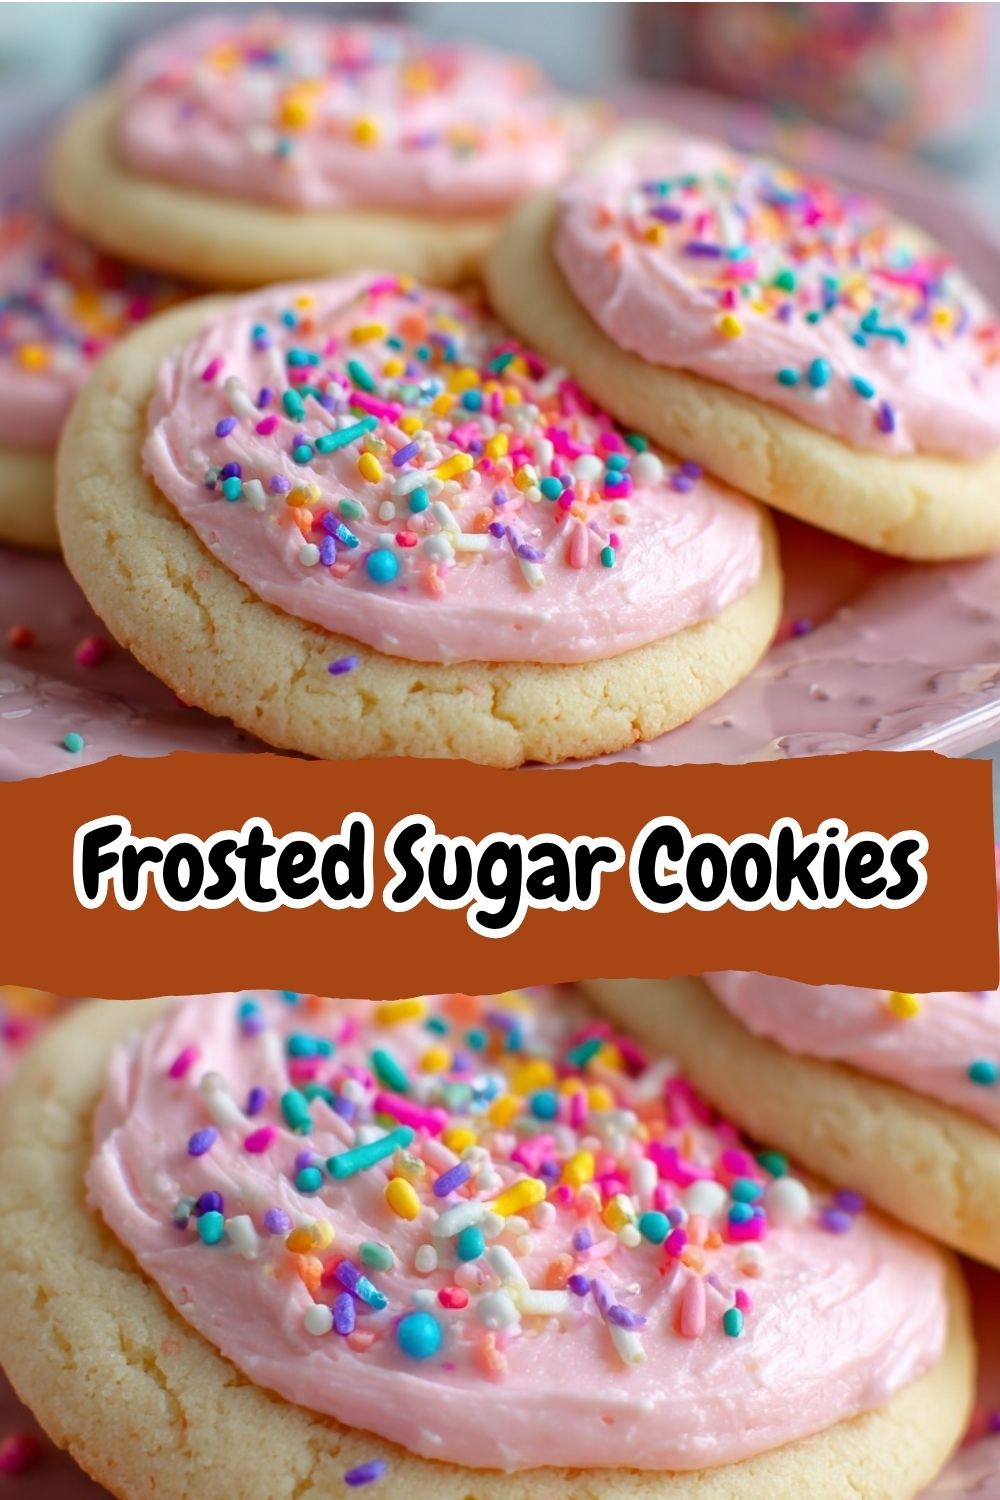
Frosted Sugar Cookies: Your New Go-To for Soft, Sweet, & Bakery-Perfect Bliss
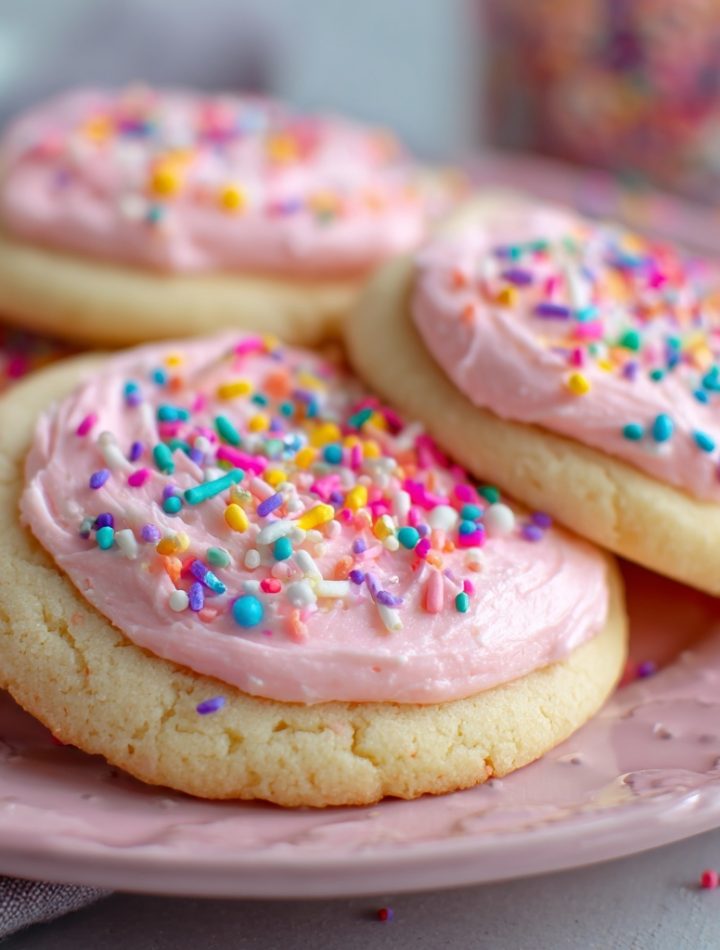
Hey there, friend! Isla here, from my cozy kitchen to yours. Let’s talk about one of life’s simple, soul-hugging pleasures: a perfect frosted sugar cookie. You know the one I mean. It’s soft, almost cake-like, and melts the second it hits your tongue. It’s topped with a layer of creamy, just-sweet-enough frosting that doesn’t crack when you bite into it, and let’s be real, it’s probably covered in a small mountain of colorful sprinkles.
For the longest time, I thought that kind of cookie magic only happened inside professional bakeries. My early attempts? Well, let’s just say they were more like sweet, crunchy hockey pucks or flat, buttery puddles. I’d end up with frosting that slid right off the cookie or a dough that spread across the entire baking sheet. It was a delicious disaster, but a disaster nonetheless.
But after years of testing, tweaking, and probably consuming my weight in butter and sugar, I’ve cracked the code. This recipe is my gold standard. It’s the one I make for birthday parties, holiday cookie swaps, or just a Tuesday that needs a little sparkle. These frosted sugar cookies are consistently soft, fluffy, and hold their beautiful shape. They’re the edible equivalent of a happy dance, and I am so, so excited to share them with you. Forget fussy, complicated methods—we’re making bakery-level magic right in your own kitchen, and I’ll be with you every step of the way. Ready to bake some joy? Let’s dive in!
The Cookie That Started It All: A Sweet Memory with Grandma
My love affair with these cookies started not in a fancy patisserie, but at my grandma’s flour-dusted kitchen table. Every summer visit, the ritual was the same. She’d pull out her big yellow mixing bowl, and I’d pull up a chair, my chin just barely clearing the tabletop. She never worked from a written recipe; it was all in her head, a symphony of scoops and pinches.
I was her official Sprinkle Supervisor. While she expertly creamed the butter and sugar with her strong, steady hands, I was tasked with organizing the rainbow of jimmies and nonpareils into little bowls. The best part was when she’d hand me the beaters to lick. That raw cookie dough, rich with vanilla and almond, tasted like pure, unadulterated childhood. She’d let me frost a few cookies myself, and my creations were always… abstract. Globs of pink frosting piled high, buried under an avalanche of every single sprinkle. She’d look at my messy masterpieces and declare them the most beautiful cookies she’d ever seen. To this day, the scent of almond extract whipping into butter instantly transports me back to that warm, sunny kitchen, filled with laughter and the promise of something sweet. This recipe is my love letter to her, and to every baker who believes the best recipes are the ones that come with a side of happy memories.
Print
Frosted Sugar Cookies : Soft, Sweet & Bakery-Perfect
- Total Time: 1 hour 30 minutes (includes chilling)
- Yield: Makes about 24 cookies 1x
- Diet: Vegetarian
Description
Frosted sugar cookies are soft, sweet, and bakery-perfect with a tender crumb and creamy icing on top. These classic cookies are ideal for holidays, parties, or anytime you want a cheerful, customizable treat.
Ingredients
- 2½ cups all-purpose flour
- ½ tsp baking soda
- ½ tsp baking powder
- ¼ tsp salt
- ¾ cup unsalted butter, softened
- ¾ cup granulated sugar
- 1 egg
- 1 tsp vanilla extract
- ¼ cup sour cream
- For the frosting:
- ½ cup unsalted butter, softened
- 2 cups powdered sugar
- 1–2 tbsp milk or cream
- ½ tsp vanilla extract
- Food coloring and sprinkles (optional)
Instructions
- In a bowl, whisk together flour, baking soda, baking powder, and salt.
- In a large bowl, cream butter and sugar until light and fluffy.
- Beat in the egg, vanilla extract, and sour cream until smooth.
- Gradually add the dry ingredients and mix until a soft dough forms.
- Cover and chill the dough for at least 1 hour.
- Preheat oven to 350°F (175°C) and line baking sheets with parchment paper.
- Roll out dough to about ¼ inch thick and cut into shapes.
- Place cookies on the baking sheet and bake for 8–10 minutes, until just set and barely golden.
- Cool on the pan for 5 minutes, then transfer to a wire rack to cool completely.
- For the frosting, beat butter until creamy. Add powdered sugar, milk, and vanilla. Beat until fluffy. Add food coloring if desired.
- Frost cooled cookies and decorate with sprinkles.
Notes
- Don’t overbake—cookies should stay soft and pale.
- Chilling the dough helps maintain shape and soft texture.
- Frosting can be made ahead and stored in the fridge.
- Freeze unfrosted cookies for up to 2 months.
- Perfect for holidays with themed cutters and colors.
- Prep Time: 20 minutes
- Cook Time: 10 minutes
- Category: Dessert, Cookies
- Method: Baking
- Cuisine: American
Nutrition
- Serving Size: 1 cookie
- Calories: 190
- Sugar: 17g
- Sodium: 70mg
- Fat: 9g
- Saturated Fat: 6g
- Unsaturated Fat: 2g
- Trans Fat: 0g
- Carbohydrates: 25g
- Fiber: 0g
- Protein: 2g
- Cholesterol: 30mg
Keywords: frosted sugar cookies, soft sugar cookies, holiday cookies, cut-out sugar cookies, bakery style cookies, sugar cookie frosting
Gather Your Ingredients: Let’s Talk Flavor & Function!
Here’s everything you’ll need to create this soft cookie perfection. Don’t just think of this as a shopping list—think of it as your flavor roadmap! I’ve included why each ingredient is here and how you can swap things if needed.
For the Super Soft Sugar Cookies:
- 2 cups Cake Flour: This is our secret weapon for that tender, melt-in-your-mouth crumb! Cake flour has a lower protein content than all-purpose, which means less gluten development and a softer, more delicate cookie. Chef’s Insight: If you don’t have cake flour, you can make a DIY version! For every cup of all-purpose flour, remove two tablespoons and replace them with two tablespoons of cornstarch. Whisk it well!
- 1/2 cup All-Purpose Flour: We use a little AP flour to give the cookies just enough structure so they don’t fall apart when you pick them up.
- 1 cup Granulated Sugar: For sweetness, of course, but it also helps creame with the fat to create that light, airy texture.
- 1/2 cup (1 stick) Unsalted Butter, room temperature: Using room temp butter is NON-NEGOTIABLE for proper creaming. It should be soft to the touch but not melted. This builds the cookie’s foundation.
- 1/4 cup Butter-Flavored Shortening: Don’t panic! This isn’t about being old-fashioned. Shortening has a higher melting point than butter, which helps the cookies hold their shape and stay extra soft. The butter-flavored kind gives you that great taste, too.
- 1 large Egg + 1 Egg White: The whole egg provides richness and structure. The extra egg white adds more moisture and tenderness without the fat of another yolk, making the texture even more cloud-like.
- 1 1/2 tsp Baking Powder: Our primary leavening agent! This is what gives the cookies their gentle rise and fluffy lift.
- 1/4 tsp Cream of Tartar: A classic partner to baking powder, it stabilizes the rise and adds a subtle tang that balances the sweetness.
- 1/4 tsp Salt: The flavor enhancer! Salt makes all the other flavors, especially the vanilla and almond, pop. Never skip it.
- 2 1/2 tsp Vanilla Extract: Use the good stuff! This is the heart of the cookie’s flavor.
- 1/2 tsp Almond Extract: This is the magic whisper. It doesn’t make the cookies taste like almond, but it gives them that classic, nostalgic “bakery” flavor profile. Trust me on this one!
For the Dreamy Creamy Frosting:
- 2 1/2 cups Powdered Sugar: The base of our frosting, providing that smooth, sweet, meltaway texture.
- 1/2 cup (1 stick) Unsalted Butter, room temperature: Creaming the butter first makes the frosting light and fluffy, not gritty.
- 2–3 tbsp Milk: Whole milk is best for richness, but any milk will work. We add this gradually to get the perfect spreading consistency.
- Pinch of Salt: Again, this cuts the overwhelming sweetness and makes the frosting taste more complex.
- 1–2 drops Pink Food Coloring (optional): Gel food coloring is best as it won’t water down your frosting, but a drop or two of liquid works fine for a soft pastel hue.
- Sprinkles!: Because joy is non-negotiable. Use whatever makes your heart happy!
Let’s Bake! Your Step-by-Step Guide to Cookie Perfection
Okay, team. Aprons on! This is where the fun begins. Follow these steps, and you’ll be a sugar cookie superstar in no time. I’ve packed each step with my best chef hacks to ensure your success.
- The Creaming Method is Key: In the bowl of your stand mixer fitted with the paddle attachment (or a large bowl with a hand mixer), combine the granulated sugar, room temperature butter, and shortening. Beat on medium-high speed for a full 2 minutes. I set a timer for this! You’re not just mixing; you’re incorporating tiny air bubbles into the fat. The mixture should become noticeably paler in color and fluffy. Chef’s Hack: Scrape down the bowl halfway through to ensure everything is getting evenly mixed.
- Incorporate the Wet Ingredients: Add the vanilla and almond extracts, the whole egg, and the extra egg white to the creamed mixture. Mix on medium speed until everything is smooth and well-combined. It might look a little curdled at first, but it will come together—promise!
- Whisk the Dry Team: In a separate, medium-sized bowl, whisk together both flours, baking powder, cream of tartar, and salt. This is an important step! Whisking aerates the flour and ensures the leavening agents and salt are evenly distributed throughout, so every cookie bakes up the same.
- Combine Wet & Dry: With your mixer on low speed, gradually add the dry ingredients to the wet ingredients. Mix just until the flour streaks disappear and a soft dough forms. Do not overmix! Overmixing is the enemy of a tender cookie. As soon as you don’t see any more dry flour, stop the mixer.
- The All-Important Chill Time: This is the step that separates the puddles from the perfect puffs. Transfer the soft dough to an airtight container and chill it in the refrigerator for at least 3 hours, or even overnight. Chef’s Insight: Chilling the dough solidifies the fat. When the cold dough hits the hot oven, the fat takes longer to melt, giving the cookies less time to spread before they set. This is how we get thick, soft cookies!
- Preheat and Prep: When you’re ready to bake, preheat your oven to 375°F (190°C). This is a slightly higher temp than some recipes, and it helps the cookies set quickly. Line your baking sheets with parchment paper or a Silpat mat. Do NOT grease the sheets, as this can encourage spreading.
- Shape with Care: Using a 3 1/2 tablespoon cookie scoop (this is a #20 scoop if you’re into scoop sizes) is my best hack for uniform cookies. Portion out the dough and roll it lightly between your palms to smooth it into a ball. Then, place it on the baking sheet and gently flatten it to about 1/2-inch thick. Chef’s Hack: Dip the bottom of a glass or your fingers in a little sugar before flattening to prevent sticking.
- Bake to Perfection: Bake for 10-12 minutes. You’re looking for the cookies to be set on the edges but still look soft and slightly puffy in the center. They should not be brown on top. A light golden hue on the bottom is perfect. Chef’s Secret: They will continue to cook on the hot baking sheet after you take them out, so under-baking them slightly is the secret to ultimate softness.
- The Cool Down: Let the cookies cool on the hot baking sheet for exactly 3 minutes. This allows them to firm up enough to handle. Then, use a spatula to transfer them to a wire rack to cool completely. I cannot stress this enough: DO NOT frost warm cookies. You will have a melty, glazy mess. Patience is a virtue here!
- Make the Frosting: While the cookies cool, make the frosting. In a clean bowl, beat the room temperature butter on its own for a minute until it’s light and smooth. Add 2 tablespoons of milk, the pinch of salt, and the food coloring (if using). Mix to combine. Gradually add the powdered sugar with the mixer on low speed until it’s all incorporated. Whip it on medium-high for a minute until fluffy. If it’s too thick, add the remaining milk, one teaspoon at a time, until it’s a spreadable consistency.
- Decorate and Devour! Once the cookies are completely cool, it’s time for the grand finale! Frost them generously, and immediately add your sprinkles so they stick. Then, try to resist eating them all in one sitting. (No judgment if you can’t!)
How to Serve These Sweet Little Clouds of Joy
Presentation is part of the fun! I love piling these frosted sugar cookies high on a vintage cake stand for a real “wow” factor at a party. For a more casual vibe, stack them on a simple wooden board or a colorful plate. They pair beautifully with a cold glass of milk for the ultimate classic combo, or with a hot cup of coffee to balance the sweetness. Honestly, the best way to serve them is with a big smile, straight from your kitchen to the people you love.
Ride the Flavor Wave: 5 Fun Ways to Mix It Up!
Once you’ve mastered the classic, the world is your oyster (or, well, your cookie!). Here are a few of my favorite twists:
- Lemon Sunshine: Swap the almond extract for 1 tsp of lemon extract and add the zest of one lemon to the dough. Top with a lemon-buttercream (use lemon juice instead of milk).
- Funfetti Party: Fold 1/2 cup of rainbow sprinkles (jimmies work best) into the dough right before chilling. Bake as usual and frost with vanilla buttercream.
- Chocolate Dipped: Skip the frosting altogether and dip half of each cooled cookie into melted chocolate or candy melts. Let set on parchment paper.
- Brown Sugar & Cinnamon: Replace 1/2 cup of the granulated sugar with brown sugar and add 1 tsp of cinnamon to the dry ingredients. A cozy fall twist!
- Dairy-Free Delight: Use vegan butter sticks and your favorite non-dairy milk. The shortening is already dairy-free, so you’re good to go!
Isla’s Chef’s Notes: A Few More Crumbs of Wisdom
This recipe has been a living, evolving thing in my kitchen. The first time I made it, I was so impatient I only chilled the dough for 30 minutes. The resulting “cookies” merged into one giant cookie sheet slab. It was delicious, but not exactly what we’re going for! My husband still jokes that I invented “cookie brittle.”
Over time, I learned that the combination of cake flour and shortening was the ultimate softness hack, and that the almond extract was the missing flavor note my cookies needed. I also started using that specific cookie scoop size because it’s the perfect “one-serving” treat—not too big, not too small.
Don’t be afraid to make this recipe your own. Baking is a conversation, not a monologue. Maybe you love a thicker frosting, so you use less milk. Maybe you want to go wild with different food coloring for every holiday. That’s the beauty of it! This recipe is your trusty foundation—now go build your own sweet masterpiece on it.
FAQs & Troubleshooting: Let’s Solve Your Cookie Conundrums
Q: My cookies spread too much! What went wrong?
A: This is the #1 question, and it usually comes down to three things: 1) Your butter was too warm, or you didn’t cream it properly. 2) You didn’t chill the dough for long enough. The dough must be cold! 3) Your baking powder might be old. Check its expiration date—it loses potency over time.
Q: Can I make the dough ahead of time?
A: Absolutely! This dough chills beautifully. You can keep it in the fridge for up to 3 days, tightly wrapped. You can also freeze the dough balls on a tray, then transfer them to a freezer bag for up to 3 months. Bake from frozen, adding a minute or two to the bake time.
Q: Why is my frosting runny/grainy?
A: Runny frosting usually means you added too much liquid. You can thicken it back up by beating in a little more powdered sugar. Grainy frosting means the powdered sugar wasn’t fully dissolved. Make sure your butter is truly at room temperature and beat it for a full 3-4 minutes until it becomes light and super fluffy before adding the sugar.