
Your New Favorite Healthy Snack is Here (And It Tastes Like a Cookie!)
Hey there, friend! Isla here from BiteTide, coming at you from my flour-dusted kitchen. Can we have a real talk for a second? We all have those moments. You know the ones. It’s 3:17 PM, your energy has decided to take an unscheduled vacation, and your stomach is staging a full-blown mutiny. You’re staring into the abyss of the pantry, willing something—anything—to appear that’s both delicious and won’t send you on a sugar rollercoaster.
You crave the cozy, comforting hug of an oatmeal raisin cookie, but you also want to feel amazing after you eat it. Sound familiar? I’ve been there more times than I can count, usually while trying to wrangle a grocery list and answer a million “why?” questions from a tiny human.
That’s exactly why I created these little rounds of joy. These Oatmeal Raisin Protein Balls are the snack superhero you’ve been dreaming of. They’re my secret weapon for bridging that gap between “I need a treat” and “I need real fuel.” Imagine all the warm, cinnamon-spiced, chewy goodness of your favorite childhood cookie, rolled into a no-bake bite that’s packed with protein and fiber to keep you powered through your day. No baking required, just one bowl, and about ten minutes of your time. Let’s make that pantry stare-down a thing of the past, shall we?
A Little Taste of Nostalgia
This recipe always takes me right back to my grandma’s sunny kitchen. She was the queen of “a little of this, a little of that” cooking, and her oatmeal raisin cookies were legendary. The whole house would smell like brown sugar and cinnamon, a scent that feels like a warm hug even now.
I remember standing on a wobbly stool next to her, “helping” by enthusiastically dumping in cups of oats. She’d let me sneak a few raisins, her eyes twinkling, and she’d always say, “Isla, the best food is the kind that makes you smile.” She was so right. While my version is a bit more modernized for our on-the-go lives—swapping in honey and flax for some of the butter and sugar—the soul of the recipe is pure Grandma. It’s that same feeling of cozy, simple joy. Every time I roll up a batch of these protein balls, I get a little hit of that nostalgia, and I hope they bring a bit of that same simple happiness to your kitchen, too.
Print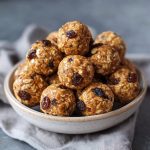
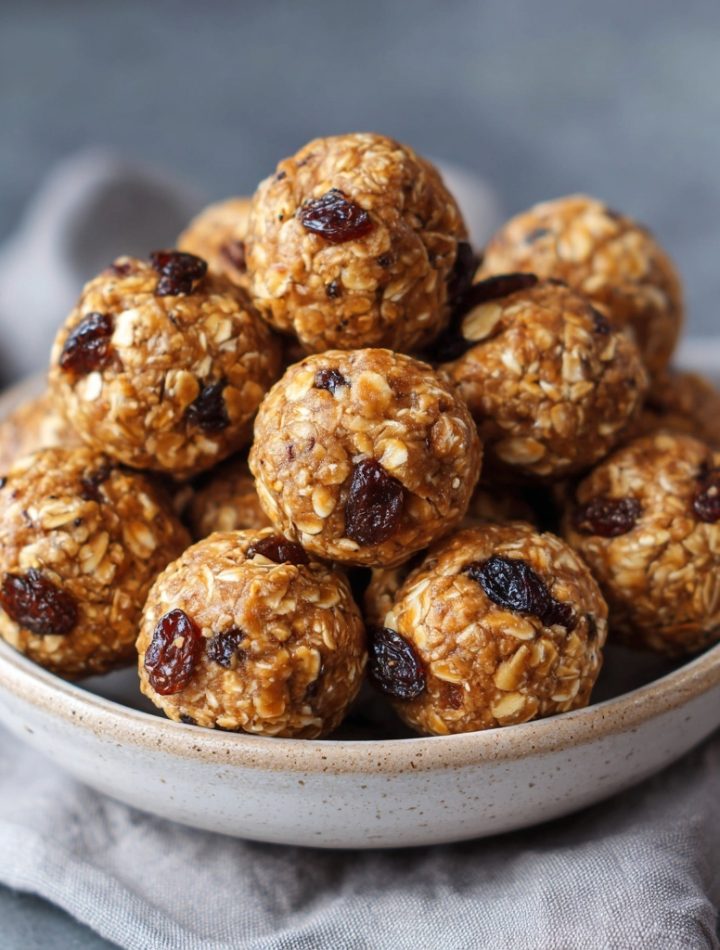
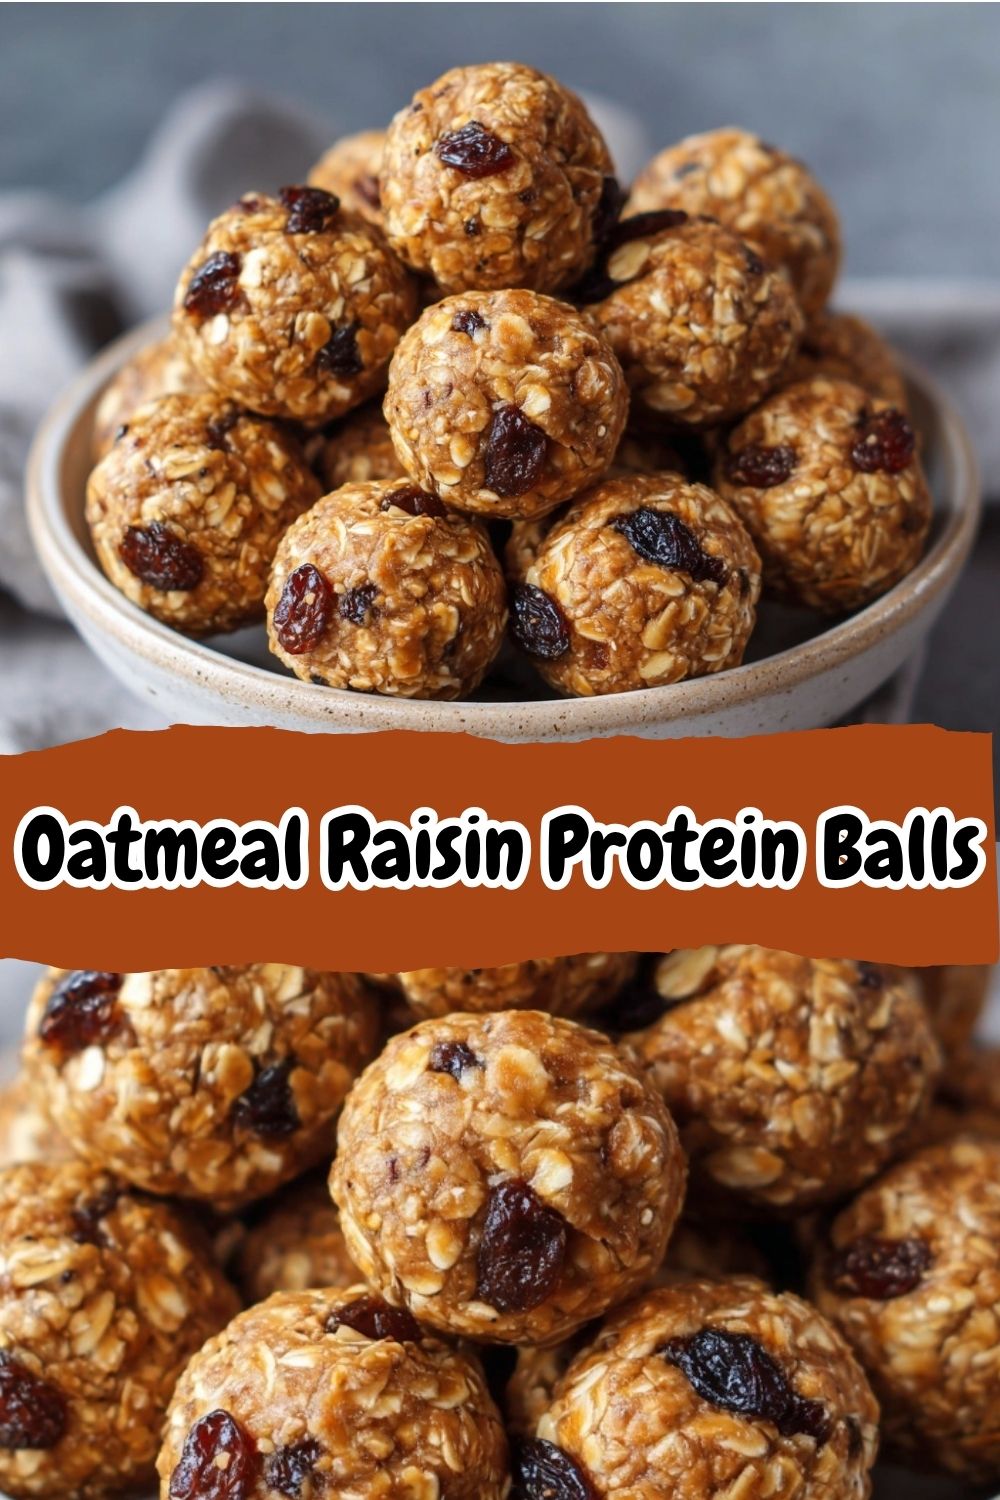
Oatmeal Raisin Protein Balls
- Total Time: 30 minutes
- Yield: 18 balls 1x
Description
Like your favorite cookie—but healthier. These Oatmeal Raisin Protein Balls are chewy, warmly spiced, and naturally sweetened with honey and raisins. With added flaxseed for fiber and staying power, they make the perfect snack to fuel your day without the crash.
Ingredients
1 cup old-fashioned oats
½ cup peanut butter (natural, creamy)
3 tbsp honey or maple syrup
¼ cup raisins
¼ cup ground flaxseed
1 tsp cinnamon
Optional: ½ tsp vanilla extract
Optional: 1–2 tsp water if needed for texture
Instructions
In a mixing bowl, combine oats, flaxseed, and cinnamon.
Stir in peanut butter, honey, and vanilla (if using) until evenly mixed.
Fold in raisins.
If mixture is too dry to roll, add water a teaspoon at a time until it holds together.
Roll into 1-inch balls and place on a tray.
Chill for 20–30 minutes to firm up. Store in the fridge for up to 1 week.
- Prep Time: 10 mins
- Cook Time: 20 minutes
- Category: Snack
Nutrition
- Calories: 100
- Fiber: ~2g
- Protein: ~3–4g
Gather Your Flavor Crew
Here’s the beautiful part: you probably have most of this in your pantry right now! This is a no-fuss, real-life recipe, remember?
- 1 cup old-fashioned oats: These are our base, giving that classic, chewy cookie texture and heartiness. Chef’s Insight: Don’t use quick oats if you can help it—old-fashioned give a much better, substantial chew!
- ½ cup natural, creamy peanut butter: This is our glue and our protein powerhouse. Substitution Tip: Any nut or seed butter works wonders here! Almond butter, sunflower seed butter (for a nut-free version), or even cashew butter would be delicious.
- 3 tbsp honey or maple syrup: Our natural sweetener that binds everything together. Chef’s Insight: I love the warm flavor of honey with the cinnamon, but pure maple syrup keeps it vegan and adds a lovely depth.
- ¼ cup raisins: Little bursts of sweet, chewy goodness. Substitution Tip: Not a raisin fan? Chopped dried apricots, cranberries, or even mini chocolate chips would be a fantastic swap.
- ¼ cup ground flaxseed: This is my sneaky health hack! It adds a mega-dose of fiber, omega-3s, and helps bind the mixture. Chef’s Insight: Using ground flax is key here—whole flaxseeds won’t blend in or provide the same nutritional benefits.
- 1 tsp cinnamon: The warm, cozy spice that makes it taste like a cookie. Don’t be shy with it!
- Optional: ½ tsp vanilla extract: This is my “secret” ingredient for that bakery-style flavor. It deepens all the other flavors. Highly recommend!
- Optional: 1–2 tsp water: This is our texture rescue squad. Depending on your peanut butter, your mixture might be a bit dry. We’ll assess this together in the steps!
Let’s Get Rolling! Your Foolproof Steps
Ready for the easiest “cooking” you’ll do all week? Grab a medium mixing bowl and a spatula—let’s do this!
- The Dry Team Assemble! In your bowl, combine the old-fashioned oats, ground flaxseed, and that glorious teaspoon of cinnamon. Give it a good stir with your spatula until everything is evenly distributed. You should see little flecks of cinnamon throughout. Chef’s Hack: This is a great job for a little helper in the kitchen! Measuring and stirring dry ingredients is a perfect way to get kids involved.
- Welcome the Wet Ingredients. Now, plop in your peanut butter, honey (or maple syrup), and that optional-but-highly-recommended vanilla extract. Time to get your arm workout in! Stir, stir, stir until everything is completely combined and no dry spots remain. The mixture will be thick and a bit shaggy—that’s exactly what we want! Chef’s Hack: If your peanut butter is straight from the fridge, microwave it for 15-20 seconds to make it easier to mix.
- Fold in the Fun! Sprinkle in your raisins. Now, use a folding motion to incorporate them gently. We don’t want to crush them, just get them evenly distributed throughout our oat mixture. Chef’s Commentary: See how it’s coming together? Smell that cinnamon and peanut butter? You’re basically a snack wizard already.
- The Texture Test (This is the Most Important Step!). Now, here’s where we use our chef intuition. Try to press a small amount of the mixture between your fingers. Does it hold together easily? If it does, fantastic! Skip to the next step. If it feels crumbly and doesn’t want to stick, it just needs a little help. Add a teaspoon of water and mix again. Test once more. Repeat with a second teaspoon only if needed. We want a pliable dough, not a wet one!
- Ball Time! Using a tablespoon or a small cookie scoop, portion out the mixture. Roll it firmly between your palms to create smooth, 1-inch balls. Chef’s Hack: If the mixture is sticking to your hands, lightly dampen them with water. This creates a non-stick barrier and makes rolling a breeze!
- The Chill Factor. Place your beautifully rolled balls on a plate or baking sheet lined with parchment paper. Now, the hardest part: patience! Pop them into the fridge for at least 20-30 minutes. This step is non-negotiable—it allows the oats and flax to absorb the moisture and lets the fats from the peanut butter firm up, giving you the perfect, firm-yet-chewy texture.
How to Serve & Savor
Once they’re perfectly chilled, the snacking can begin! I love storing these in a glass container in the fridge and grabbing them straight from there. They’re fantastic as a quick breakfast bite with your morning coffee, the star of your lunchbox, or that crucial afternoon pick-me-up. Pack a couple in a small container for a healthy snack on hikes, road trips, or long days running errands. They’re perfectly portable and guaranteed to bring a smile to your face when hunger strikes.
Ride Your Own Flavor Wave! 5 Tasty Twists
The beauty of this base recipe is how incredibly adaptable it is. Make it your own!
- Cranberry Orange Zing: Swap raisins for dried cranberries and add the zest of one small orange to the mixture. So bright and refreshing!
- Chocolate Chip Cookie Dough: Replace the raisins with mini chocolate chips and the cinnamon with a pinch of salt. It’s like eating healthy cookie dough!
- Tropical Vacation: Use chopped dried pineapple and mango instead of raisins, and coconut almond butter instead of peanut butter. You’ll feel like you’re on a beach.
- Double Chocolate: Omit cinnamon. Add 2 tablespoons of cocoa powder to the dry ingredients and use chocolate chips instead of raisins. For all my chocolate lovers.
- Sunflower Power (Nut-Free): Use sunflower seed butter and pumpkin seeds instead of raisins for a completely nut-free, school-safe version.
More Chef’s Notes & Kitchen Confessions
This recipe has truly evolved in my kitchen. The first time I made them, I was a little overzealous with the honey and created a sticky situation worthy of a comedy sketch. My hands were glued together, I had oats stuck to my elbow, and my dog thought it was the best day ever because he kept finding dropped raisins. It was a beautiful mess! I’ve since perfected the ratio, but it just goes to show that even “failed” kitchen experiments can be fun.
Over time, I started adding the flaxseed for an extra nutritional punch, and the vanilla became a non-negotiable for me. I also discovered that letting them chill overnight makes the texture even better, so if you have the willpower, I highly recommend it! This recipe is a living thing in my home, and I encourage you to make it live in yours. Add a pinch of nutmeg, try a different nut butter, make them your own!
Your Questions, Answered!
I’ve gotten so many wonderful questions about these protein balls over the years. Here are the most common ones to ensure your success!
- My mixture is too wet and sticky! What did I do wrong? No worries, this is an easy fix! This usually happens if your nut butter was particularly oily or you added a bit too much honey. Simply add a tablespoon or two more of oats or ground flaxseed and mix it in. It will absorb that excess moisture and get you back to the perfect rolling consistency.
- Can I make these without peanut butter? Absolutely, 100%! That’s the magic of this recipe. Almond butter, cashew butter, sunflower seed butter, or even Wowbutter (a soy-based butter) all work beautifully. Just make sure they are a creamy, drippy consistency for the best results.
- How long do these really last, and can I freeze them? Stored in an airtight container in the fridge, they are perfect for up to 2 weeks (if they last that long!). And yes, they freeze amazingly well! Place them in a single layer on a baking sheet to freeze solid, then transfer to a freezer bag. They’ll keep for up to 3 months. Just thaw in the fridge or at room temperature for 15 minutes before eating.
- Are these okay for kids? They are a huge hit with kids! They’re a much healthier alternative to packaged snacks and granola bars. For younger toddlers, you can even roll them into smaller, bite-sized balls to prevent any choking hazard.
Quick Nutritional Snapshot
Please note: This is an estimate and can vary based on the specific brands of ingredients you use.
Estimated per ball (makes ~18):
Calories: ~100 | Protein: ~3–4g | Net Carbs: ~7g | Fiber: ~2g | Fat: ~5g
There you have it! Your new go-to, no-bake, feel-good snack. I’m so excited for you to try it. Remember, cooking is supposed to be fun, so don’t stress. Happy rolling!
– Isla 💛