
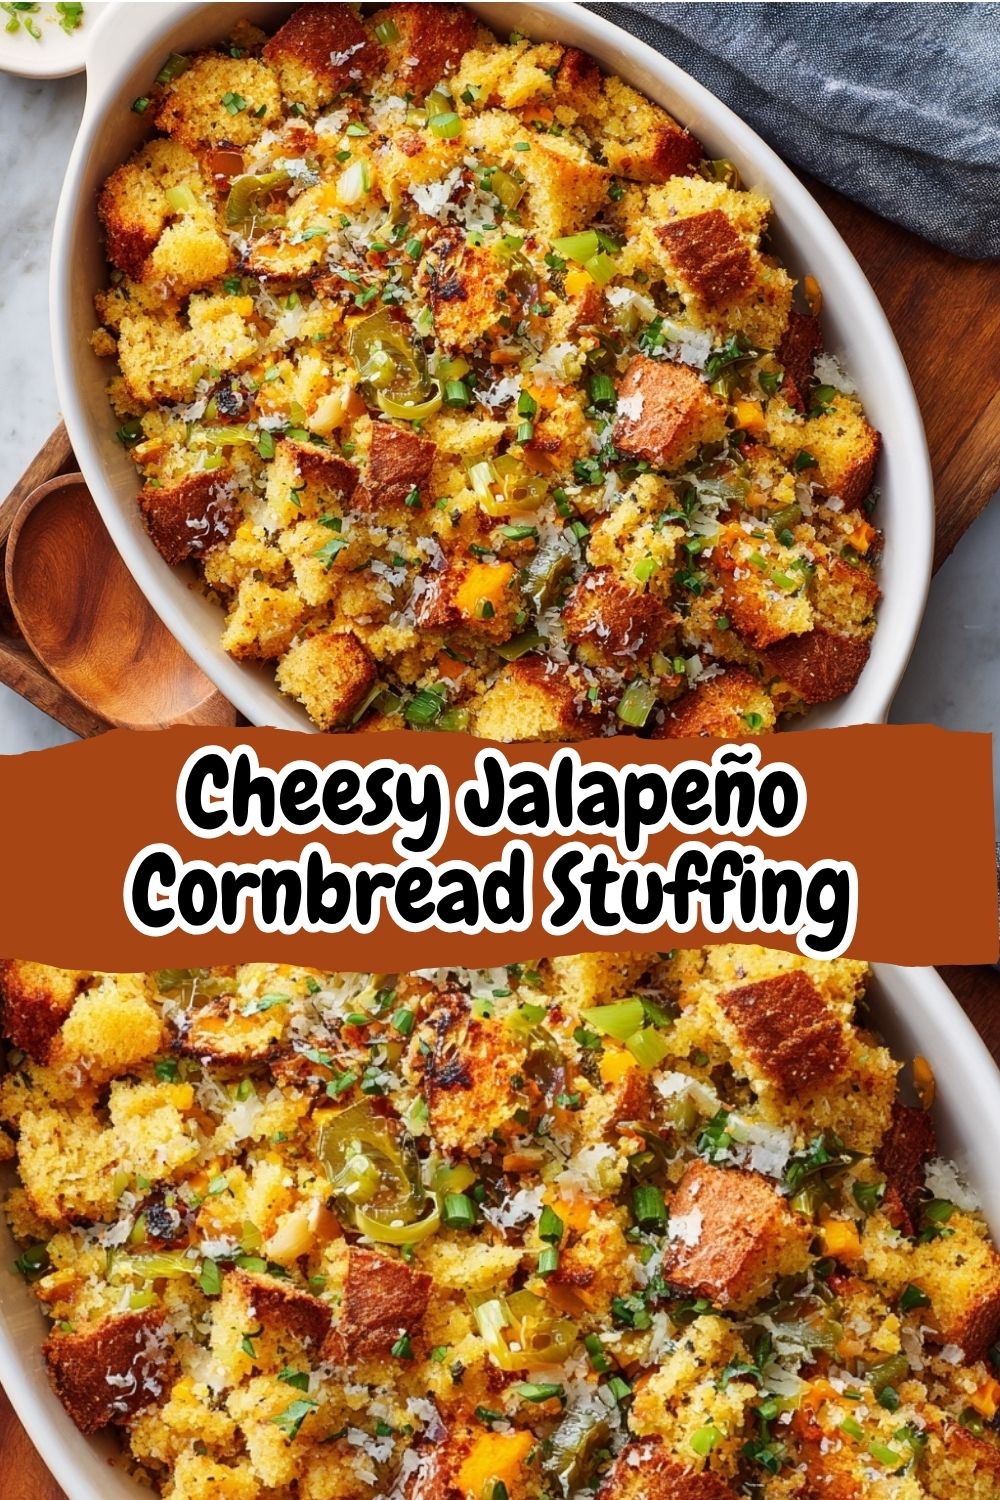
The Side Dish That Steals the Show: Cheesy Jalapeño Cornbread Stuffing
Hey there, friend! Isla here, from my cozy kitchen to yours. Let’s be real for a second: the turkey might get the prime real estate on the holiday table, but we all know the true MVP is the stuffing. It’s the comforting, carb-y, flavor-packed pillow that soaks up all the gravy and, let’s be honest, often ends up being the first thing we go back for for seconds (and thirds!). But what if we took that beloved classic and sent it on a little flavor vacation? A trip south of the border, perhaps?
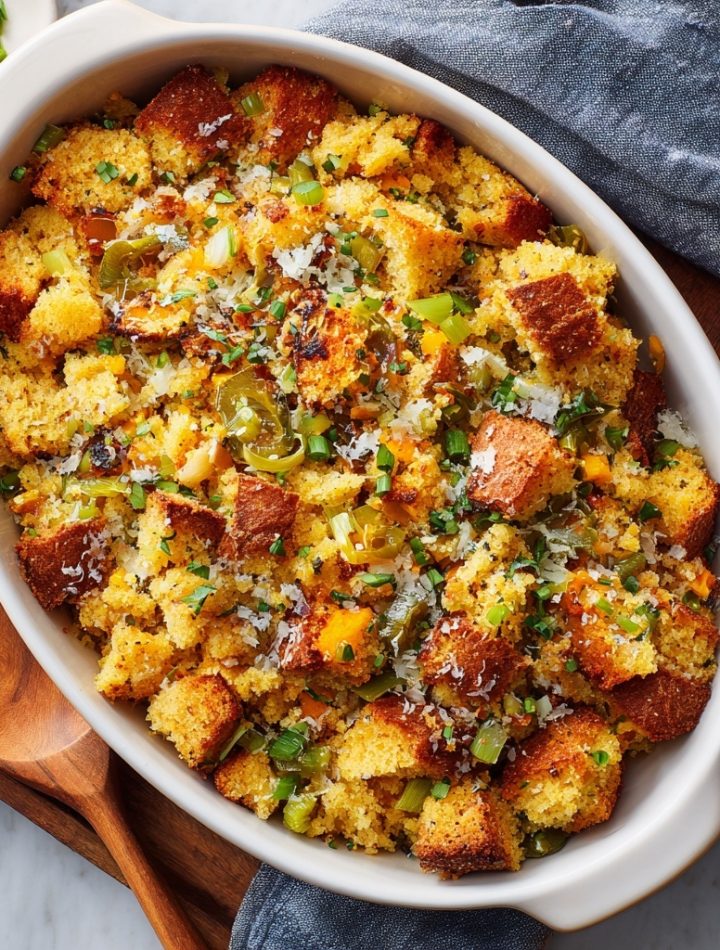
That’s exactly what we’re doing today with my Cheesy Jalapeño Cornbread Stuffing. This isn’t just a side dish; it’s a full-blown experience. Imagine fluffy, slightly sweet cornbread, toasted to perfection, hugging pockets of melted, gooey cheese. Now, add in the gentle, smoky heat of sautéed jalapeños and the classic, aromatic base of onion and celery. Every single bite is a perfect storm of savory, spicy, cheesy, and comforting. It’s the kind of dish that makes people’s eyes light up, the one that sparks conversations and has everyone asking, “Wait, can I get this recipe?” Spoiler alert: you’re about to have it, and it’s easier than you think. So, tie on your favorite apron, and let’s create some kitchen magic together. This is the potluck hero you’ve been dreaming of!
A Spicy Twist on a Coastal Memory
Food has this incredible power to transport you, doesn’t it? One whiff of a particular scent, and you’re right back in your grandma’s kitchen. For me, the smell of cornbread baking instantly takes me to my childhood in our small coastal town. My dad, a man of few words but immense culinary talent, had a Saturday morning ritual: a giant cast-iron skillet of cornbread to go with a pot of slow-cooked beans. It was simple, humble, and absolutely perfect.
One particularly blustery autumn day, my uncle—a fisherman with a taste for adventure—showed up with a bucket of fresh oysters and a handful of jalapeños from his garden. “Let’s liven things up,” he’d declared with a grin. Dad, never one to shy away from a challenge, crumbled that day’s cornbread, sautéed those jalapeños with some onion, and created a makeshift “dressing” to stuff the oysters. The result was chaotic, messy, and utterly delicious. It was my first introduction to the magical marriage of cornbread and spice. This Cheesy Jalapeño Cornbread Stuffing is my homage to that day—a grown-up, more refined (but just as fun) version of that spontaneous kitchen creation. It carries the warmth of my dad’s kitchen and the bold spirit of my uncle’s flavor experiments.
Print
Cheesy Jalapeño Cornbread Stuffing
- Total Time: 50 mins
- Yield: 8 servings 1x
Description
This Cheesy Jalapeño Cornbread Stuffing is a bold, spicy twist on a Southern staple. Fluffy cornbread meets melty cheese, sautéed veggies, and just the right amount of jalapeño heat. It’s smoky, savory, and potluck-perfect—basically the side dish that steals the show every single time.
Ingredients
6 cups cornbread, cubed (day-old or toasted)
1 tbsp butter
1 small onion, diced
2 celery stalks, chopped
1–2 jalapeños, diced (seeds removed for less heat)
1½ cups shredded cheddar or pepper jack cheese
2 cups chicken or veggie broth
2 eggs, beaten
1 tsp garlic powder
Salt & pepper to taste
Optional: chopped cilantro or green onions for garnish
Instructions
Preheat oven to 350°F (175°C). Grease a 9×13-inch baking dish.
In a skillet, melt butter and sauté onion, celery, and jalapeños until soft (about 5–6 minutes).
In a large bowl, combine cornbread cubes, sautéed veggies, cheese, garlic powder, salt, and pepper.
In a separate bowl, whisk together broth and eggs, then pour over cornbread mixture. Toss gently to coat.
Transfer to baking dish and bake uncovered for 30–35 minutes, until golden and set.
Top with fresh herbs if desired and serve warm.
- Prep Time: 15 mins
- Cook Time: 35 mins
- Category: Dinner
Nutrition
- Calories: 340
- Fat: 20g
- Carbohydrates: 30g
- Protein: 11g
Gathering Your Flavor Crew
Here’s everything you’ll need to bring this flavor wave to life. Don’t stress about exact brands or perfection—this is about feel and fun! I’ve included my favorite chef insights and swaps so you can make this recipe your own.
- 6 cups cornbread, cubed (day-old or toasted): This is the heart and soul of the dish! Using slightly stale or toasted cornbread is my number one chef hack—it soaks up the custardy broth mixture without turning to mush. You can use your favorite homemade recipe or a good-quality store-bought cornbread. I’m a sucker for a cornbread with a touch of honey.
- 1 tbsp butter: For sautéing our veggies to buttery, aromatic perfection. Salted or unsalted works just fine here.
- 1 small onion, diced: The aromatic base that builds a foundation of sweet, savory flavor.
- 2 celery stalks, chopped: Adds a necessary crunch and a subtle, fresh earthiness that balances the richness.
- 1–2 jalapeños, diced (seeds removed for less heat): Here’s where the magic happens! The key is controlling the heat. For a gentle warmth, remove all the seeds and white membranes. For a bigger kick, leave some in! Remember to wash your hands thoroughly after handling them—I’ve learned that lesson the hard way (hello, accidental eye-rubbing!).
- 1½ cups shredded cheddar or pepper jack cheese: CHEESE, glorious cheese! I love sharp cheddar for its tang, but pepper jack takes the spice level up a notch in the best way. For the love of all that is melty and good, please shred your own cheese from a block. The pre-shredded stuff is coated to prevent clumping, which means it doesn’t melt as beautifully.
- 2 cups chicken or veggie broth: This is the hydrating hero. Use a good-quality broth, as its flavor will shine through. Veggie broth keeps it wonderfully vegetarian-friendly!
- 2 eggs, beaten: Our binding agent! The eggs create a rich, custardy interior that holds everything together and gives it that perfect sliceable texture.
- 1 tsp garlic powder: A little cheat I adore. It distributes garlic flavor evenly throughout the stuffing without the risk of burning fresh garlic.
- Salt & pepper to taste: The dynamic duo! Season as you go, and don’t be shy.
- Optional: chopped cilantro or green onions for garnish: A pop of fresh green color and flavor right at the end makes the whole dish sing.
Let’s Build the Flavor, Step-by-Step
Ready to create some magic? Follow these steps, and I promise you’ll have a show-stopping side dish that’s easier than it looks. I’ve packed this section with all my favorite little kitchen hacks to ensure your success.
- Preheat and Prep: First things first, get that oven preheating to a cozy 350°F (175°C). This gives it plenty of time to come to the perfect temperature. While it’s warming up, grab a 9×13-inch baking dish and give it a light coating of butter, oil, or a quick spritz of cooking spray. Chef’s Hack: A well-greased dish means you’ll get those beautiful, crispy edges that everyone fights over!
- Sauté the Aromatics: Place a skillet over medium heat and melt your tablespoon of butter. Once it’s foaming slightly, add in your diced onion, chopped celery, and jalapeños. We’re not looking to brown them, just to soften them up and wake up their flavors. This should take about 5-6 minutes, and your kitchen will start to smell absolutely incredible. You’ll know they’re ready when the onions turn translucent and the celery has lost its raw crunch.
- The Big Combine: In a large mixing bowl—I’m talking large, you want room to toss everything without making a mess—combine your cornbread cubes, the sautéed veggie mixture, most of your shredded cheese (save a handful for the top!), garlic powder, salt, and pepper. Gently toss this with your hands or a large spoon. Be a little gentle with the cornbread so it doesn’t completely crumble. You’re creating a beautiful, colorful mosaic of ingredients.
- Create the Custard: In a separate medium bowl (a 4-cup liquid measuring cup works perfectly here!), whisk together the 2 cups of broth and the 2 beaten eggs until they are completely homogenous. This is the “secret sauce” that transforms dry cubes into a moist, unified stuffing. Chef’s Insight: Whisking thoroughly is key here—you don’t want streaks of cooked egg white in your final dish!
- Bring It All Together: Now, pour the broth and egg mixture evenly over the cornbread and veggie combination. Using a large spoon or a spatula, gently fold and toss everything together. You’ll see the cornbread start to absorb the liquid almost immediately. The goal is to get everything evenly moistened without turning it into a paste. A few dry spots are okay—they’ll hydrate as it sits for a minute.
- Bake to Golden Perfection: Transfer the entire mixture into your prepared baking dish and spread it out into an even layer. Now, sprinkle that reserved handful of cheese over the top. This will create a gorgeous, bubbly, golden-brown cheesy crust. Pop it into the preheated oven, uncovered, for 30-35 minutes. You’re looking for a golden-brown top, crispy edges, and a set center. To test, you can insert a knife into the center; it should come out clean.
- The Final Touch: Once it’s out of the oven, let it rest for about 5-10 minutes. This allows the custard to fully set, making it easier to slice and serve. Right before serving, scatter the top with your fresh chopped cilantro or green onions for a burst of color and freshness. And that’s it! You’ve just created a masterpiece.
How to Serve This Crowd-Pleaser
This stuffing is incredibly versatile! Of course, it’s the star of any holiday table, sitting proudly next to the turkey and mashed potatoes. But let’s think bigger! I love serving it straight from the baking dish for a rustic, family-style feel. Scoop out generous portions with a large spoon. It’s also phenomenal as a bed for saucy dishes like braised short ribs or smothered pork chops—it soaks up all those incredible juices. And honestly? Don’t you dare wait for a holiday. It’s a perfect, complete meal on a chilly Tuesday night, maybe with a simple side salad to cut through the richness. However you serve it, serve it warm, and get ready for the compliments to roll in.
Make It Your Own: Fun Flavor Twists!
One of my core food beliefs is that recipes are just a starting point for your own creativity. Here are a few ways you can ride this flavor wave in a new direction:
- Smoky & Meaty: Add ½ pound of cooked, crumbled spicy sausage or chopped crispy bacon to the mix with the cornbread. A teaspoon of smoked paprika would be incredible here, too.
- Southwest Fiesta: Stir in a can of drained black beans and a cup of frozen corn (no need to thaw) for a heartier, Tex-Mex inspired version.
- Green Chile Lovin’: Swap the jalapeños for a 4-ounce can of diced green chiles for a more mellow, earthy heat that’s so classic in Southwestern cooking.
- Ultimate Creamy Cheesy: For the cheese fiends (I see you!), add a 4-ounce block of softened cream cheese to the broth mixture when you whisk it together. It creates an unbelievably rich and creamy texture.
- Gluten-Free Friendly: As long as you use a gluten-free cornbread, this recipe is naturally gluten-free! Just double-check that your broth is also certified GF.
Isla’s Chef Notes & Kitchen Confessions
This recipe has been a living, evolving thing in my kitchen. The first time I made it, I was so nervous about the spice level for a family potluck that I only used half a jalapeño. Let’s just say my spice-loving cousin was… disappointed. I’ve since found that two jalapeños with the seeds removed is the sweet spot for a broad audience—flavorful with a slow, building warmth that doesn’t overwhelm.
Another confession: I am a firm believer in the “stuffing muffin” method. If you want maximum crispy edges, grease a muffin tin and divide the mixture among the cups. You’ll get about 12 individual stuffing muffins that bake in about 20-25 minutes! They’re perfect for portion control (or, more accurately, for claiming three portions for yourself without anyone noticing).
Most importantly, this dish is meant to be forgiving. Did your cornbread crumble more than you expected? It’s fine! It’ll be more cohesive, almost like a spoonbread. Forgot to save cheese for the top? Just mix it all in—it will still be outrageously delicious. The goal is joy, not perfection.
Your Questions, Answered!
Over the years, I’ve gotten a lot of brilliant questions about this recipe. Here are the ones that come up most often!
Q: Can I make this cornbread stuffing ahead of time?
A: Absolutely! This is a fantastic make-ahead dish. You have two options. 1) Assemble the entire thing the day before, cover tightly with plastic wrap, and refrigerate. When you’re ready to bake, let it sit on the counter for 20-30 minutes while the oven preheats, then bake as directed. It might need an extra 5-10 minutes in the oven since it’s starting from cold. Or, 2) You can cube and toast the cornbread a day or two in advance and store it in a bag on the counter. You can also chop all your veggies ahead of time and keep them in a container in the fridge. Day-of, it’s just a quick assembly!
Q: My stuffing turned out a bit dry/soggy. What happened?
A: This is usually a cornbread or broth issue. If it’s dry, your cornbread may have been very dense or too dry to begin with. Next time, you can add an extra ¼ to ½ cup of broth. If it’s soggy, the cornbread might have been too soft or fresh. That’s why toasting or using day-old cornbread is my #1 tip! To rescue a soggy stuffing, you can pop it back in the oven for another 10-15 minutes, uncovered, to help evaporate some of the excess moisture.
Q: What’s the best way to cube the cornbread?
A: I like a mix of textures! I use a serrated bread knife to slice the cornbread into roughly 1-inch cubes. Don’t worry about them being perfect. A variety of sizes gives you some softer, custardy bits and some firmer, toastier bits—it’s all part of the textural joy.
Q: Can I freeze the leftovers?
A: You sure can! Let the stuffing cool completely, then transfer it to an airtight, freezer-safe container. It will keep for up to 3 months. To reheat, I recommend thawing it in the fridge overnight and then warming it in a 350°F oven, covered with foil, until heated through. You can reheat from frozen, but it will take longer and the texture might be a little softer.
Nutritional Information*
Per Serving (yields approximately 8 servings):
Calories: ~340 | Protein: 11g | Carbohydrates: 30g | Fat: 20g
*This is an estimate provided for informational purposes. Values can vary significantly based on the specific brands and ingredients you use.
Prep time: 15 mins | Cook time: 35 mins | Total time: 50 mins