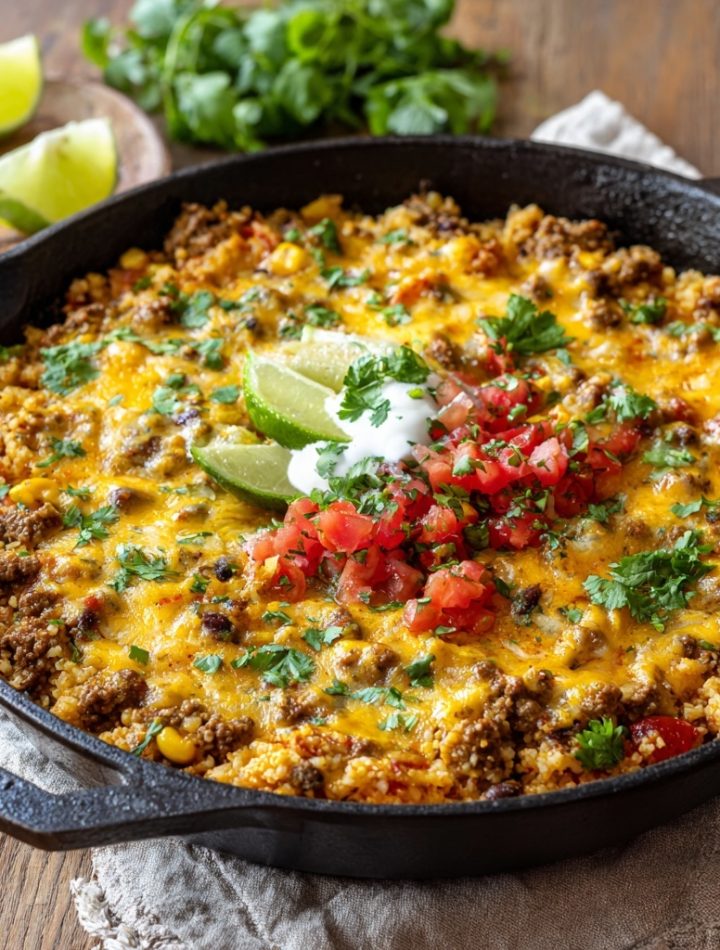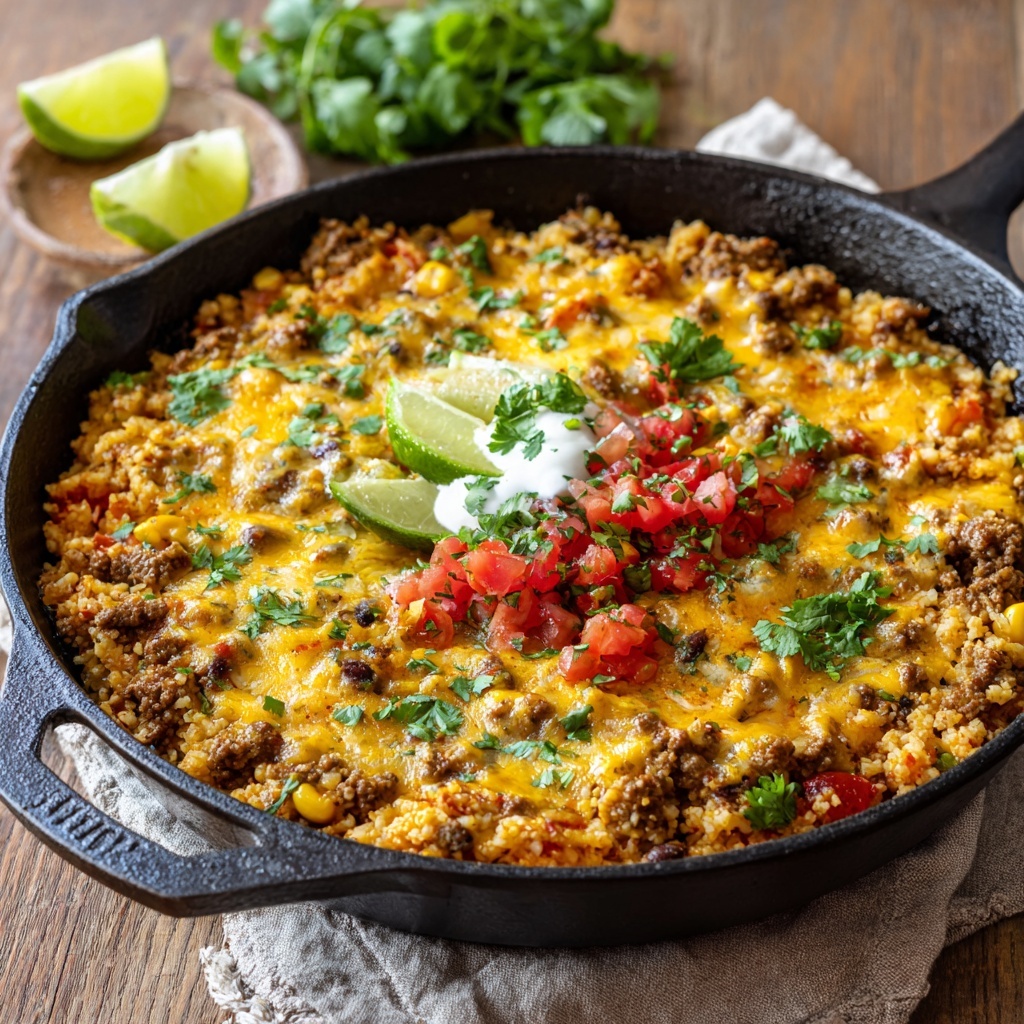
Low Carb Cheesy Mexican Cauliflower Rice Skillet: Your New Weeknight Hero!
Forget Fussy Dinners, Let’s Make Magic in One Pan
Hey there, friend! Isla here from BiteTide. Can we talk about that eternal weeknight question for a second? You know the one: “What’s for dinner?” It hits right around 4 PM, usually when you’re still knee-deep in work emails, the kids are getting hangry, and your energy is at an all-time low. You want something delicious, something that feels like a warm hug, but you also don’t want to spend an hour washing a mountain of pots and pans. Sound familiar?
Well, get ready to meet your new kitchen bestie: the Low Carb Cheesy Mexican Cauliflower Rice Skillet. This isn’t just another “healthy” recipe that tastes like punishment. Oh no. This is a flavor FIESTA in a single pan. It’s bold, it’s cheesy, it’s packed with protein and veggies, and it comes together in less than 30 minutes. I’m talking about all the cozy, comforting vibes of your favorite Mexican casserole, but with a light, bright twist that won’t leave you in a food coma. So, grab your favorite skillet, and let’s turn that “what’s for dinner” dread into a happy dance. This is real-life, no-fuss, totally craveable food, just the way we like it here at BiteTide!
A Skillet Full of Sunshine Memories
This recipe always takes me right back to my grandma’s sunny, slightly chaotic kitchen. She didn’t believe in “low-carb” as a term, but she was a genius at making vegetables the star of the show. I remember one sweltering summer afternoon, we’d just come back from the farmer’s market with a bounty of fresh produce, including a head of cauliflower “the size of a cloud,” as she put it. She started browning some ground beef with onions and a heaping spoonful of her secret spice blend (I later learned it was just cumin and chili powder, but it felt like magic then). Instead of rice, she grated that entire cauliflower head by hand, her knuckles dusted white, laughing as she told me stories. When she stirred it into the skillet, topped it with a mountain of cheddar, and let it get all melty, the smell was absolutely incredible. That dish taught me a powerful lesson: eating well isn’t about restriction; it’s about creativity. It’s about taking simple, fresh ingredients and turning them into something that makes everyone around the table feel happy and nourished. This skillet is my modern, streamlined tribute to her—and to every cook who needs a little bit of that sunshine on a busy Tuesday night.
Print
Low Carb Cheesy Mexican Cauliflower Rice Skillet
- Total Time: 30 mins
- Yield: 4 servings 1x
Description
Who says low carb can’t be bold and cheesy? This one-skillet Mexican cauliflower rice dish delivers all the flavor of your favorite casserole—minus the carbs. Packed with veggies, melty cheese, and zesty spices, it’s a healthy dinner that hits like comfort food.
Ingredients
1 tbsp olive oil
1 lb ground turkey or beef
1 small onion, diced
2 garlic cloves, minced
1 tsp cumin
1 tsp chili powder
1/2 tsp smoked paprika
1 (10 oz) bag riced cauliflower (fresh or frozen)
1/2 cup salsa
1/2 cup canned black beans (optional)
1/2 cup corn (optional)
Salt & pepper to taste
1 cup shredded cheddar or Mexican cheese blend
Fresh cilantro & lime wedges to serve
Instructions
Cook the meat: In a large skillet, heat olive oil over medium. Add ground meat, breaking it up and cooking until browned.
Add flavor: Stir in onion, garlic, and spices. Sauté 3–4 minutes until fragrant.
Rice it up: Add cauliflower rice, salsa, beans, and corn. Stir to combine and cook 5–7 minutes until tender.
Get cheesy: Sprinkle cheese on top, cover, and let it melt—about 2 minutes.
Finish & serve: Garnish with cilantro and a squeeze of lime.
- Prep Time: 10 mins
- Cook Time: 15 mins
- Category: Dinner
Nutrition
- Calories: 350
- Carbohydrates: 12g
- Protein: 28g
Gather Your Flavor Crew
Here’s the dream team of ingredients that makes this dish so special. Don’t stress if you’re missing something—I’ve got swaps and chef-y insights for you!
- 1 tbsp Olive Oil: Our trusty cooking fat! It adds a subtle fruitiness and keeps everything from sticking. Avocado oil works beautifully here too if you have it.
- 1 lb Ground Turkey or Beef: The protein powerhouse! I love lean ground turkey for a lighter feel, but 85/15 ground beef brings that classic, rich flavor. For a plant-based twist, crumbled tempeh or a plant-based ground “meat” are fantastic.
- 1 Small Onion, diced: The flavor foundation. Onions add a sweet, savory depth that is non-negotiable for a great skillet. No onion? A generous spoonful of onion powder can work in a pinch!
- 2 Garlic Cloves, minced: The aromatic heartthrob! Please, please use fresh garlic here. That punchy, fragrant bite is irreplaceable and makes the entire kitchen smell like a professional restaurant.
- 1 tsp Cumin: The soul of Mexican cuisine. It’s earthy, warm, and instantly makes the dish taste authentic.
- 1 tsp Chili Powder: This is where the warmth and color come from. Not all chili powders are created equal—some are spicier than others, so taste as you go!
- 1/2 tsp Smoked Paprika: My secret weapon! It doesn’t add a lot of heat, but it gives a subtle, smoky campfire flavor that makes the dish taste like it’s been slow-cooking for hours.
- 1 (10 oz) Bag Riced Cauliflower: The brilliant low-carb star! Using pre-riced cauliflower (fresh or frozen) is the ultimate weeknight hack. If you’re using frozen, no need to thaw—just add a minute or two to the cooking time.
- 1/2 Cup Salsa: This is your shortcut to big, bold flavor! It adds moisture, acidity, and a bit of chunkiness. Use your favorite store-bought brand or homemade. A chunky pico de gallo works wonders here.
- 1/2 Cup Canned Black Beans (optional): For a little extra fiber and heartiness. Rinse them well to remove that starchy canning liquid!
- 1/2 Cup Corn (optional): A pop of sweetness and color. I love using frozen fire-roasted corn if I can find it for an extra flavor boost.
- Salt & Pepper to taste: The essential seasoners! Don’t forget to taste and season at the end—the cheese and salsa add salt, so you might not need much.
- 1 Cup Shredded Cheddar or Mexican Cheese Blend: The glorious, melty finish! I’m a sucker for a sharp cheddar, but a Mexican blend with Monterey Jack and queso quesadilla is pure magic. For a sharper kick, try pepper jack!
- Fresh Cilantro & Lime Wedges to serve: The non-negotiable fresh finish! The bright, citrusy squeeze of lime and the herbal pop of cilantro cut through the richness and make every single bite sing.
Let’s Build That Flavor, Step-by-Step
Okay, team! Skillet out, let’s get cooking. This is where the magic happens, and I’ll be right here with my chef hacks to guide you.
- Cook the Meat: Place your large skillet over medium heat and add the olive oil. Once it shimmers, add your ground meat. My number one tip here? Let it sear for a minute before you start breaking it up! This creates those delicious, caramelized bits of flavor on the bottom of the pan. Then, use a wooden spoon to break it into crumbles and cook until it’s no longer pink. (Chef’s Hack: If you’re using higher-fat beef, you can drain a little of the excess grease after browning, but leave a bit for flavor!)
- Add Flavor (The Aromatics!): Now, stir in your diced onion, minced garlic, cumin, chili powder, and smoked paprika. This is the moment your kitchen will start smelling absolutely incredible. Sauté for 3-4 minutes, just until the onions have softened and the spices are fragrant. Don’t rush this step—toasting the spices in the oil unlocks their full potential! (Chef’s Hack: If things are cooking too fast and the garlic looks like it might burn, just add a tiny splash of water or broth to cool the pan down.)
- Rice It Up: Time for the main event! Dump in your entire bag of riced cauliflower, the salsa, and your optional beans and corn. Give everything a really good stir, making sure the cauliflower rice is coated in all those beautiful spices and juices. Let it cook, uncovered, for 5-7 minutes. You’re looking for the cauliflower to become tender but still have a slight bite—you don’t want it mushy! Stir it occasionally. (Chef’s Hack: If you’re using frozen cauliflower rice, it might release more water. Just cook it for a minute or two longer until that excess liquid evaporates.)
- Get Cheesy (The Best Part!): Turn the heat down to low. Now, evenly sprinkle that glorious mountain of shredded cheese over the entire surface of the skillet. Pop a lid on it (or use a baking sheet if you don’t have a lid) and let it hang out for 2-3 minutes. You’re just melting the cheese into a gooey, irresistible blanket. No peeking! (Chef’s Hack: For a beautifully browned and bubbly top, you can pop the whole skillet under the broiler for a minute or two at the end. Just make sure your skillet is oven-safe!)
- Finish & Serve: Take the skillet off the heat. Grab a handful of fresh cilantro, give it a rough chop, and scatter it over the top. Serve immediately with lime wedges on the side for that essential zesty squeeze. (Chef’s Hack: Let the skillet sit for 5 minutes after cooking—it makes serving so much easier and allows the flavors to settle in.)

How to Serve This Skillet Sensation
I love serving this right from the skillet at the table—it’s rustic, beautiful, and means less cleanup! For a full meal, I scoop generous portions into shallow bowls. The real fun is in the toppings. Set up a little “toppings bar” with extra cilantro, diced avocado, a dollop of cool sour cream or Greek yogurt, sliced jalapeños for heat, and of course, those all-important lime wedges. It turns a simple dinner into an interactive, restaurant-style experience that everyone loves.
Ride Your Own Flavor Wave: 5 Tasty Twists
This recipe is a perfect canvas for your cravings! Here are a few of my favorite ways to mix it up:
- Taco Tuesday Twist: Swap the spices for 1 tablespoon of your favorite taco seasoning and stir in a can of diced green chiles.
- Spicy Fiesta: Use pepper jack cheese and add a diced jalapeño (seeds and all for maximum heat!) when you cook the onions.
- Full Keto/Paleo: Simply omit the beans and corn. It’s just as delicious and fits perfectly into a keto lifestyle.
- Enchilada-Style: Replace the salsa with 1/2 cup of red enchilada sauce for a deeper, richer flavor profile.
- Breakfast-for-Dinner: Use breakfast sausage instead of ground turkey, and top with fried or scrambled eggs for the ultimate hearty meal.
Isla’s Kitchen Chronicles & Pro-Tips
This recipe has seen some things in my kitchen, let me tell you. I once made it for a last-minute potluck and accidentally used a bag of frozen riced broccoli instead of cauliflower. Guess what? It was a hit! It just goes to show you that the method is what matters most. Over time, I’ve learned that the key to avoiding a watery skillet is to not overcrowd the pan and to let the cauliflower cook until that excess moisture evaporates. If your skillet does get a bit soupy, just crank the heat up for the last minute of cooking, uncovered, and stir vigorously. This recipe is a living, breathing thing in my home—it adapts to what’s in the fridge, it comforts on tough days, and it always, always delivers on flavor. Don’t be afraid to make it your own!
Your Questions, Answered!
I’ve gotten so many amazing comments and questions on this recipe over the years. Here are the ones that pop up most often!
- Q: My cauliflower rice is turning out mushy. What am I doing wrong?
A: The most common culprit is overcrowding the pan or using frozen cauliflower rice that hasn’t had its excess water cooked off. Make sure you’re using a large enough skillet (a 10 or 12-inch is perfect) and cook over medium-high heat, stirring occasionally, until the liquid released by the cauliflower has evaporated. You want it tender, but with a texture similar to cooked rice. - Q: Can I make this ahead of time?
A: Absolutely! You can cook the entire dish, but hold off on adding the cheese. Let it cool, then store it in an airtight container in the fridge for up to 3 days. When you’re ready to eat, reheat it in a skillet over medium heat, stir well, then top with cheese and cover to melt. It might release a little more liquid upon reheating, so just cook it for a minute or two longer. - Q: I can’t find pre-riced cauliflower. Can I make my own?
A: You sure can, and it’s super easy! Just chop a head of cauliflower into florets (discarding the tough core) and pulse it in a food processor until it reaches a rice-like consistency. Be careful not to over-process, or it’ll turn to paste! One medium head of cauliflower usually yields about 4 cups of “rice.” - Q: Is this dish actually spicy?
A: As written, it’s more flavorful than spicy. The chili powder and cumin provide warmth, not intense heat. The spice level really depends on your salsa and chili powder. For a totally mild dish, use a mild salsa and a mild chili powder. To turn up the heat, use a hot salsa, add some cayenne pepper, or toss in those diced jalapeños!
Quick Nutrition & Prep Info
Prep Time: 10 mins | Cook Time: 15-20 mins | Total Time: 25-30 mins | Servings: 4
Please note: The following is an estimate and can vary based on specific ingredients used, especially the type of meat and cheese.
Per Serving (approx.): Calories: 350 | Protein: 28g | Carbs: 12g | Fat: 20g
