
Your New Favorite Cookie: The 4-Ingredient Wonder That Steals Every Heart
Hey there, friend! Isla here, from my cozy kitchen to yours. Have you ever had one of those moments where a cookie craving hits you like a tidal wave? I’m talking a deep, undeniable need for something sweet, salty, chewy, and chocolatey—all at once. Well, pull up a stool, because I’m about to introduce you to your new best friend in the baking world: the legendary Peanut Butter Kiss Cookie.
Now, I know what you’re thinking. “Isla, there are a million peanut butter blossom recipes out there.” And you’re right! But this one? This one is different. It’s the stripped-down, no-fuss, pure-magic version that I turn to when life gets beautifully chaotic (which is always). With just four main ingredients and about 20 minutes from bowl to bliss, these cookies are a testament to my core belief: that the most craveable flavors don’t need a long ingredient list or a fancy degree to make.
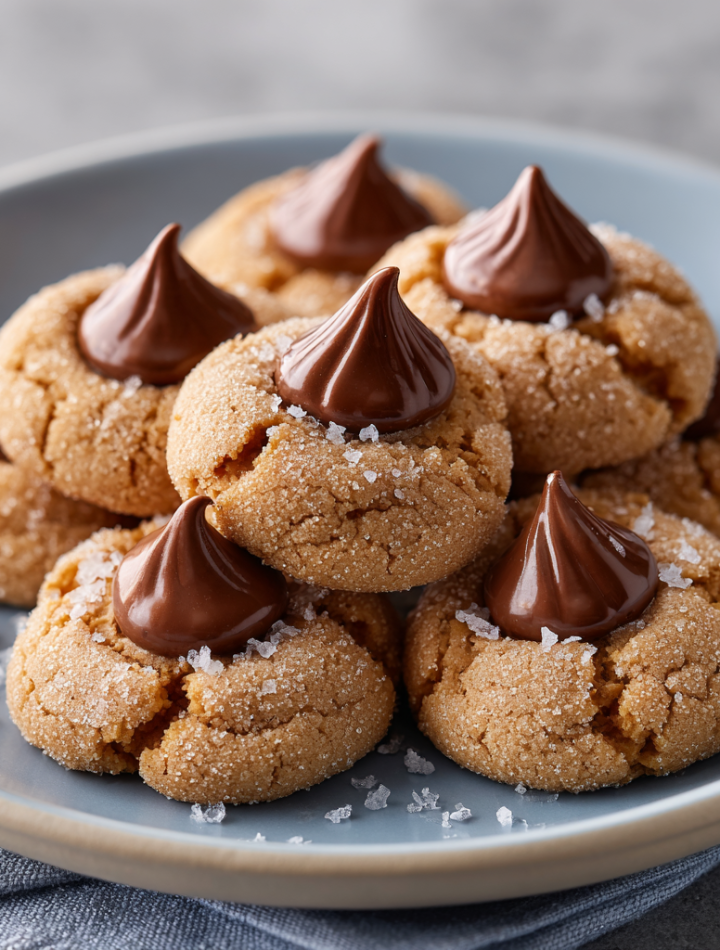
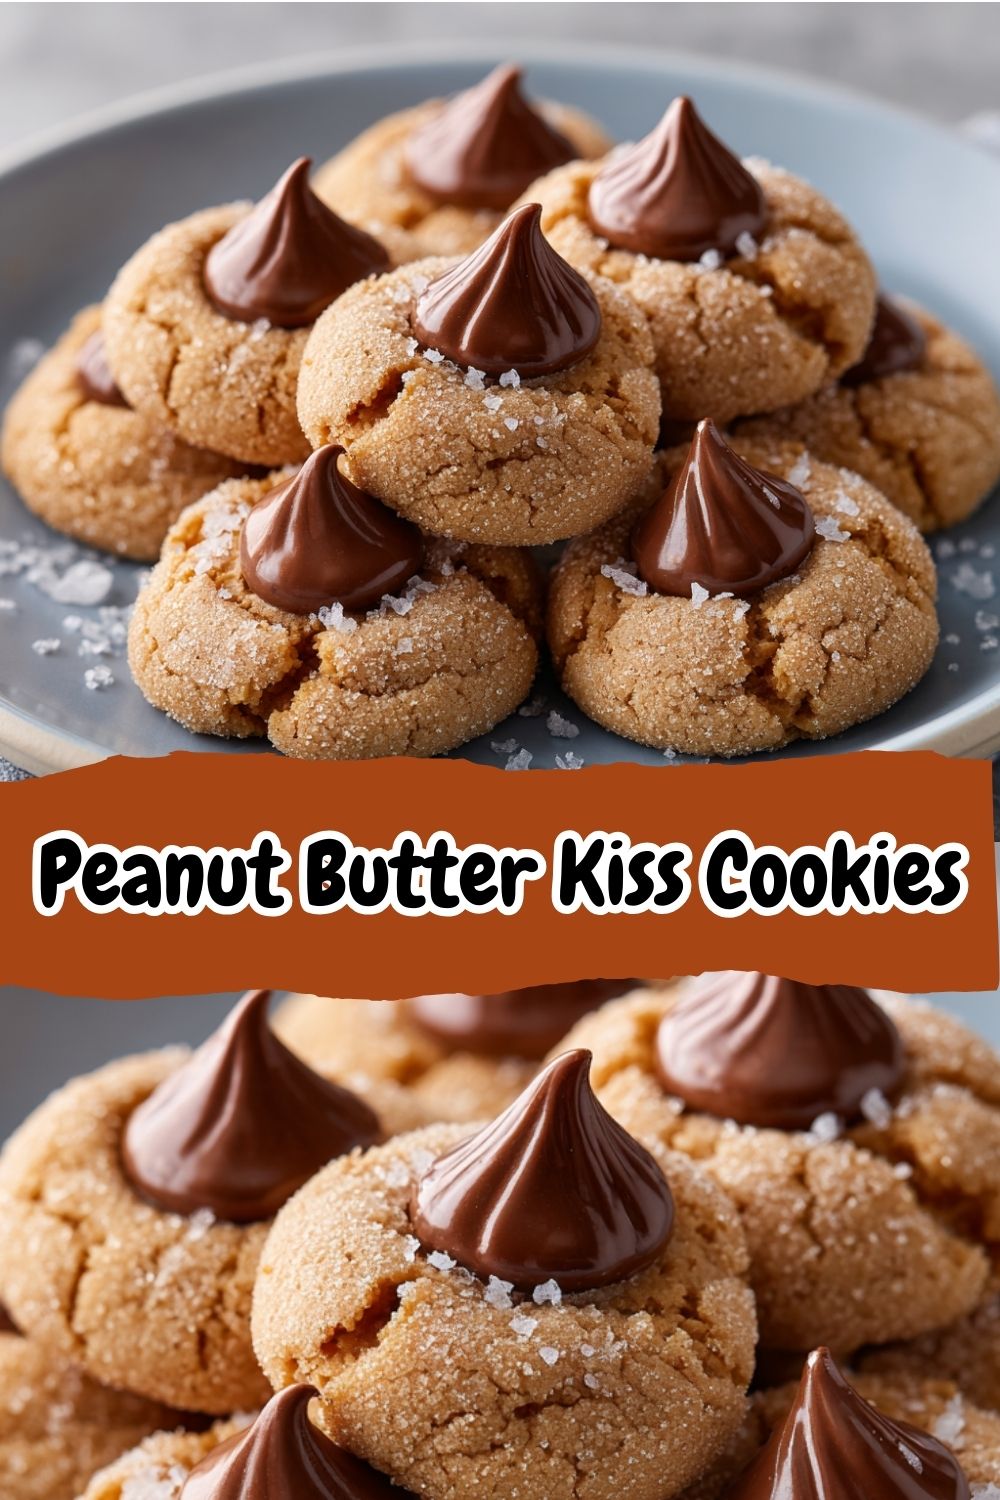
These cookies are the ultimate hug in dessert form. They’re soft and chewy with that signature crinkly top, and the second they come out of the oven, we crown them with a cool, melting milk chocolate kiss. It’s a perfect contrast of warm cookie and cool chocolate that just… works. It’s the cookie you make for last-minute guests, for a lunchbox surprise, for a holiday cookie swap that will have everyone asking for your “secret” recipe. And the best part? That secret is glorious simplicity itself. So, preheat that oven, and let’s bake some joy together!
A Kitchen Full of Love and Chocolate Smudges
I can’t talk about these cookies without flashing back to my grandma’s warm, always-flour-dusted kitchen. She was the queen of “a little of this, a little of that” cooking, but when it came to these cookies, she was a scientist. Every December, the ritual began. My job, as the smallest set of hands, was the all-important task of unwrapping the chocolate kisses. I’d sit at the Formica table, a mountain of silver foil growing beside me, trying my absolute hardest not to “test” too many for quality assurance.
The air would smell of roasting peanuts and sugar, and the radio would be playing holiday tunes. My grandma would let me roll the dough into little balls, her hands guiding mine, showing me how to make them just the right size so they’d bake evenly. But the real magic happened when the first tray came out of the oven. She’d call me over, hand me a kiss, and let me press it into the center of a puffy, golden cookie. It would sink down with a soft sigh, and I felt like I had performed actual kitchen wizardry. It wasn’t just about the cookies; it was about the connection, the shared focus, and the immense pride of creating something delicious together. That’s the feeling I hope these cookies bring to your kitchen.
Print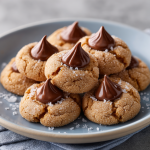
Peanut Butter Kiss Cookies
- Total Time: 20 minutes
- Yield: 36 cookies 1x
Description
With just four main ingredients, these soft, chewy peanut butter kiss cookies are the simplest way to deliver big flavor. Doubling the recipe means more to share—or stash—and a few easy upgrades give this classic a delicious new spin. Perfect for last-minute baking or holiday trays.
Ingredients
2 cups white sugar
2 cups creamy peanut butter
2 large eggs
36 milk chocolate candy kisses, unwrapped
Optional Twists:
Add 1 tsp vanilla extract or ½ tsp almond extract for extra depth
Use crunchy peanut butter for added texture
Roll dough in cinnamon sugar or sparkling sugar before baking
Use dark chocolate, peppermint, or caramel-filled kisses for variety
Add a pinch of sea salt on top for a salty-sweet finish
Instructions
Preheat oven to 350°F (175°C). Line a baking sheet with parchment paper.
In a bowl, mix sugar, peanut butter, eggs, and optional extract until smooth.
Roll dough into 1-inch balls. If desired, roll in sugar.
Place on baking sheet and bake for 9–10 minutes, until lightly golden.
Immediately press a kiss into the center of each warm cookie.
Let cool on the tray for 5 minutes, then transfer to wire racks.
- Prep Time: 10 minutes
- Cook Time: 10 minutes
- Category: Dessert
Nutrition
- Calories: 110–120
- Fat: 6g
- Carbohydrates: 12g
- Protein: 2g
Gathering Your Flavor Crew: It’s a Short List!
Here’s the beautiful part! You probably have everything you need in your pantry right now. This is the dream team for creating cookie magic:
- 2 cups white sugar: This might seem like a lot, but trust the process! The sugar is crucial for creating that dreamy, chewy texture and that classic crinkly top as the cookies bake. It also sweetens the deal since our peanut butter is the main star. For a slightly deeper flavor, you can swap out 1/4 cup for brown sugar, but it will change the texture slightly, making them a bit softer.
- 2 cups creamy peanut butter: Use the standard shelf-stable kind, not the natural kind that needs to be stirred. The oils in natural peanut butter can separate and make the cookies greasy and prone to spreading. This is your flavor foundation! For a fun textural twist, crunchy peanut butter is a fantastic option that adds a little surprise in every bite.
- 2 large eggs: Our binding agents! They hold the dough together and provide structure. Make sure they’re at room temperature for easiest mixing and a more uniform dough.
- 36 milk chocolate candy kisses, unwrapped: The grand finale! The classic milk chocolate is perfection, but don’t be afraid to play. Dark chocolate kisses offer a richer, less sweet bite, and hugs (the white and milk chocolate swirled ones) are a gorgeous and tasty alternative. Pro tip: unwrap them all before you start baking. You’ll thank yourself when the cookies are hot out of the oven!
Optional Flavor Boosters:
- 1 tsp vanilla extract or ½ tsp almond extract: A splash of vanilla is my go-to for adding a warm, sweet depth that complements the peanut butter beautifully. Almond extract makes it taste almost like a peanut butter and jelly sandwich in cookie form—it’s incredible!
- Sparkling sugar or cinnamon sugar for rolling: This is my favorite little upgrade! Rolling the dough balls in sugar before baking gives the cookies a delightful sparkly, crunchy exterior that contrasts with the soft interior.
- A pinch of flaky sea salt on top: After you press in the kiss, a tiny sprinkle of good sea salt takes these from great to absolutely unforgettable. Salty-sweet forever!
Let’s Bake! Your Foolproof Guide to Cookie Perfection
Ready to make some magic? Follow these steps, and you’ll be a peanut butter kiss cookie pro in no time. I’ve packed this section with all my best chef hacks to ensure your success!
- Preheat and Prep: Fire up your oven to 350°F (175°C). This is the perfect temperature to cook the cookies through without burning the bottoms. Line your baking sheets with parchment paper. This is non-negotiable for me! It prevents sticking and makes cleanup an absolute dream. No parchment? A silicone baking mat works great, too.
- The Big Mix: In a large bowl, combine the sugar, peanut butter, and eggs (and vanilla or almond extract, if using). Now, you can use a stand mixer with a paddle attachment, a hand mixer, or good old-fashioned elbow grease and a sturdy spoon. Mix until it’s completely smooth and all the ingredients are fully incorporated. You’ll know it’s ready when the dough is thick, a bit sticky, and pulls away from the sides of the bowl. Chef’s Hack: If the dough feels too sticky to handle, pop it in the fridge for 15-20 minutes. This makes it much easier to roll!
- Rolling Time: Using your hands or a small cookie scoop (a #60 scoop is perfect here!), portion the dough and roll it into 1-inch balls. Aim for uniformity so they all bake at the same rate. This is where you can get fancy! If you’re using that sparkling sugar or cinnamon sugar, roll each ball in the sugar now until it’s lightly coated. It adds such a pretty touch and a lovely little crunch.
- Bake to Golden Bliss: Place the dough balls about 2 inches apart on your prepared baking sheets. They don’t spread a ton, but they need a little room to breathe. Bake for 9-10 minutes. You’re looking for the edges to be very lightly golden and the tops to look just set. They might still look a tiny bit soft in the middle—that’s perfect! They will continue to cook on the hot tray. Chef’s Hack: Do NOT overbake! Overbaked cookies lose their beautiful chewiness and become crumbly. 10 minutes is usually the sweet spot in my oven.
- The Kiss: As soon as you pull the trays out of the oven, it’s go-time! Working quickly, gently press a chocolate kiss into the center of each warm cookie. You’ll see it sink down into that perfect little crater. Press firmly but not so hard that you break the cookie. The residual heat from the cookie will start to melt the chocolate just enough to make it stick. Chef’s Hack: If your kisses are getting too soft while you handle them, you can pop them in the freezer for 5 minutes before unwrapping.
- The Patient Wait: This is the hardest part! Let the cookies cool on the baking sheet for at least 5 minutes. If you try to move them too soon, they might break. After they’ve firmed up a bit, transfer them to a wire rack to cool completely. This allows the bottom to crisp up nicely and the chocolate to set back up.
How to Serve These Beauties
These cookies are stars all on their own, but presentation is part of the fun! Pile them high on a rustic wooden board for a casual gathering. For a more elegant touch, arrange them on a beautiful vintage platter. They pair perfectly with a cold glass of milk, a hot cup of coffee, or a dunk in some hot cocoa. Honestly, they’re best served with a big smile and shared with people you love.
Ride the Flavor Wave: Let’s Get Creative!
The basic recipe is perfection, but I love a good kitchen experiment. Here are a few ways to make these cookies your own:
- The Chocolate Lover: Swap the milk chocolate kisses for dark chocolate, caramel-filled, or even peanut butter-filled ones!
- The Holiday Twist: Use peppermint-filled kisses for a festive winter treat. Roll the dough balls in crushed candy canes for an extra peppermint punch.
- The Texture Seeker: Use crunchy peanut butter or stir in 1/4 cup of finely chopped salted peanuts into the dough for an extra nutty crunch.
- The gluten-free Friend: Good news! This recipe is naturally gluten-free. Just double-check that your peanut butter and other ingredients are certified GF to be safe.
- The Triple Threat: Drizzle cooled cookies with melted chocolate or a simple powdered sugar glaze for a truly decadent finish.
Isla’s Kitchen Confidential: Notes from My Counter to Yours
This recipe has been with me for years, and it’s evolved in little ways. I used to be so nervous about underbaking that I’d leave them in for 12 minutes, only to end up with less-chewy cookies. Trust the timer! I also went through a phase of adding flax seeds and wheat germ to make them “healthier.” My family politely asked me to please never do that again. Some classics are meant to be celebrated as they are.
One of my favorite kitchen memories involving these cookies was the Great Holiday Bake-Off of, well, let’s not say the year. I was determined to make 10 different types of cookies. I got to these last, and in my tired state, I forgot the sugar. I baked an entire tray of sad, savory peanut butter pucks before I realized my mistake. We still laugh about it. The moral of the story? Even pros make mistakes! Always taste your dough (it’s egg-safe since there’s no flour!) before baking a whole batch.
Your Questions, Answered!
Q: My cookies spread too much and went flat! What happened?
A: The most likely culprit is your peanut butter. If you used a natural peanut butter (the kind where the oil separates on top), it can cause spreading. Next time, grab the standard creamy Jif or Skippy kind. Also, make sure your oven is fully preheated before the cookies go in.
Q: My cookies are too crumbly and dry. How can I fix that?
A: This is almost always a case of overbaking. Remember, the cookies continue to cook on the hot tray after you take them out. Pull them out at 9 minutes, even if they look a little underdone. They will set up perfectly. Also, be sure to measure your peanut butter correctly—packed into the measuring cup.
Q: Can I make the dough ahead of time?
A: Absolutely! You can cover the bowl and refrigerate the dough for up to 2 days. You can also roll the dough into balls and freeze them on a parchment-lined tray. Once frozen solid, transfer them to a zip-top freezer bag for up to 3 months. Bake straight from frozen, adding 1-2 minutes to the bake time.
Q: The chocolate kiss completely melted into a puddle! Help!
A: The cookies were likely too hot when you placed the kiss. Let them cool on the baking sheet for just 60-90 seconds before pressing the chocolate in. Also, ensure your kisses are at room temperature, not warm from being in a hot kitchen.
Nutritional Information (Per Cookie, Approximate)
Calories: 115kcal | Carbohydrates: 12g | Protein: 3g | Fat: 7g | Saturated Fat: 2g | Cholesterol: 9mg | Sodium: 55mg | Potassium: 65mg | Fiber: 1g | Sugar: 11g | Vitamin A: 15IU | Calcium: 15mg | Iron: 0.2mg
*Please note: This is an estimate provided for informational purposes only. Actual values will vary based on ingredient brands and specific measurements used.