Ditch the Boring Appetizer: Your New Go-To Party Starter is Here!
Hey there, flavor friend! Isla here, from my cozy kitchen to yours. Ever find yourself staring into the abyss of your refrigerator, tasked with creating something *spectacular* for a holiday party, girls’ night, or frankly, just a Tuesday that deserves a little celebration? You want it to look like you spent hours, taste like a dream, and secretly be so simple you can whip it up while simultaneously narrating your life story to your bestie on the phone. I see you. I AM you. And that, my friend, is exactly why these Roasted Pear and Blue Cheese Salad Cups were born.
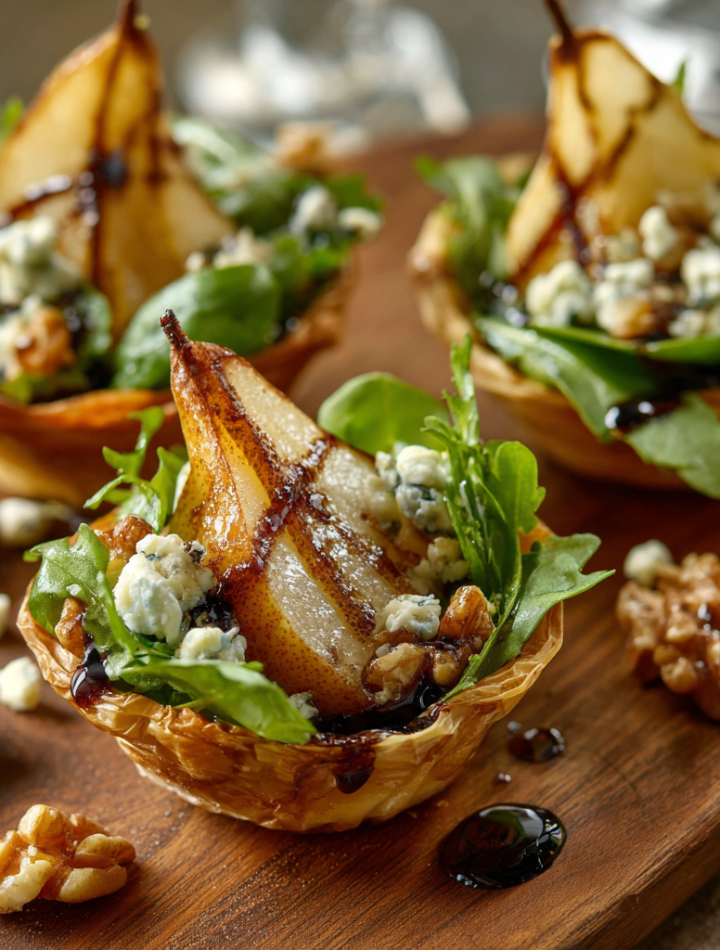
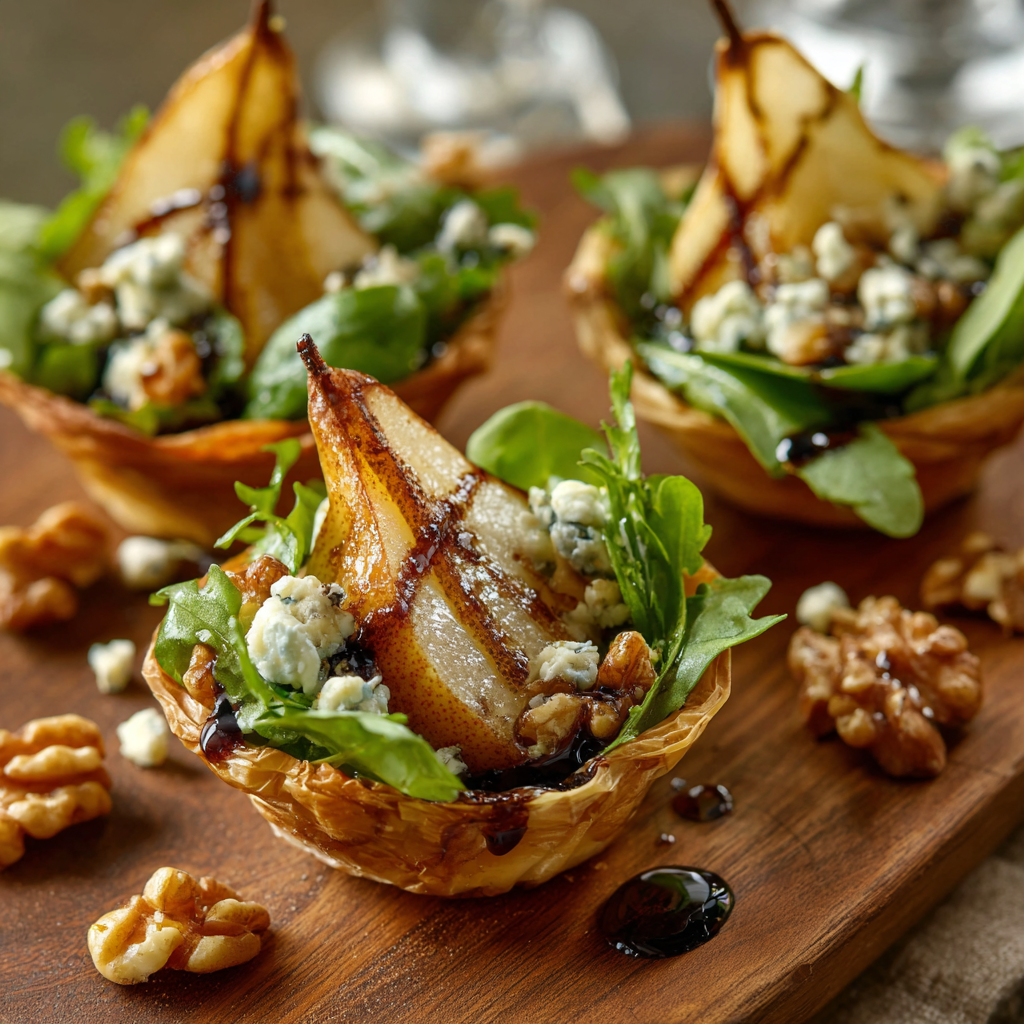
Imagine this: sweet, caramelized pears fresh from the oven, their warmth mingling with the bold, tangy punch of creamy blue cheese. Then, add a crunch of toasted walnuts and the peppery kick of fresh arugula, all nestled in a cute, edible cup and finished with a luxurious drizzle of balsamic glaze. It’s a flavor explosion in every single bite—a perfect harmony of sweet, savory, creamy, and crisp. These little cups are more than just an appetizer; they’re a conversation starter, a guaranteed crowd-pleaser, and proof that the most elegant dishes are often the simplest to make. So, preheat that oven, grab your favorite mixing bowl, and let’s turn simple ingredients into pure magic together.
A Slice of Memory: Where This Recipe Really Came From
This recipe, like so many of my favorites, has its roots tangled up in memory and a little bit of happy kitchen chaos. It was a chilly, golden-hour autumn afternoon years ago. My grandma, a woman who believed a perfectly ripe pear was one of life’s greatest treasures, had brought over a giant basket of them from her tree. We were meant to be making a pie, but as usual, we got distracted—taste-testing different cheeses and daydreaming about what to serve at her bridge club gathering the next day.
I’ll never forget the smell of those pears roasting in her ancient oven, their sugary scent filling her warm, tiny kitchen. She, ever the iconoclast, tossed a few slices with some leftover blue cheese from a steak dinner and declared it a “grown-up candy.” We stood there at the counter, eating warm pear and blue cheese off little plates, laughing at how something so random could be so ridiculously good. That spontaneous combo, born from distraction and a love of good food, is the heart and soul of this recipe. It’s my grandma’s fearless flavor pairing, all grown up and dressed for a party. Every time I make these, I think of her, and it makes the experience that much sweeter.
Print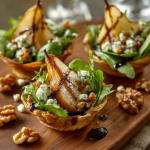
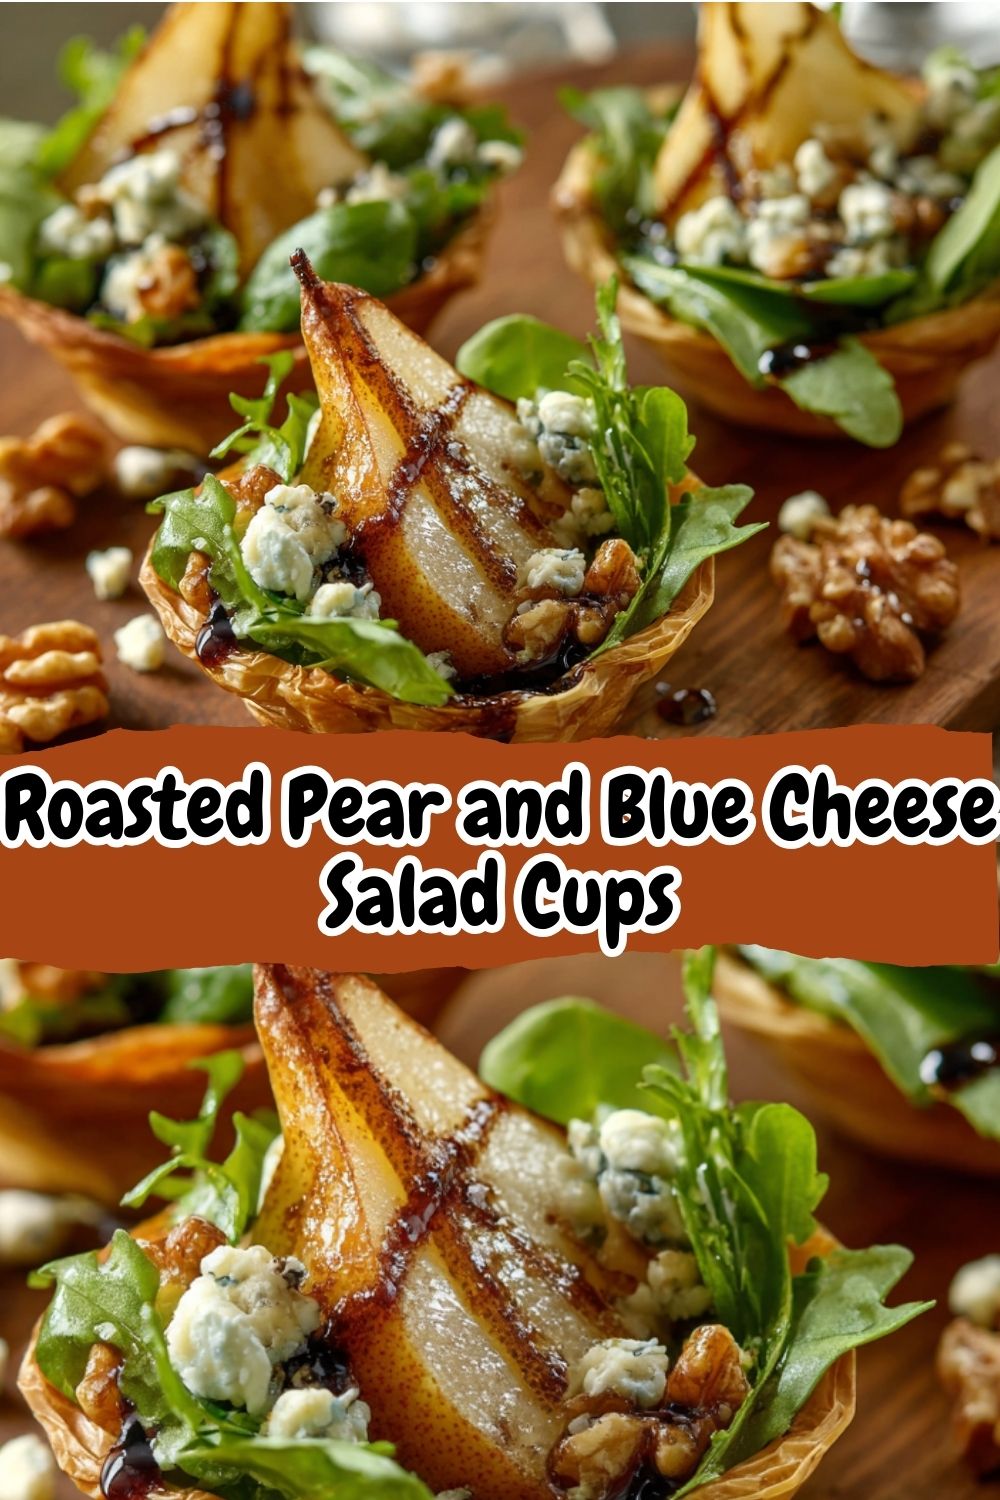
Roasted Pear and Blue Cheese Salad Cups
- Total Time: 30 minutes
- Yield: 12–16 cups 1x
Description
Sweet, savory, and totally chic—these salad cups pair caramelized roasted pears with tangy blue cheese, crisp greens, and crunchy walnuts. Served in edible cups or mini shells, they’re the perfect bite-sized starter for fall or holiday gatherings.
Ingredients
2 ripe pears, sliced
1 tbsp olive oil
Salt & pepper to taste
1 cup baby arugula or mixed greens
¼ cup crumbled blue cheese
¼ cup toasted walnuts, chopped
1 tbsp balsamic glaze or vinaigrette
Mini phyllo shells or endive leaves for serving
Instructions
Roast pears: Preheat oven to 400°F (200°C). Toss pear slices with olive oil, salt, and pepper. Roast for 15–20 mins until tender and golden.
Assemble cups: In each phyllo shell or endive leaf, layer a few greens, a slice of roasted pear, a sprinkle of blue cheese, and walnuts.
Drizzle with balsamic glaze just before serving.
- Prep Time: 10 mins
- Cook Time: 20 mins
- Category: Dinner
Nutrition
- Calories: 80
- Sugar: 3g
- Fat: 5g
- Carbohydrates: 7g
- Protein: 2g
Gathering Your Flavor Crew: The Ingredients
This is where the magic starts! Here’s your shopping list for these irresistible bites. Remember, cooking is an adventure, not a rigid science—so feel free to play around with these!
- 2 ripe but firm pears (Bosc or Anjou are my faves): You want them just ripe enough to be sweet but still firm enough to hold their shape during roasting. A mushy pear will turn to jam! Chef’s Insight: No Bosc? Anjou works beautifully. In a pinch, a firm apple like Honeycrisp is a fantastic swap!
- 1 tbsp olive oil: This is our roasting workhorse! It helps the pears caramelize into golden perfection. A good extra virgin olive oil adds a lovely fruitiness.
- Salt & pepper to taste: Don’t you dare skip the salt! It’s the secret weapon that makes the sweet pears sing and balances the richness of the cheese. Freshly cracked black pepper adds a tiny, welcome heat.
- 1 cup baby arugula or mixed greens: I’m team arugula all the way for its peppery bite, but a spring mix or even little gems of butter lettuce work if you want something milder.
- ¼ cup crumbled blue cheese: The star of the show! I love a classic Danish or Maytag blue for its creamy tang. Substitution Tip: If blue cheese isn’t your thing, creamy goat cheese (chèvre) or even sharp feta will create a totally different but equally delicious vibe.
- ¼ cup toasted walnuts, chopped: Toasting is NON-NEGOTIABLE. It wakes up their oils and gives you that deep, nutty crunch. Chef’s Hack: Toast them in a dry pan over medium heat for 3-5 minutes until fragrant. Watch them like a hawk—they burn fast!
- 1 tbsp balsamic glaze: This is the elegant finish! The thick, syrupy glaze clings beautifully. Chef’s Insight: Please don’t confuse this with regular balsamic vinegar, which is runny and will make your cups soggy. If you only have vinegar, simmer ¼ cup of it in a small pan until it reduces by half and thickens.
- Mini phyllo shells or endive leaves for serving: Your edible vessel! The pre-made phyllo cups are a lifesaver for crunch and ease. For a lighter, gluten-free option, endive leaves are chic, refreshing, and have a lovely bitter contrast.
Let’s Get Building: Your Foolproof Steps to Success
Ready to create some magic? Follow these steps, and you’ll have a platter of gorgeous appetizers in no time. I’ve packed this section with all my best tips to ensure your success!
- Preheat and Prep: Fire up your oven to 400°F (200°C). This is the perfect roasting temp—hot enough to caramelize the sugars in the pears but not so hot that they burn before tenderizing. While it heats, line a baking sheet with parchment paper. Trust me, this saves you from a sticky, frustrating clean-up later!
- Pear-fect Slices: Wash your pears. You can peel them if you want a more refined look, but I often leave the skin on for extra fiber and color! Slice them in half, core them (a melon baller works wonders for this), and then slice them into ¼-inch thick half-moons. Chef’s Hack: Toss your sliced pears in a bowl with the olive oil, salt, and pepper. Using your hands is the best way to ensure every single slice gets a glossy, even coat.
- Roast to Sweetness: Arrange the pears in a single layer on your prepared baking sheet. Single layer is key! If they’re piled on top of each other, they’ll steam instead of roast. Pop them in the oven for 15-20 minutes. You’re looking for them to be tender when pierced with a fork and have gorgeous golden-brown edges. The smell will be incredible. Let them cool for a few minutes after roasting—this stops them from wilting your greens.
- Toast Those Nuts: While the pears are roasting, toast your walnuts. Place them in a dry skillet over medium heat. Shake the pan frequently for 3-5 minutes until they’re fragrant and slightly darker. Immediately transfer them to a cutting board to cool, then give them a rough chop. Toasting is the step that takes them from “okay” to “OH WOW!”
- The Grand Assembly: Now for the fun part! Lay out all your phyllo cups or endive leaves on a serving platter. Place a small piece of arugula in each one—this creates a base and prevents the pear moisture from making the bottom soggy. Top with a warm slice of roasted pear, a generous crumble of blue cheese, and a sprinkle of those glorious toasted walnuts.
- The Final Drizzle: Wait to do this until right before you serve! Take your balsamic glaze and drizzle it artfully over the top of each cup. This is your moment to feel like a professional chef plating at a five-star restaurant. It adds a beautiful visual touch and that final hit of sweet-and-sour flavor.
Plating with Panache: How to Serve These Beauties
You’ve made something amazing—now show it off! Arrange your finished salad cups on a beautiful wooden board or a sleek white platter to make the colors really pop. Scatter a few extra arugula leaves, walnut pieces, and a few tiny pear slices around the platter for a professionally styled look. I love serving these immediately while the pears are still slightly warm, as the contrast between the warm pear and cool, crisp greens is just *chef’s kiss*. They’re the perfect elegant starter for a sit-down dinner, but they also shine as part of a larger appetizer spread. Pair them with a crisp glass of Sauvignon Blanc or a dry cider, and watch them disappear!
Ride Your Own Flavor Wave: Fun Variations to Try
The beauty of this recipe is its flexibility! Once you’ve mastered the classic, try one of these delicious twists:
- Goat Cheese & Honey: Swap the blue cheese for creamy goat cheese and drizzle with warm honey instead of balsamic for a sweeter, tangier profile.
- Prosciutto & Pepita: Add a thin ribbon of salty prosciutto to each cup and swap the walnuts for toasted pepitas (pumpkin seeds) for a salty crunch.
- Maple Candied Pecans: Use maple-candied pecans instead of walnuts for an next-level sweet and crunchy element.
- Vegan Delight: Use a vegan blue cheese alternative (or skip it) and swap the honey in the glaze for maple syrup. It’s still utterly delicious!
- Fig & Feta: In the late summer, try using fresh, ripe figs instead of pears and swap the blue cheese for a firm, salty feta.
From My Kitchen to Yours: Chef’s Notes
This recipe has evolved so much since that first afternoon with my grandma. I’ve made these cups for probably a hundred events now, and I’ve learned a thing or two. The first time I brought them to a potluck, I made the classic mistake of assembling them hours ahead of time. The phyllo cups turned from delightfully crisp to tragically soggy. I learned my lesson: always assemble as close to serving as possible! Now, I prep all the components separately—roast the pears, toast the nuts, crumble the cheese—and transport them in little containers. Then, I do the assembly on-site. It takes 5 minutes and earns me maximum “wow” points. It’s all about working smarter, not harder! This recipe is a testament to that. It feels fancy, but it’s built for real life, real people, and really good times.
Your Questions, Answered: FAQs & Troubleshooting
Q: Can I make any part of this ahead of time?
A: Absolutely! This is a great make-ahead app. Roast the pears and let them cool completely, then store them in an airtight container in the fridge for up to 2 days. Toast and chop the walnuts and store them at room temperature. Crumble the cheese. Assemble everything just before serving for the best texture.
Q: My pears turned out mushy. What happened?
A: This usually means they were too ripe to begin with, or they were overcrowded on the pan and steamed instead of roasting. Next time, look for pears that are still quite firm to the touch, and always spread them in a single layer with a little space between each slice.
Q: I can’t find balsamic glaze. What can I use?
A: No problem! As mentioned, you can make your own by gently simmering ¼ cup of regular balsamic vinegar until it reduces by half and becomes syrupy. Alternatively, a high-quality, aged balsamic vinegar will be thicker and can work in a pinch, or you can use a fig jam thinned with a tiny bit of water.
Q: Are there any other serving vessels I can use?
A: Get creative! Butter lettuce or radicchio cups work great. For a heartier option, serve the salad mixture on top of crostini or little slices of a baguette. It’s more of a bruschetta then, but just as tasty!
Nutritional Information*
*This is provided as an estimate based on the ingredients used and standard calculations. For precise dietary needs, please consult a nutritionist.
Per Salad Cup (approx): Calories: ~80 | Fat: 5g | Saturated Fat: 1g | Carbohydrates: 7g | Fiber: 1g | Sugar: 3g | Protein: 2g
There you have it! Your secret weapon for effortless entertaining. I hope you love making and sharing these Roasted Pear and Blue Cheese Salad Cups as much as I do. If you try them, I’d be absolutely thrilled to hear about it! Tag me on Instagram @BiteTide or drop a comment below. Now go forth and impress everyone!
With love and a full plate,
Isla 💛