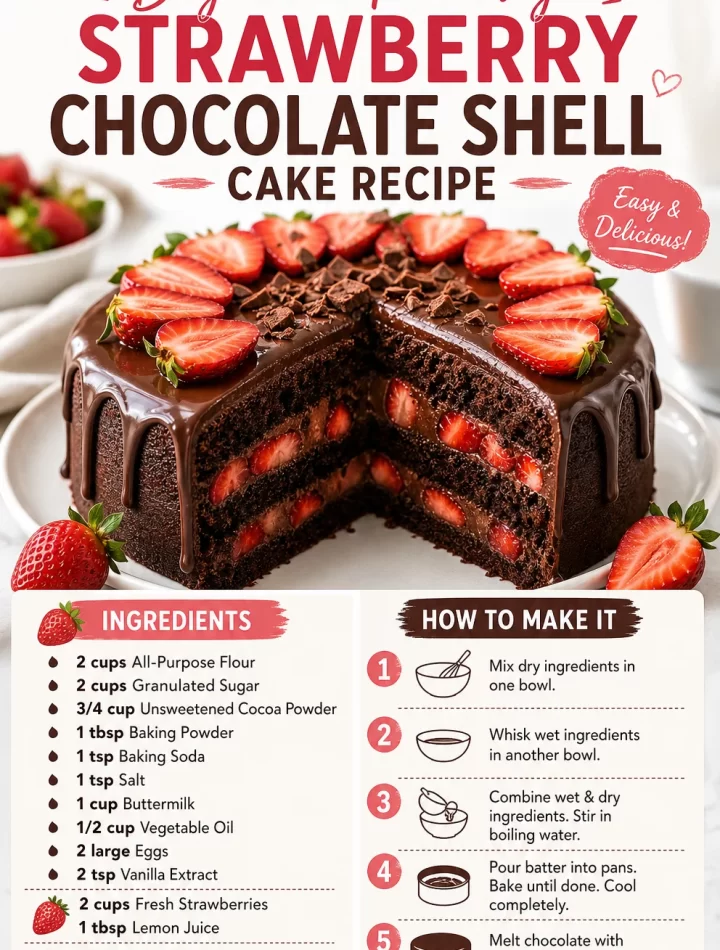
Indulgent Strawberry Chocolate Shell Cake That Wows Every Time
Hey there, fellow food lovers! Isla here, and I am beyond excited to share with you one of my all-time favorite dessert creations: the Indulgent Strawberry Chocolate Shell Cake. Let me tell you, not only is this cake beautiful to look at, but it’s also an explosion of flavors that will have everyone asking for seconds (maybe even thirds!). With layers of rich chocolate cake, fresh strawberries, and a glossy chocolate shell, this cake is a showstopper that’s surprisingly easy to whip up in your own kitchen. So, grab your apron, and let’s dive into this sweet adventure together!
A Slice of Nostalgia: A Cake to Remember
Before we get into the nitty-gritty of the recipe, I want to share a little story with you that inspired this cake. One summer, when I was about 10, my grandma and I decided to enter the county fair baking competition. I remember the excitement bubbling in my chest as we planned our entry. Grandma’s specialty was cake, and she decided we would create a chocolate cake layered with fresh strawberries from her garden.
We spent the entire afternoon in her cozy kitchen, the air filled with laughter and the delightful smell of chocolate. I’ll never forget the look on her face when we stacked the layers—each one drizzled with homemade chocolate ganache. We didn’t win first place (thanks to that incredibly impressive apple pie down the row), but what I gained that day was far more precious: a love for baking and the joy of creating something delicious with the people I love.
That memorable day fueled my passion for desserts, and this cake is a beautiful tribute to those lovely moments spent in the kitchen.
Ingredients: Let’s Gather Our Essentials
Here’s what you’ll need to create this mouthwatering cake:
-
2 cups All-Purpose Flour
Tip: If gluten is a concern, you can substitute this with gluten-free flour. -
2 cups Granulated Sugar
Chef insight: Brown sugar works well here for a deeper flavor profile. -
3/4 cup Unsweetened Cocoa Powder
Suggestion: Dutch-process cocoa offers a smoother taste if you can get your hands on it! -
1 tablespoon Baking Powder
Note: Make sure it’s fresh; it’s vital for that perfect rise. -
1 teaspoon Baking Soda
Chef’s tip: If you’re using self-rising flour, feel free to omit this! -
1 teaspoon Salt
Alternative: Sea salt adds a lovely touch to the flavor. -
1 cup Buttermilk
Tip: No buttermilk? Mix yogurt or regular milk with a splash of vinegar. -
1/2 cup Vegetable Oil
Substitution: Melted coconut oil adds a lovely tropical twist! -
2 large Eggs
Vegan option: Flaxseed meal mixed with water can be a great substitute. -
2 teaspoons Vanilla Extract
Try using almond extract for an exciting flavor twist! -
1 cup Boiling Water
Hot water helps bloom the cocoa for a rich taste—don’t skip this step! -
2 cups Fresh Strawberries
Variations: Feel free to swap these for raspberries or blueberries. -
1 tablespoon Lemon Juice
Lime juice works beautifully if you’re looking for a different zing! -
8 ounces Dark Chocolate
Semi-sweet chocolate can also work if that’s what you have on hand. -
2 tablespoons Coconut Oil
Vegetable oil can substitute this, though it may alter the final texture slightly.
Step-by-Step Instructions: Let’s Bake!
-
Preheat Your Oven
Preheat your oven to 350°F (175°C). Greasing and flouring two 9-inch round cake pans is also a key step! This ensures that your cake comes out without a hitch. -
Combine Dry Ingredients
In a large mixing bowl, sift together the flour, sugar, cocoa powder, baking powder, baking soda, and salt. Give it a thorough mix! This step is crucial; it ensures that your leavening agents are evenly distributed in the batter. -
Mix Wet Ingredients
In another bowl, whisk together the buttermilk, vegetable oil, eggs, and vanilla until combined. In my kitchen, I always aim for a smooth consistency to avoid lumps. You might even want to use a hand mixer for this part! -
Combine Wet and Dry Ingredients
Gradually pour the wet ingredients into the dry ingredients, stirring gently until they come together. Here comes the fun part—add in the boiling water! Don’t be alarmed; the batter will be thin. This is what creates that ultra-moist cake we all love. -
Bake the Cakes
Pour the batter equally into the prepared cake pans. Bake for 30–35 minutes, or until a toothpick inserted in the center comes out clean. Pro tip: Check the cakes around the 25-minute mark. You’ll want to avoid overbaking! -
Cool Down
Once baked, let the cakes cool in the pans for about 10 minutes before transferring them to a wire rack to cool completely. This gives you time to whip up that tasty filling! -
Prepare the Strawberries
While the cake cools, wash and slice your strawberries. Toss them with lemon juice to enhance their flavor. If you’re using sugar, a sprinkle will work wonders too! -
Create the Chocolate Shell
Melt the dark chocolate and coconut oil together in a microwave-safe bowl, stirring until smooth. This glossy shell is what takes this cake over the top! -
Assemble the Cake
Place one chocolate cake layer on a serving plate. Add a generous layer of strawberries on top and drizzle a bit of chocolate sauce over them (don’t be shy!). Carefully place the second cake layer on top. -
Final Touch
Pour the melted chocolate mixture over the top of your cake, allowing it to drizzle down the sides. Add a few more strawberries on top for that beautiful finish!
Serving Suggestions: Plate It Up!
When it comes to serving this gorgeous cake, presentation is key! Place the cake on a festive platter, and consider adding some fresh mint leaves as a garnish. For an extra touch of elegance (and deliciousness), serve it with a dollop of whipped cream on the side!
Recipe Variations: Get Creative!
-
Chocolate Strawberry Swirl: Before pouring the batter into the pans, reserve about a cup of batter. Mix in half of your strawberry filling with the reserved batter, and then layer it before baking for a beautiful marbled effect.
-
Nutty Chocolate Delight: Add chopped nuts (like walnuts or hazelnuts) to the batter for an added crunch if you’re in the mood for something nutty!
-
Zesty Citrus Cake: Incorporate orange zest into the batter for a citrusy punch that complements the chocolate and strawberries beautifully.
-
Decadent Ganache Topping: Make a richer chocolate ganache with equal parts chocolate and heavy cream for a thick layer on top rather than a shell.
-
Vegan Cake: Use flaxseed meal for the eggs, coconut milk for the buttermilk, and substitute applesauce for the oil to create a delicious vegan version of this cake!
Chef’s Notes: Fun Insights!
Each time I make this cake, I’m reminded of that summer day in my grandma’s kitchen. It’s funny how food can transport us back in time. This recipe has certainly evolved from my first attempts, especially when I discovered how much I loved using fresh fruit in my cakes. The glossy chocolate shell, I must admit, was a happy accident! I was looking to make a classic ganache when I stumbled upon that delightful pour-over technique. The laughter and chaotic energy of my kitchen always inspire my next adventure—trust me, the best recipes come from a little kitchen mishap now and then!
FAQs and Troubleshooting
-
Why is my cake dry?
If your cake turns out dry, you probably overbaked it. Make sure to check for doneness around the 25-minute mark and keep an eye on the time! -
How can I ensure even layers?
Using a kitchen scale can help divide your batter evenly into pans. You’ll have perfectly layered cakes every time! -
What if my chocolate shell doesn’t set properly?
Make sure the chocolate is melted but not too hot when you pour it over the cake. If it’s too warm, it might melt your fresh strawberries! -
Can I make this ahead of time?
Absolutely! The cake layers can be baked and stored in the fridge for a couple of days. Just wait to assemble and pour the shell until you’re ready to serve.
Nutritional Info (Optional)
While indulgent desserts like these don’t always comply with a strict nutritional profile, it’s good to know what you’re enjoying. Each slice boasts a rich source of antioxidants from the cocoa and strawberries—which means you’re doing your body a favor while satisfying that sweet tooth!
And there you have it, my delightful friends! This Indulgent Strawberry Chocolate Shell Cake is ready to wow at any gathering, or simply on your kitchen table (because you deserve a sweet treat!). Remember, the best memories are made around the dinner table, and I hope this recipe brings you as much joy as it has me. Let’s keep the food love flowing! Don’t forget to share your yummy creations on social media—tag me, and let’s stay connected as we ride the flavor wave together! 💛
Print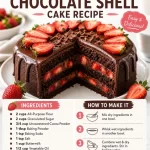
Indulgent Strawberry Chocolate Shell Cake
- Total Time: 55 minutes
- Yield: 10 servings 1x
- Diet: Vegetarian
Description
A beautiful layered chocolate cake featuring fresh strawberries and a glossy chocolate shell, perfect for any occasion.
Ingredients
- 2 cups All-Purpose Flour
- 2 cups Granulated Sugar
- 3/4 cup Unsweetened Cocoa Powder
- 1 tablespoon Baking Powder
- 1 teaspoon Baking Soda
- 1 teaspoon Salt
- 1 cup Buttermilk
- 1/2 cup Vegetable Oil
- 2 large Eggs
- 2 teaspoons Vanilla Extract
- 1 cup Boiling Water
- 2 cups Fresh Strawberries
- 1 tablespoon Lemon Juice
- 8 ounces Dark Chocolate
- 2 tablespoons Coconut Oil
Instructions
- Preheat your oven to 350°F (175°C) and grease two 9-inch round cake pans.
- Combine the flour, sugar, cocoa powder, baking powder, baking soda, and salt in a mixing bowl.
- Mix the buttermilk, vegetable oil, eggs, and vanilla in another bowl until smooth.
- Pour the wet ingredients into the dry ingredients, mixing gently. Add the boiling water to create a thin batter.
- Pour the batter into prepared pans and bake for 30–35 minutes.
- Cool the cakes in the pans for 10 minutes, then transfer to a wire rack.
- Prepare the strawberries by washing, slicing, and tossing them with lemon juice.
- Melt the dark chocolate and coconut oil in a microwave-safe bowl until smooth.
- Assemble the cake by layering the first cake with strawberries and drizzle with chocolate sauce.
- Final pour the melted chocolate over the top and add more strawberries for garnish.
Notes
Serve with whipped cream and fresh mint leaves for an elegant touch.
- Prep Time: 20 minutes
- Cook Time: 35 minutes
- Category: Dessert
- Method: Baking
- Cuisine: American
Nutrition
- Serving Size: 1 slice
- Calories: 400
- Sugar: 35g
- Sodium: 300mg
- Fat: 19g
- Saturated Fat: 9g
- Unsaturated Fat: 8g
- Trans Fat: 0g
- Carbohydrates: 56g
- Fiber: 3g
- Protein: 6g
- Cholesterol: 60mg
Keywords: chocolate cake, strawberry dessert, birthday cake, layered cake, special occasion