 Sunshine in a Snack: The Easiest, Cheeriest Fruit Roll-Ups You’ll Ever Make!
Hey friend! Isla here, coming at you from my kitchen where, let’s be honest, there’s always a stray strawberry on the counter and a spoon in the sink. Today, we’re diving into one of my all-time favorite kitchen magic tricks: turning a pile of fresh fruit into gorgeous, chewy, homemade fruit roll-ups. And I’m not talking about a complicated, all-day project. I mean a truly simple, 3-ingredient wonder that will make you feel like a total superhero.
Remember those shiny, sticky fruit roll-ups from your childhood lunchbox? The ones that tasted more like neon than nature? We’re reclaiming that fun, but we’re doing it the real-food way. Our version is bursting with pure strawberry sunshine, sweetened just enough with honey, and kissed with a hint of lemon to make the flavors pop. There are no mysterious additives, no food dyes, and you control every single bit of sugar that goes in. It’s a snack you can feel genuinely great about handing to your kids, your friends, or just treating yourself to while hiding in the pantry for five minutes of peace (no judgment here!).
This recipe is the heart of what BiteTide is all about: flavor that makes you smile, without the fuss. All you need is a blender, a baking sheet, and a little patience while your kitchen fills with the most incredible candy-sweet aroma. Whether you’re meal-prepping healthy snacks, looking for a fun project with little helpers, or just craving a taste of pure fruit, these roll-ups are your new best friend. So, tie on your favorite apron, and let’s turn some berries into edible joy!
A Strawberry-Stained Summer Memory
This recipe takes me straight back to my grandma’s sun-drenched patio, circa 1998. She had these wild, rambling strawberry plants that produced the tiniest, most intensely flavored berries you can imagine. My summer job, as decreed by her, was to help pick them before the birds got their share. My brother and I would end up with more berries in our mouths and smeared on our shirts than in our baskets, our fingertips permanently stained pink.
One blisteringly hot afternoon, after we’d hauled in a particularly huge haul, she announced we weren’t making jam. “Too hot for the stove,” she declared. Instead, she pulled out her old, avocado-green dehydrator. We blended the berries with a spoonful of her precious orange blossom honey, spread the vibrant pink puree onto trays, and waited. The wait felt eternal to my 8-year-old self! But when she finally peeled up that first sheet of fruit leather and cut it into strips, it was a revelation. It was like we’d captured the very essence of that summer day—warm, sweet, and bursting with joy—and rolled it up into something we could savor for weeks. Making these roll-ups now always brings back that feeling of simple, sticky-fingered magic. It’s a tradition I’m so happy to pass on to you.
Your Simple, Sunshine-Packed Lineup
See? I told you it was simple! This trio works in perfect harmony. Here’s the scoop on each player and how you can tweak it to make this recipe your own.
- 4 cups fresh strawberries, hulled: This is our star! The flavor foundation. Look for ripe, fragrant berries for the best sweetness. Chef’s Insight: Don’t stress about perfect uniformity—a few slightly under-ripe berries can add a lovely bright tang, while super ripe ones bring the deep sweetness. Frozen strawberries work in a pinch! Just thaw them completely and drain off any excess liquid before blending.
- 2–3 tablespoons honey: Our natural sweetener and binder. Honey adds a lovely floral depth that plain sugar doesn’t. Substitution Tip: Maple syrup, agave nectar, or even a couple of pitted Medjool dates blended with the berries are fantastic vegan swaps. Start with 2 tablespoons, blend, taste, and add more only if you need it. The ripeness of your berries will determine how much you need!
- 1 tablespoon lemon juice: The secret flavor booster! This isn’t just for tang. The acid brightens the whole batch and helps preserve that gorgeous, vibrant red color. Chef’s Hack: No fresh lemon? A half tablespoon of bottled lemon juice is fine, or you can use lime juice for a slightly different, but equally delicious, twist.Print

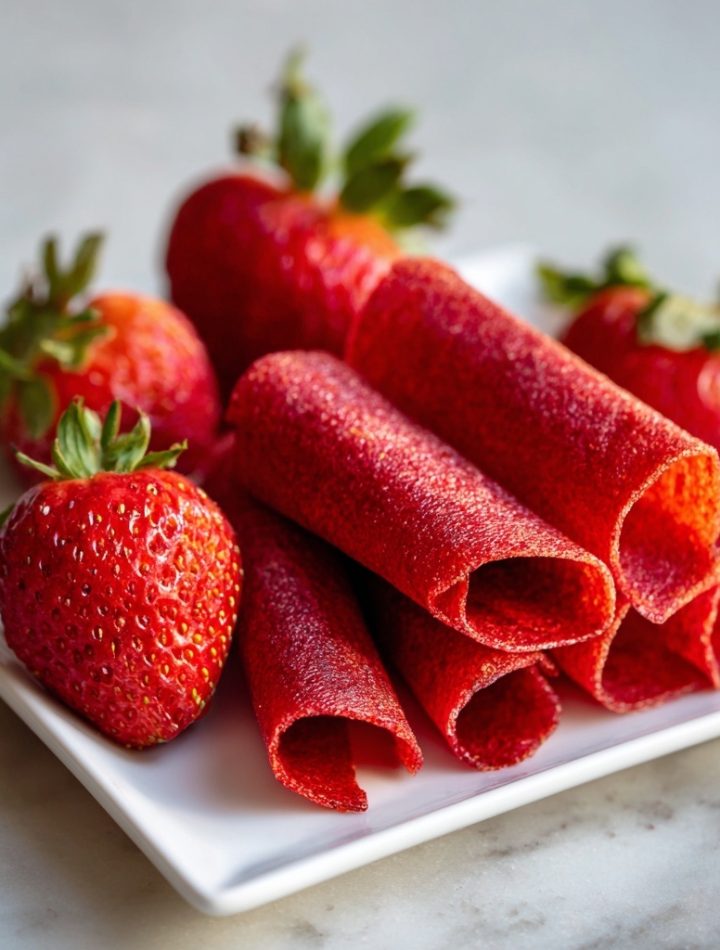
3‑Ingredient Homemade Strawberry Fruit Roll‑Ups : Healthy, Easy & No Added Sugar
- Total Time: ~4.5–6.5 hours
- Yield: 6–8 roll‑ups 1x
Description
These 3‑ingredient homemade strawberry fruit roll‑ups are a simple, wholesome way to make your own fruit leather at home. They’re naturally sweet, perfect for lunchboxes, snacks on the go, or little hands learning to love real fruit. With just strawberries, honey, and lemon, you’ll skip the preservatives and control the sweetness.
Ingredients
Scale4 cups fresh strawberries, hulled
2–3 tablespoons honey (adjust based on sweetness)
1 tablespoon lemon juice
Instructions
Prep Strawberries: Rinse and hull the strawberries.
Blend: Add strawberries, honey, and lemon juice to a blender. Puree until smooth.
Spread: Line a baking sheet with parchment paper or a silicone baking mat. Spread the strawberry puree evenly into a thin layer (about 1/8–1/4 inch thick). Smooth with a spatula.
Dry: Bake at 170°F (75°C) or the lowest setting on your oven for 4–6 hours, or until the fruit leather is no longer sticky and peels easily from the parchment. Alternatively, you can use a food dehydrator at the fruit setting and follow the manufacturer’s timing.
Cool & Roll: Let cool completely. Cut into strips and roll up in parchment or plastic wrap for storage.
- Prep Time: 10 mins
- Category: Dessert
Nutrition
- Calories: 70
- Sugar: 15g
- Carbohydrates: 18g
- Fiber: 2g
Let’s Make Some Magic: Step-by-Step
Ready to see the transformation? Follow these steps, and you’ll be a fruit leather pro in no time. I’m walking you through every bit with my favorite kitchen hacks sprinkled in.
- Prep Your Berries: Give your strawberries a good rinse in a colander. Hull them (that’s just popping off the green leafy top). You can use a paring knife or a handy huller, but my favorite method is using a sturdy straw—poke it through the bottom of the berry and push the stem right out! Chef’s Tip: Even if you’re using organic, please rinse. It removes any little bits and ensures your puree is silky smooth.
- Blend Until Dreamy: Toss the hulled strawberries, 2 tablespoons of honey, and the lemon juice into your blender. Blitz on high until the mixture is completely smooth and liquid. No chunks allowed! Chef’s Commentary: Stop and taste it! This is your moment to adjust. Want it sweeter? Add the extra tablespoon of honey and blend again for 5 seconds. Love tang? A tiny extra squeeze of lemon won’t hurt. This puree should taste delicious on its own—it’s going to taste even more concentrated as it dries.
- The Art of the Spread: This is the most important step for perfect texture! Line a standard half-sheet baking pan (roughly 13×18 inches) with parchment paper or a silicone baking mat. DO NOT use wax paper—it will stick horribly. Pour your puree into the center. Using an offset spatula or the back of a large spoon, spread it into a thin, even rectangle. Aim for about 1/8-inch thick, and try to get the edges as even as the center so everything dries at the same rate. Pro Hack: Give the pan a few gentle taps on the counter to settle the puree and pop any air bubbles for an even smoother finish.
- The Low & Slow Dry: Here’s where patience pays off. Preheat your oven to its lowest setting, ideally 170°F (75°C). If your oven only goes down to 200°F, that’s okay—just prop the door open an inch with the handle of a wooden spoon to allow moisture to escape. Place the pan in the oven and let the magic happen for 4 to 6 hours. Chef’s Insight: Drying time depends on humidity, puree thickness, and your oven. It’s done when the surface is no longer sticky or tacky to a light touch, and it peels away from the parchment cleanly. You can also use a food dehydrator set to 135°F (57°C) for about 6-8 hours, following your machine’s instructions for fruit leather.
- Cool, Cut, and Roll! Once fully dried, remove the pan from the oven and let the giant fruit leather cool completely on the counter. This is crucial—it finishes setting up as it cools. Once cool, peel it gently from the parchment. Use kitchen scissors or a pizza wheel to cut it into strips. Roll each strip up in a small piece of parchment paper or plastic wrap, and twist the ends like a candy wrapper for the full nostalgic effect!
How to Serve Up Your Homemade Sunshine
The beauty of these roll-ups is in their grab-and-go simplicity! I love stacking a few in a mason jar on the counter for an instant healthy snack. Tuck them into lunchboxes (they’re a guaranteed smile). They’re also the perfect pre-or-post workout fuel, or a sweet treat that doesn’t derail your day. For a fun dessert platter, slice them into smaller squares and serve alongside a cheese board with some nuts and dark chocolate—the sweet-tangy fruit leather pairs amazingly with sharp cheddar!
Ride Your Own Flavor Wave: Fun Variations!
Once you’ve mastered strawberry, the fruit leather world is your oyster! Get creative with these easy twists:
- Tropical Twist: Swap strawberries for 3 cups of mango and 1 cup of pineapple. Add a teaspoon of lime juice instead of lemon.
- Mixed Berry Bliss: Use 2 cups strawberries, 1 cup raspberries, and 1 cup blueberries. The color will be a deep, gorgeous purple.
- Apple-Cinnamon “Pie”: Use 3 cups of unsweetened applesauce + 1 cup of fresh berries for color. Blend in 1 teaspoon of ground cinnamon.
- “Green Machine” Boost: Add a big handful of fresh spinach to the strawberry blend. I promise you won’t taste it, but you’ll get a vibrant green color and a nutrient boost!
- Spice it Up: Add a tiny pinch of cayenne pepper or chili powder to the strawberry blend for a sweet-and-spicy adult version.
Isla’s Chef Notes & Kitchen Confessions
This recipe has evolved in my kitchen from a “let’s see if this works” experiment to a total staple. My biggest lesson learned? Patience is not just a virtue; it’s the key to perfect texture. I once tried to crank the oven heat to speed things up, and I ended up with fruit jerky—tasty, but not the pliable, tearable leather we’re after. Low and slow is the only way.
Also, a funny story: the first time I made these, my dog, Captain, became utterly convinced that the incredible strawberry smell coming from the oven was somehow meant for him. He parked himself in front of the oven for the entire 5 hours, periodically sighing deeply. Now, he gets his own little un-sweetened, no-lemon piece (cooled, of course) as his “chef’s tax.” It’s our little ritual.
Don’t be afraid if the edges dry faster than the center—that’s normal! You can even trim them off early as “chef’s snacks” (the best perk of the job) and let the middle keep drying. This recipe is forgiving and fun. Make it your own!
Your Questions, Answered!
Q: My fruit leather is still sticky/tacky after 6 hours. What do I do?
A: No worries! This usually means your layer was a touch too thick or your kitchen humidity is high. Just pop it back in the oven for another hour or so, checking every 30 minutes. It will get there!
Q: Can I make this without any added sweetener?
A: Absolutely! If your strawberries are perfectly ripe and sweet, you can absolutely omit the honey. The lemon juice is still recommended for flavor and color. The roll-ups will be more tart, like a true fruit leather.
Q: How do I store these, and how long do they last?
A: Once rolled and wrapped, store them in an airtight container or bag at room temperature for up to 2 weeks. For longer storage (up to 2 months), keep them in the fridge. If they seem a bit stiff straight from the fridge, let them sit at room temp for 10 minutes—they’ll soften up.
Q: Why did mine turn out brittle and crack when I tried to roll it?
A: This means it over-dried. It’s still edible and delicious—just more of a fruit “chip” than a roll-up! Next time, check it a little earlier. You can also try spreading the puree a tiny bit thicker (closer to 1/4 inch).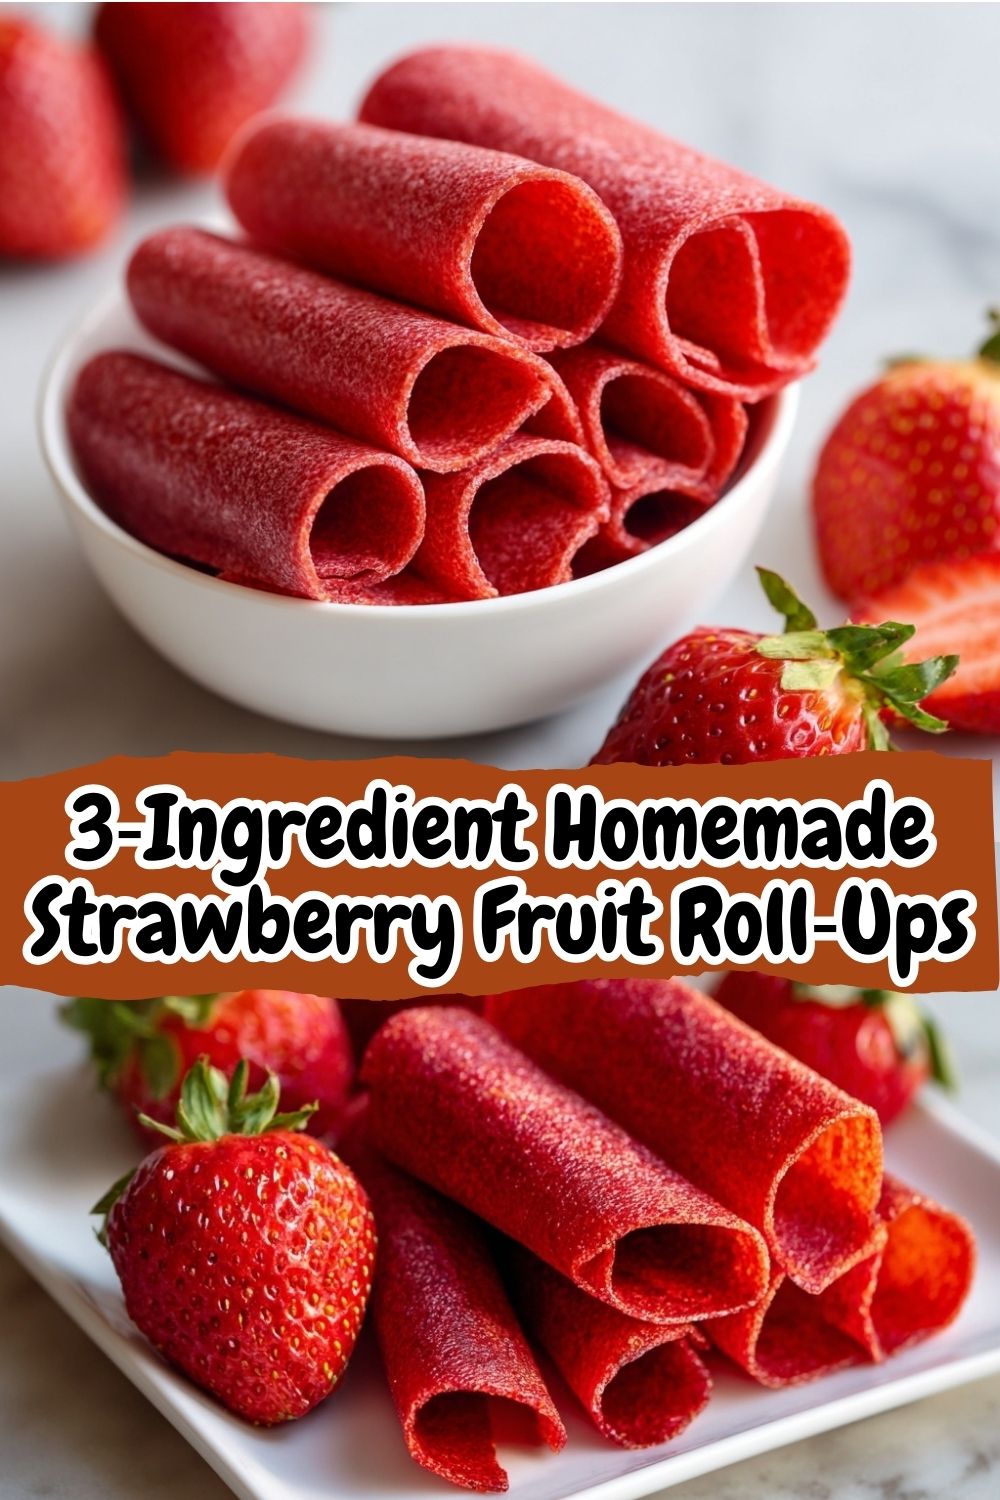
Nutritional Info (Approximate, per roll-up)
This is an estimate based on 8 servings from the recipe. Remember, it’s just fruit and a touch of honey!
- Calories: 70
- Carbs: 18g
- Sugar: 15g (all natural from fruit & honey)
- Fiber: 2g
- Fat: 0g
- Protein: 1g